
V1.2

Introducing the desktop and tablet version of the PIXO VR Hub App! See below for installation instructions and a feature overview.
Related Article: Hub App Guide
Install the Hub App
To install the desktop version of the PIXO VR Hub App, log in to the PIXO Platform and navigate to courses under the training tab. Click the “PIXOVR HUB APP” from the list of modules:

Next, select the "Download" icon next to the Windows or Mac Platform:

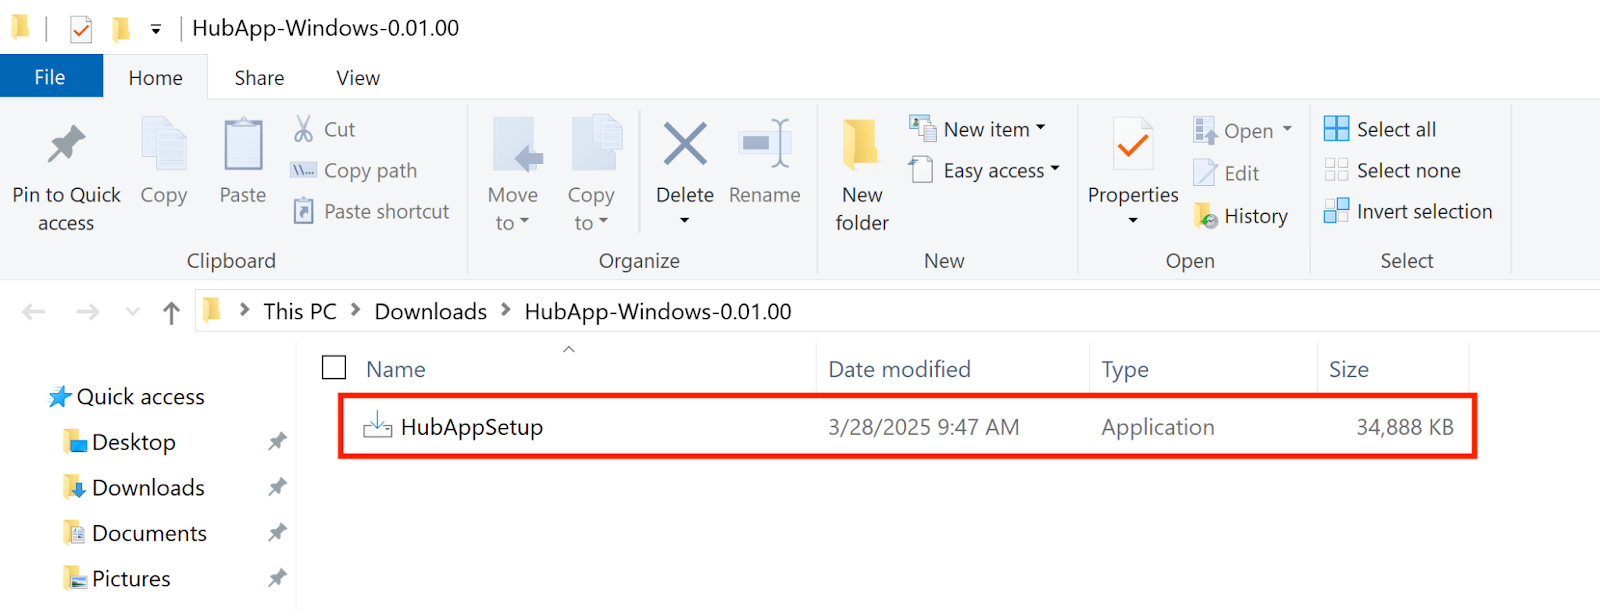
Your computer will then download the Hub App installation file. When the download is completed, open it and extract the file (double click the unzipped folder). In the extracted file, open the "HubAppSetup" Application:
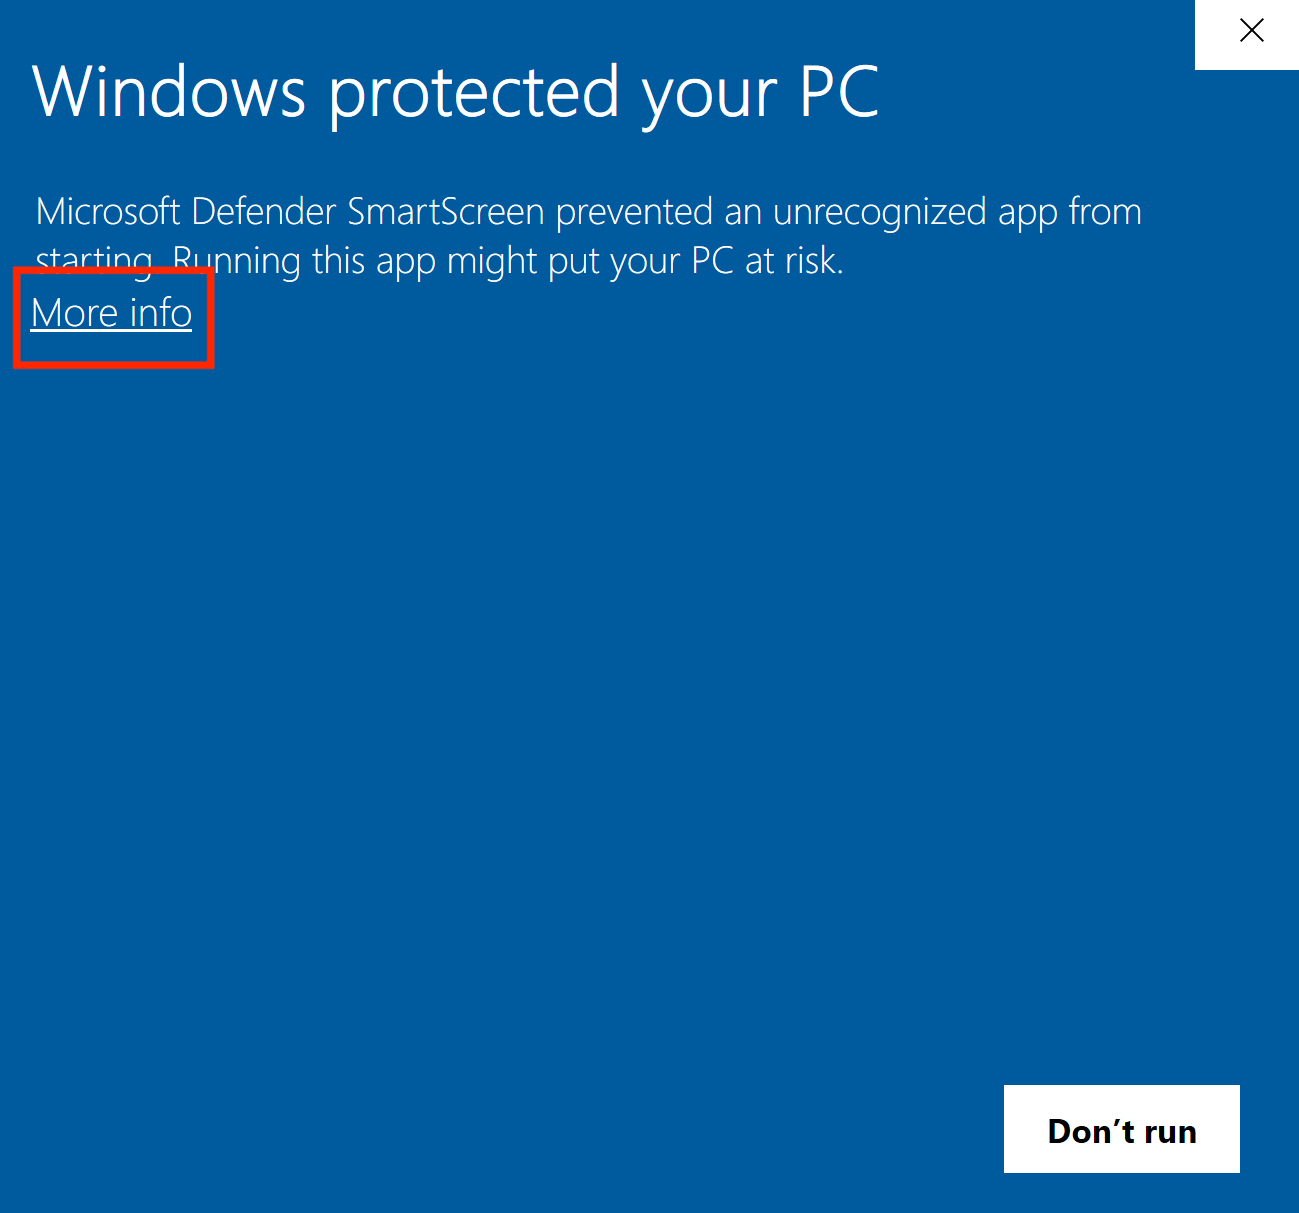
Important: If this message appears, click "More Info":
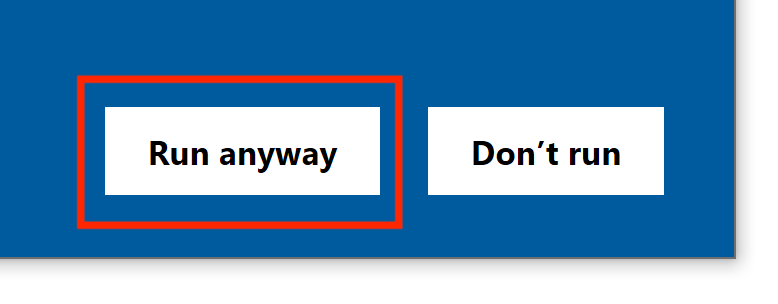
Click "Run anyway", then click "Yes":
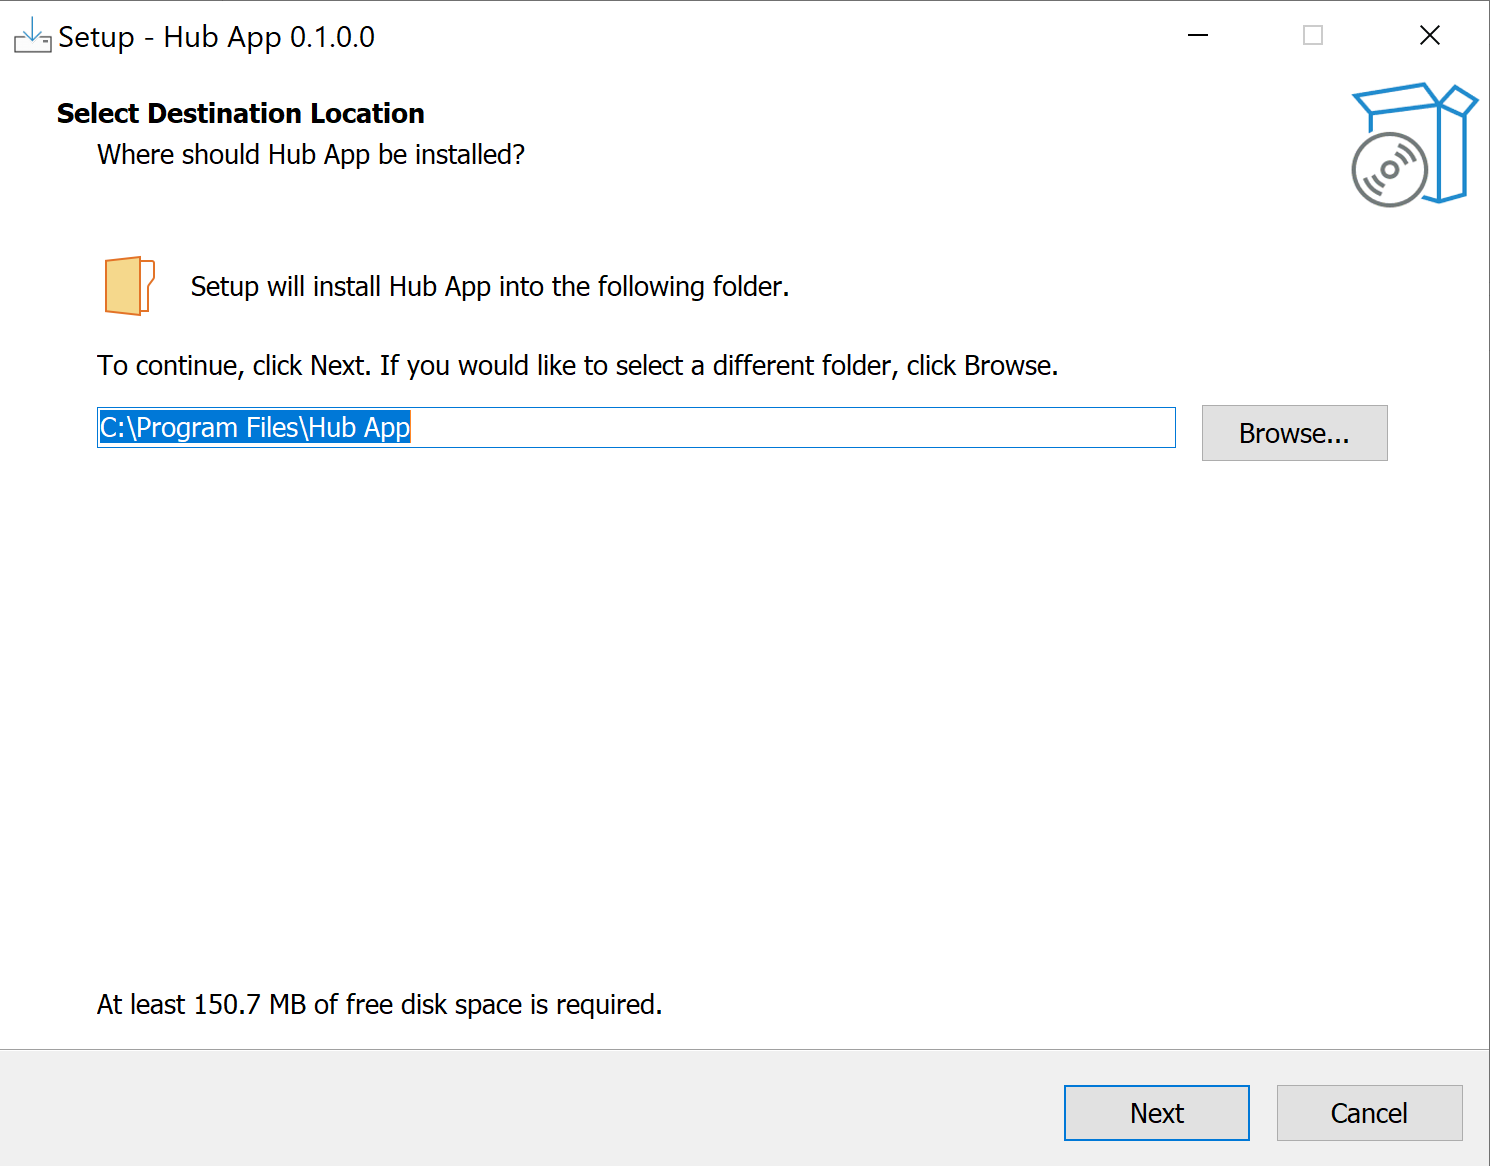
Choose a location. Click "Next" and follow the prompts until setup is completed:
Navigate to where you installed the Hub App shortcut on your computer and launch it.
Install the PIXO Player
In addition to installing the Hub App, you must also install the PIXO Builder in order to launch any modules created using the PIXO Builder system.
To do this, download the Windows or Mac PIXO Builder from the PIXO Platform and install it the same way you installed the Hub App.
Login
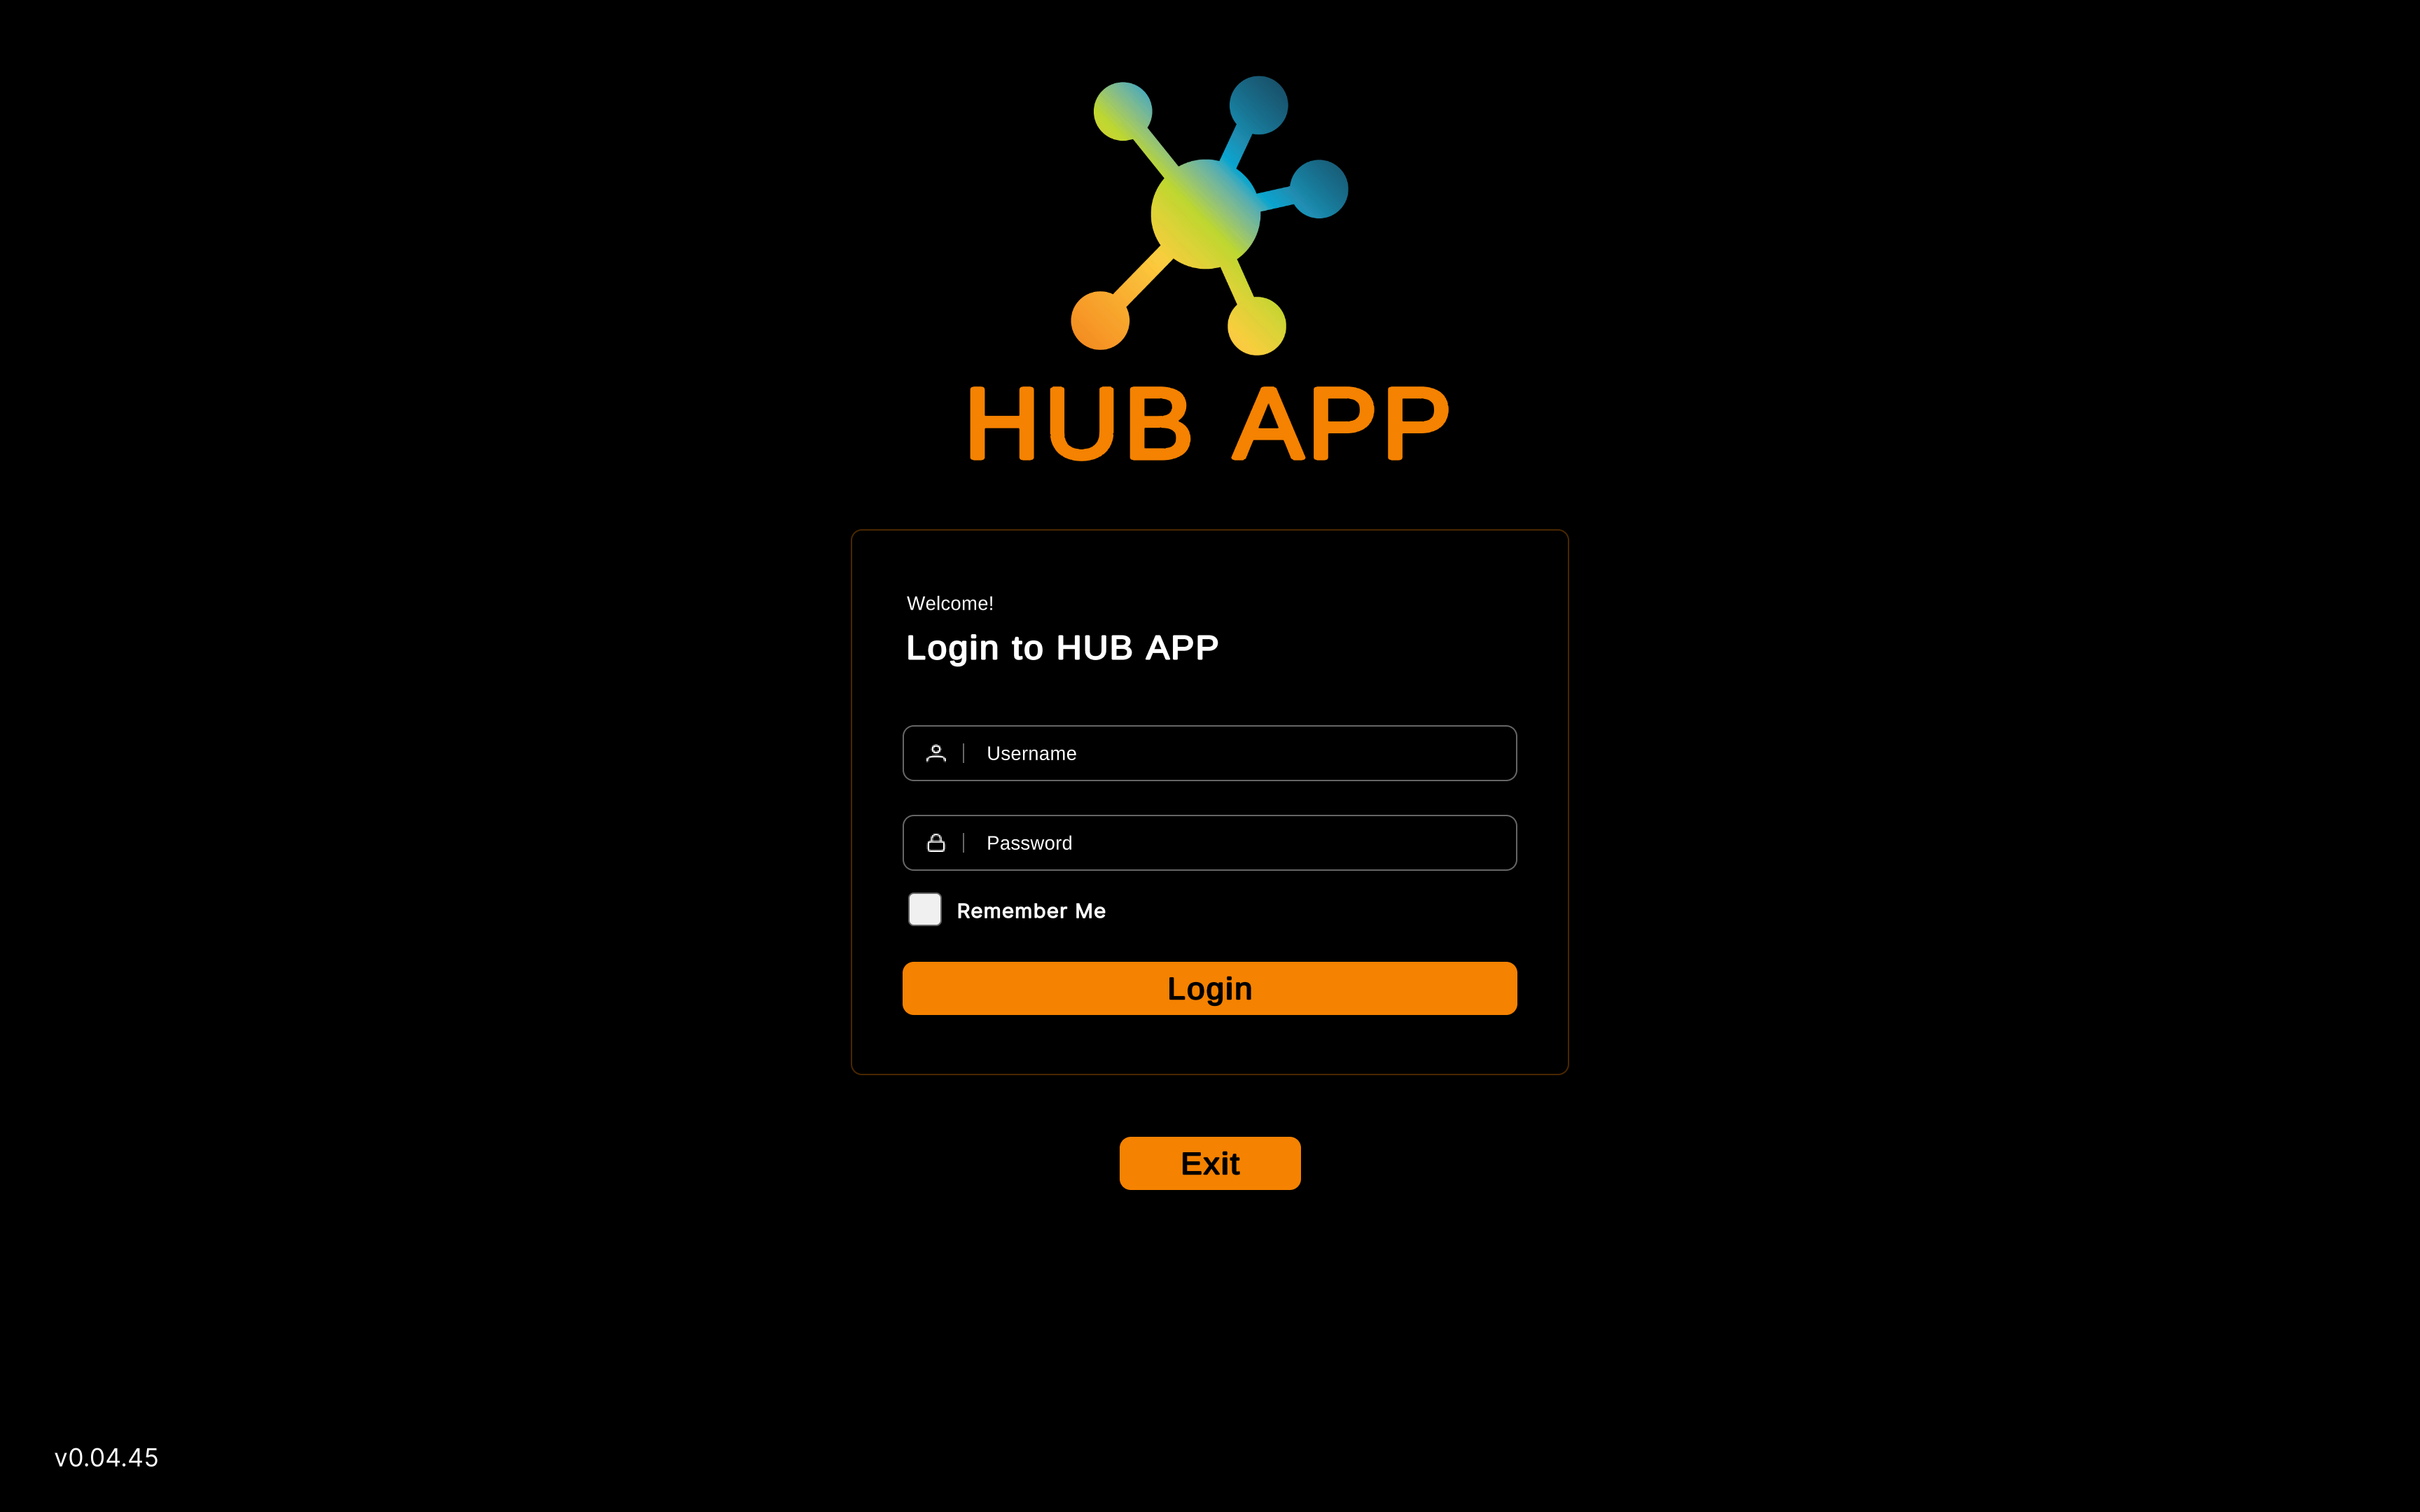
Once the Hub App launches, you will be prompted to log in to your PIXO account. This will be provided for you by your organization’s administrator, or by a PIXO VR Representative. The login must be performed from a computer that is connected to the internet for authentication to work successfully.
-
Enter your PIXO credentials in the corresponding fields, then click "Login".
-
Tip: If logging in with a one-time passcode, type the code in the "Username" field and click "Login". Do not type anything in the password field.
-
-
Once logged in, you will proceed to the Modules tab.
Modules Tab
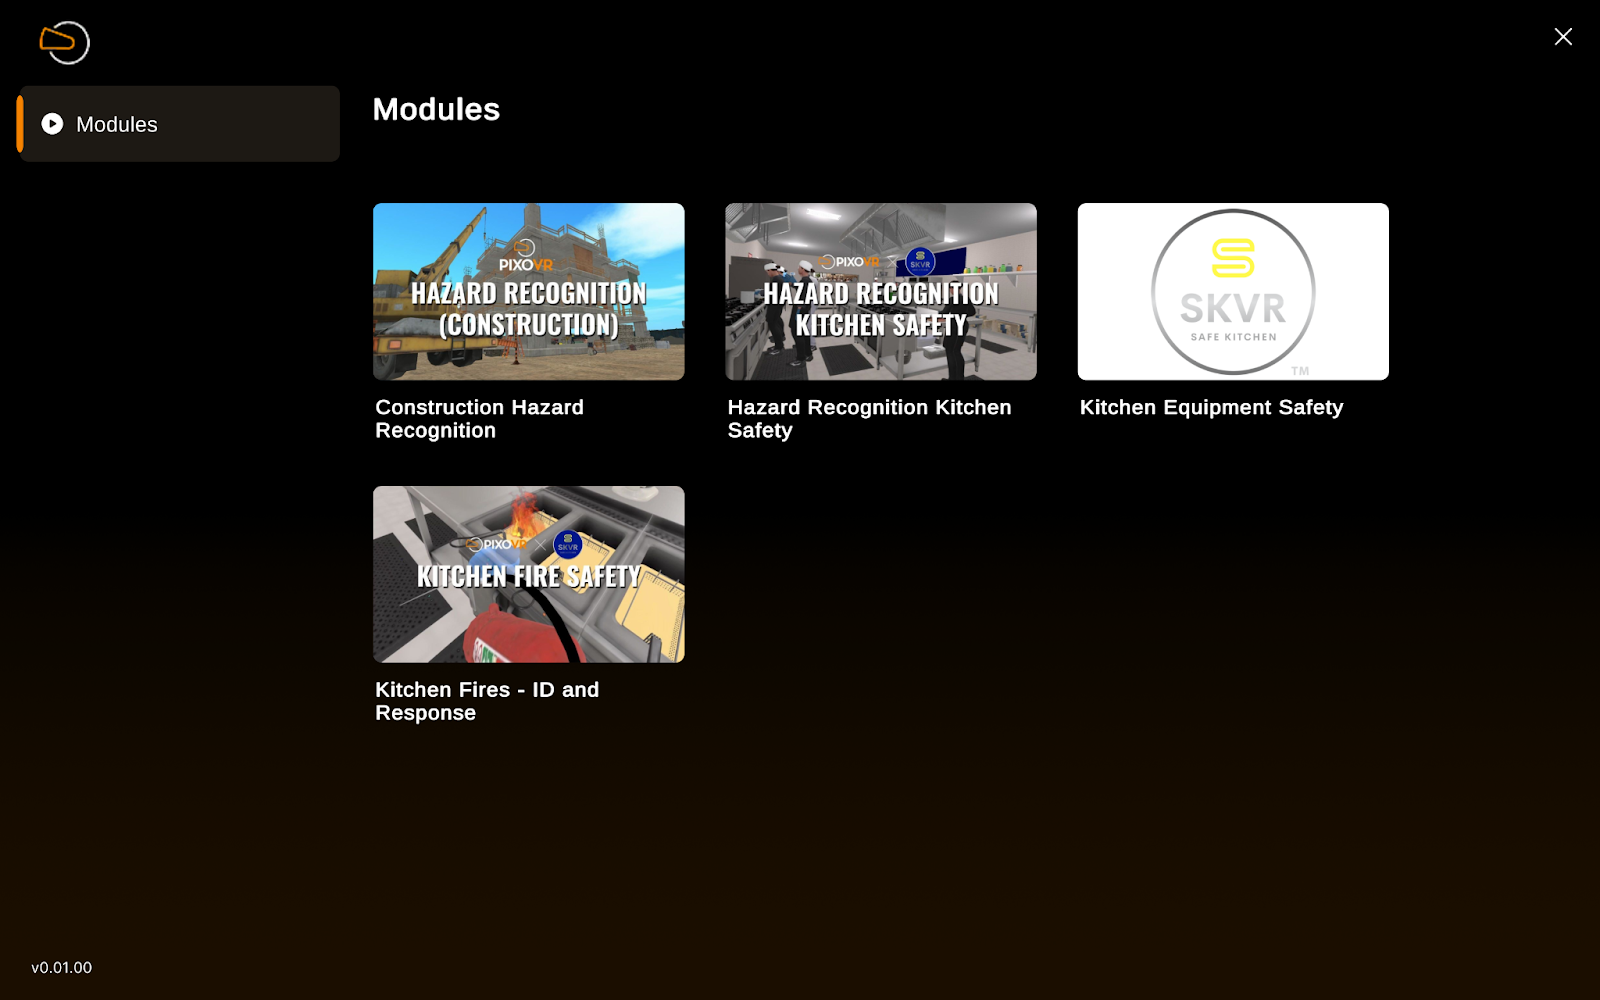
The Modules tab displays all content that you have access to and can launch.
View and Launch Modules
Select a module to read a description, launch the module, or download the module's User Guide.

After clicking "Launch", the training module will launch in a new window, displaying the module. Maximize the opened window to begin the module:
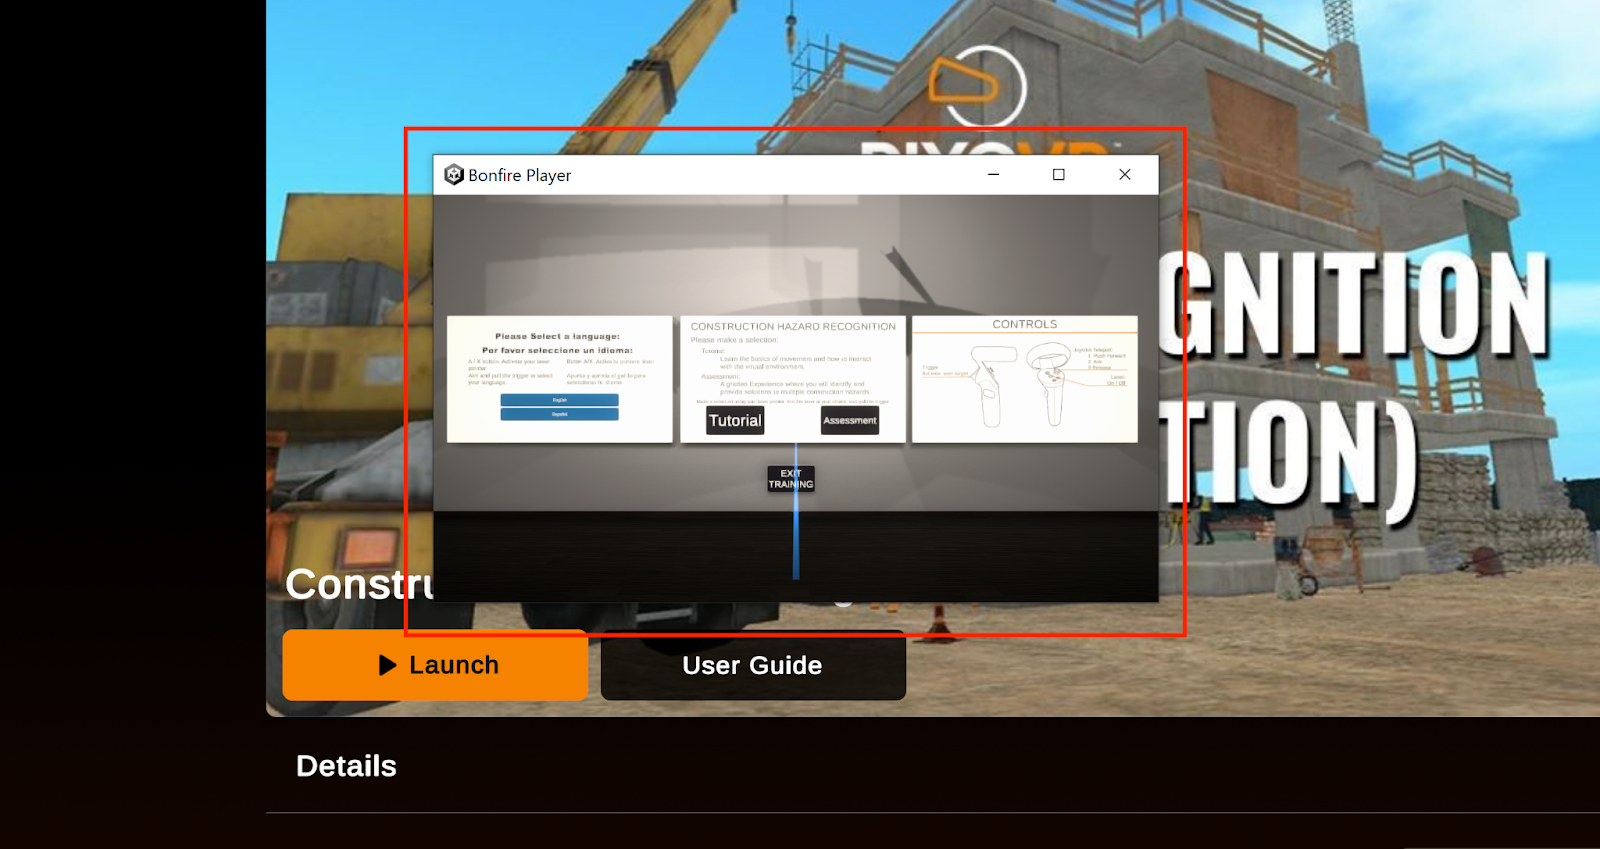
Note: The PIXO Builder must also be installed in order to launch modules created using the PIXO Builder tool.
Share Codes Tab
Use the Share Codes tab to type a one-time passcode and login:

Trainer Mode Tab
Use the Trainer Mode tab to assist trainees with logging in, stream their in-headset view for troubleshooting, and view their session data.
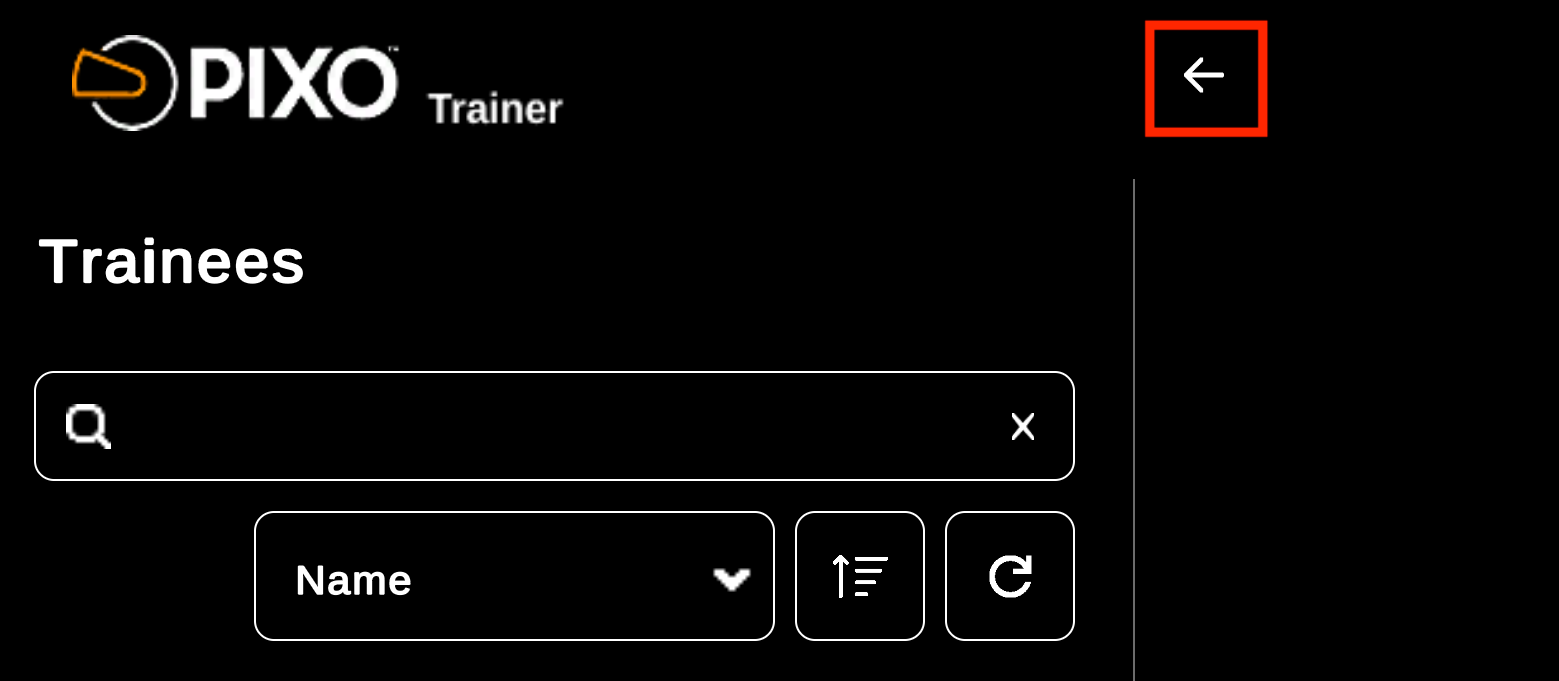
To exit trainer mode, select the back arrow:
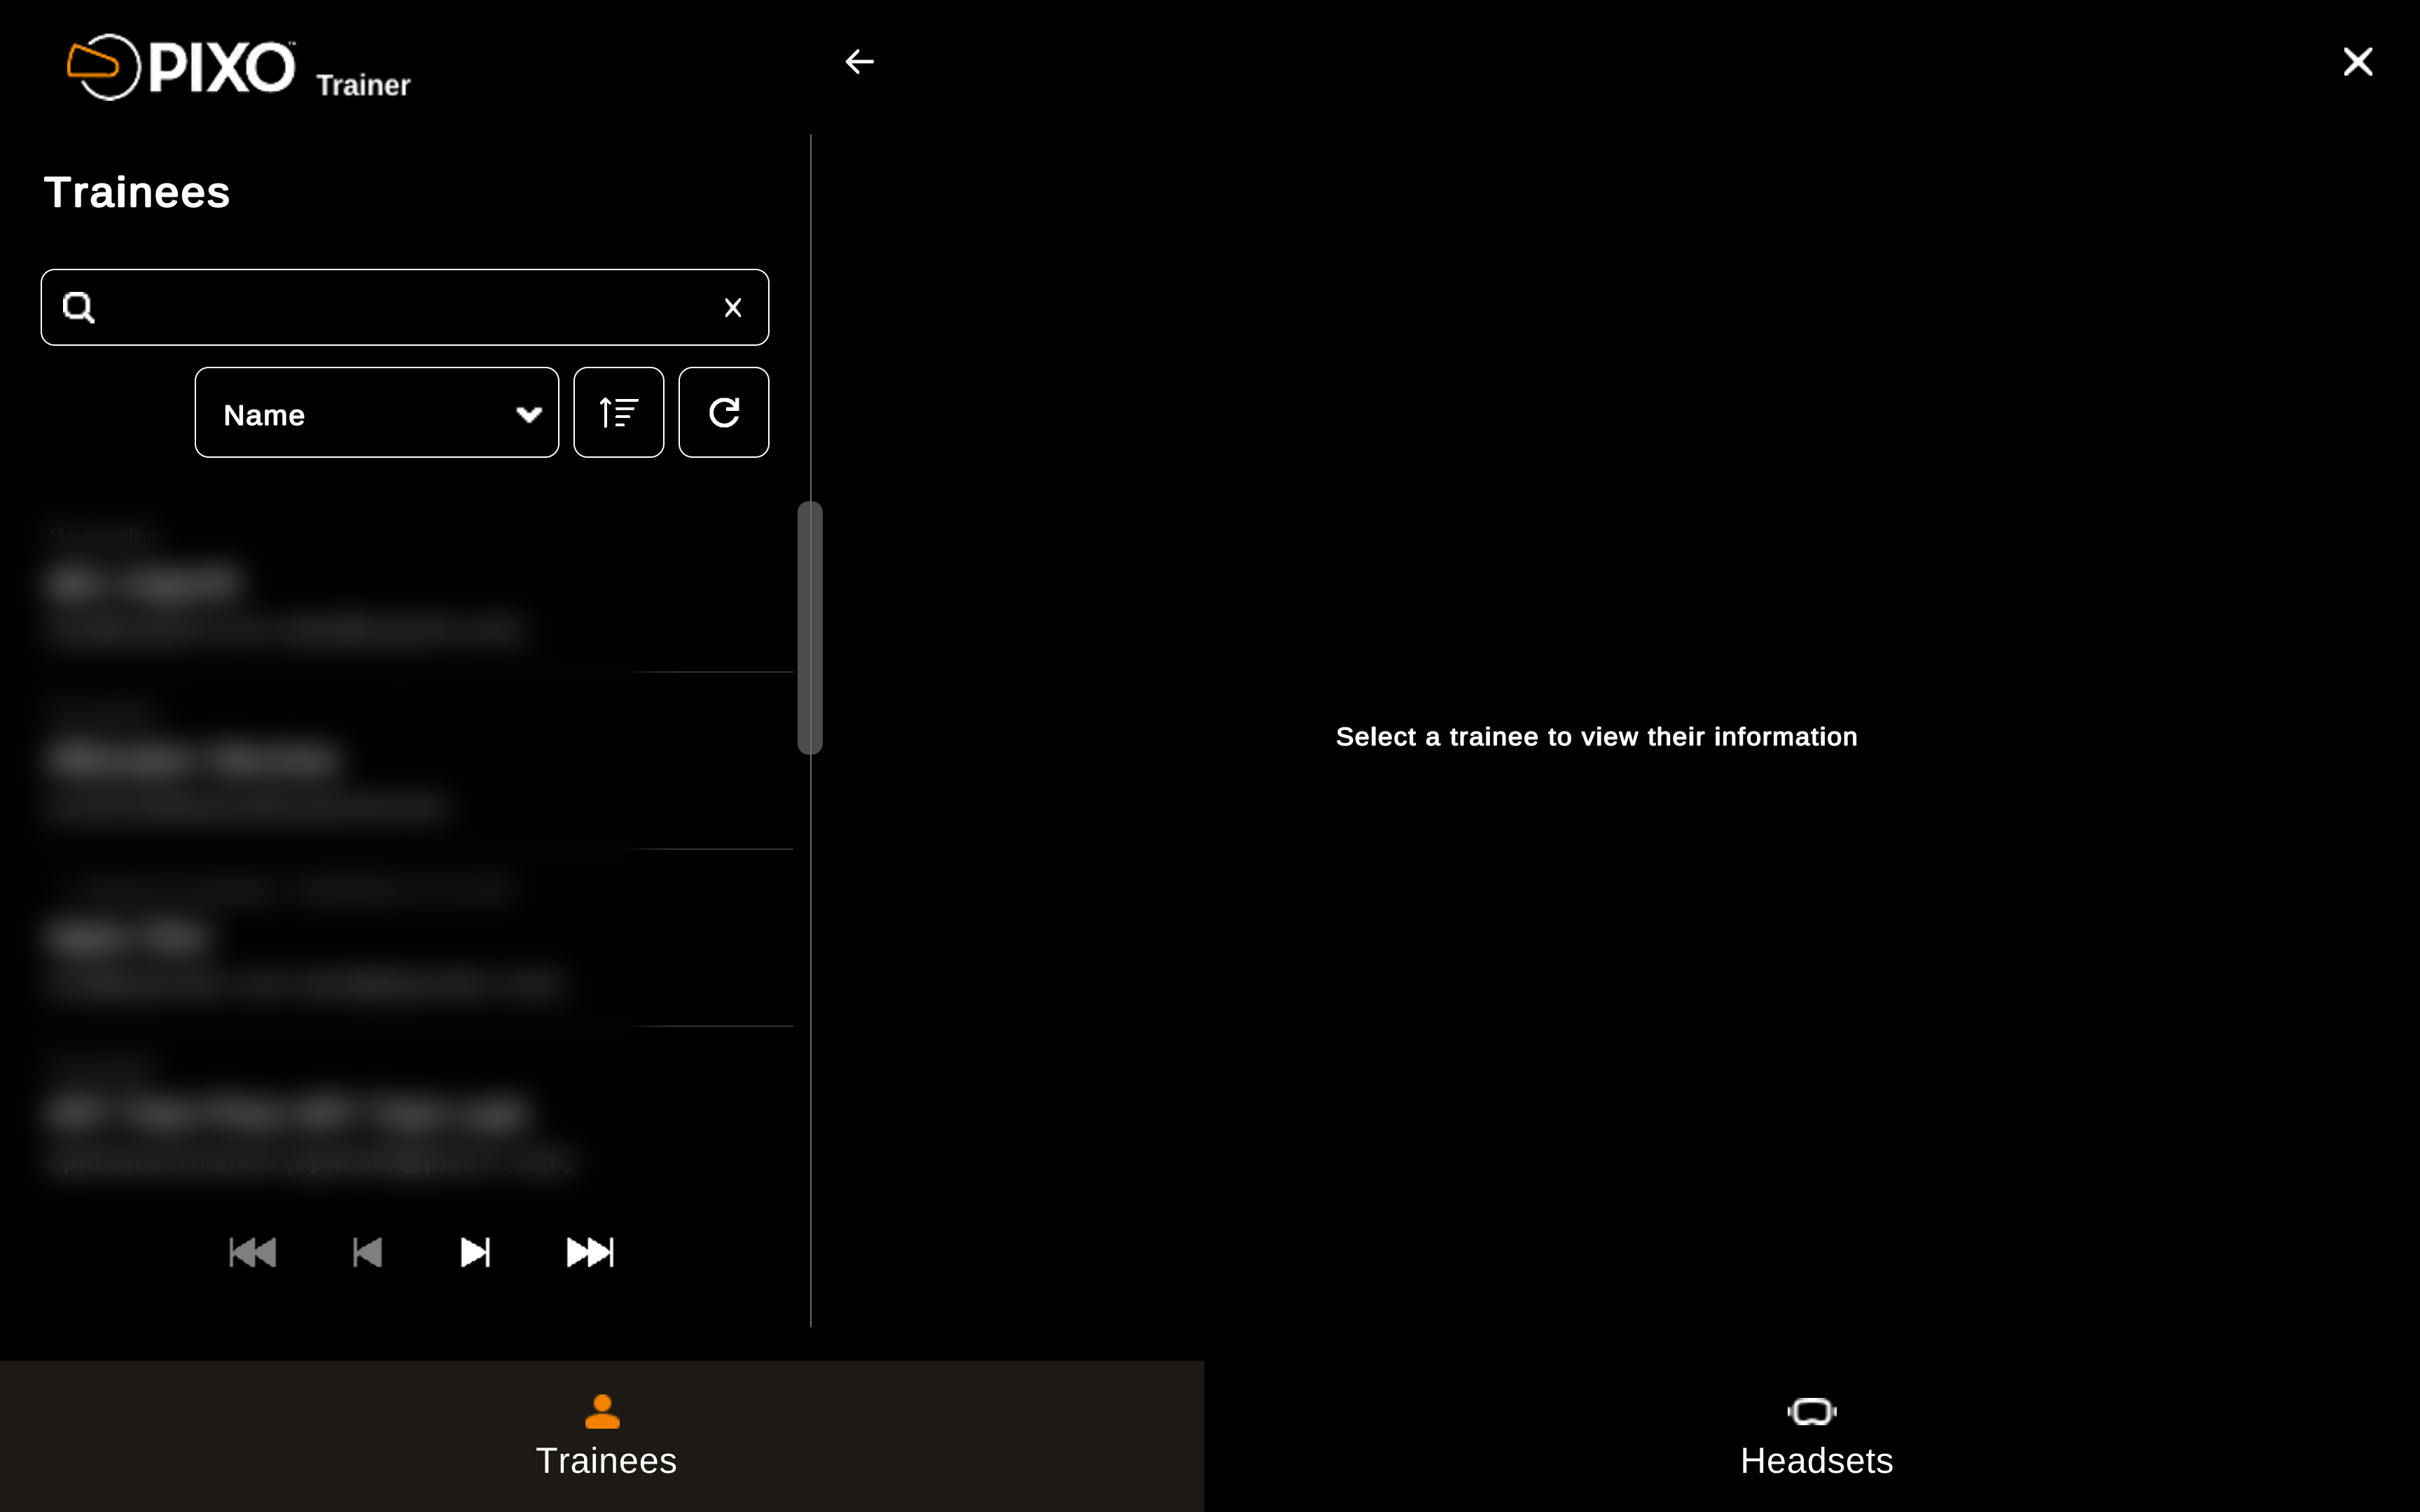
Trainees Tab
All trainees within your organization will appear on this tab, separated by online and offline status:
-
Green indicator — trainee is online and in a session
-
Orange indicator — trainee is online and using the Hub App
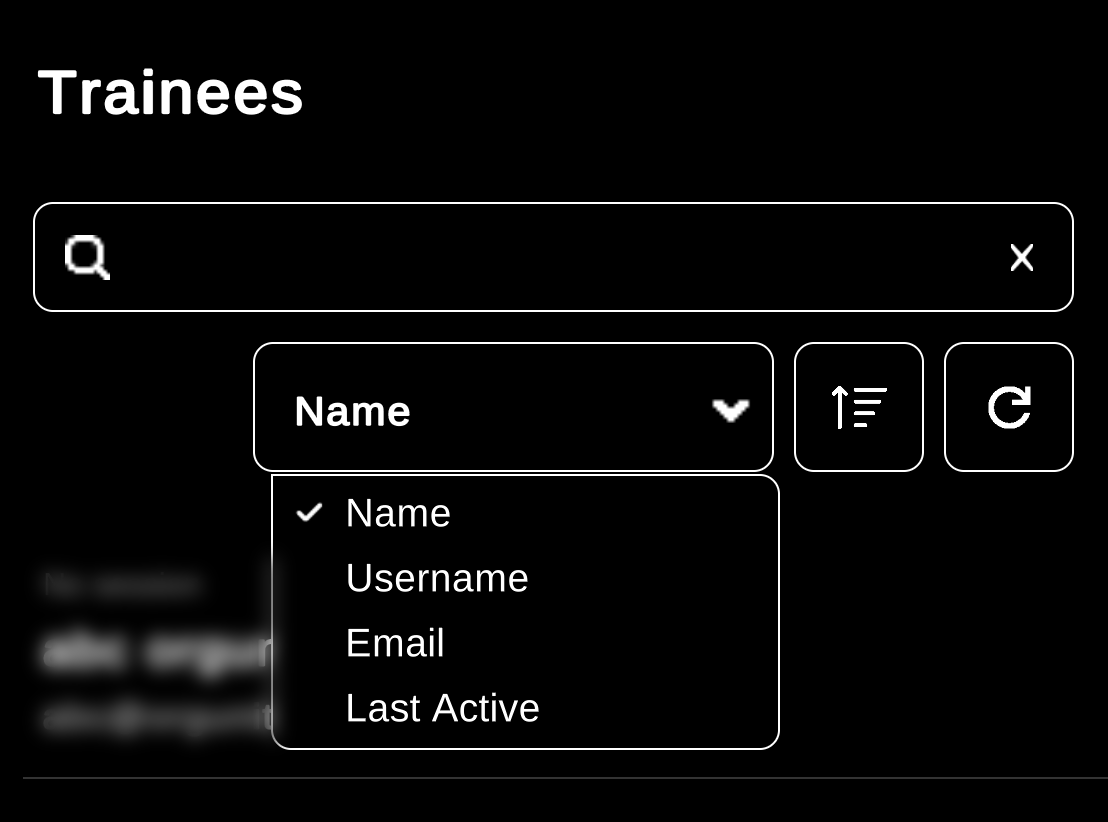
Start by selecting a trainee from the list. You can also type their name in the search bar or select the "Name" dropdown menu to filter by name, username, email or last active:
After selecting a trainee, you can view a one-time passcode for them to login with or look through their session data.
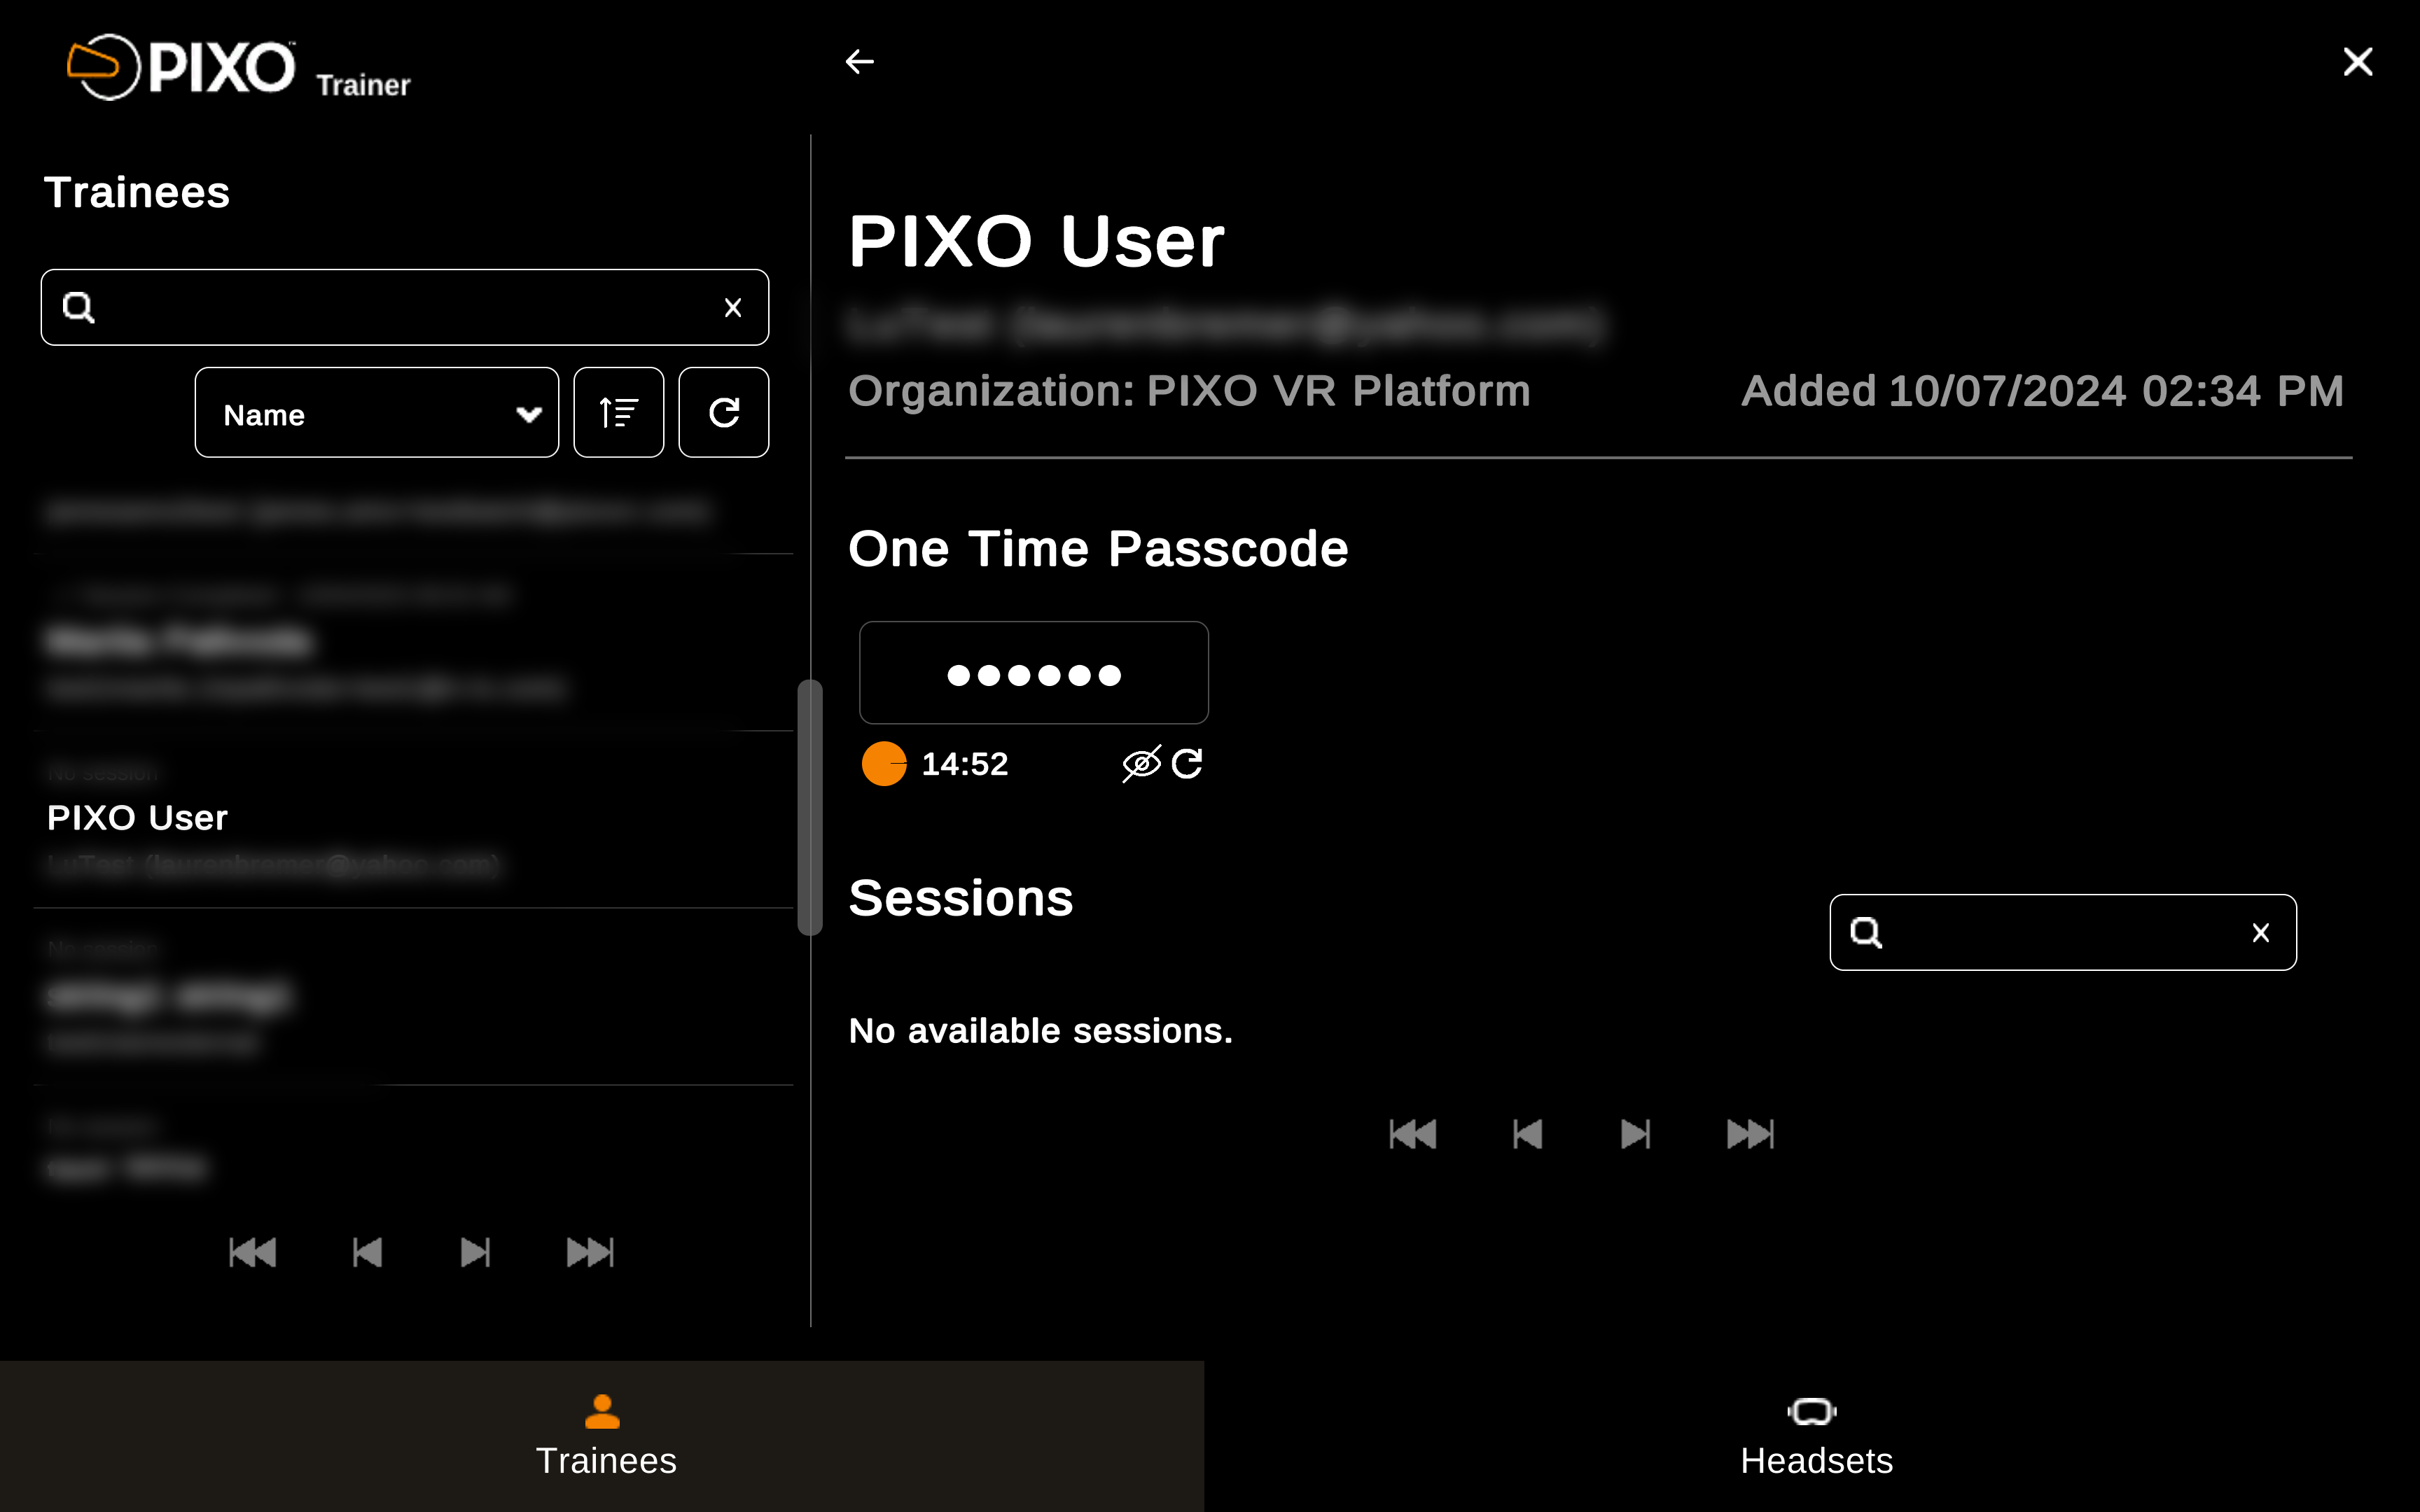
One-time Passcode
After selecting a trainee, you will see their current one-time passcode along with a timer that resets the code every 15 minutes.
-
To view the passcode, click the "Eye" icon
-
To generate a new passcode before the timer is up, click the "Refresh" icon
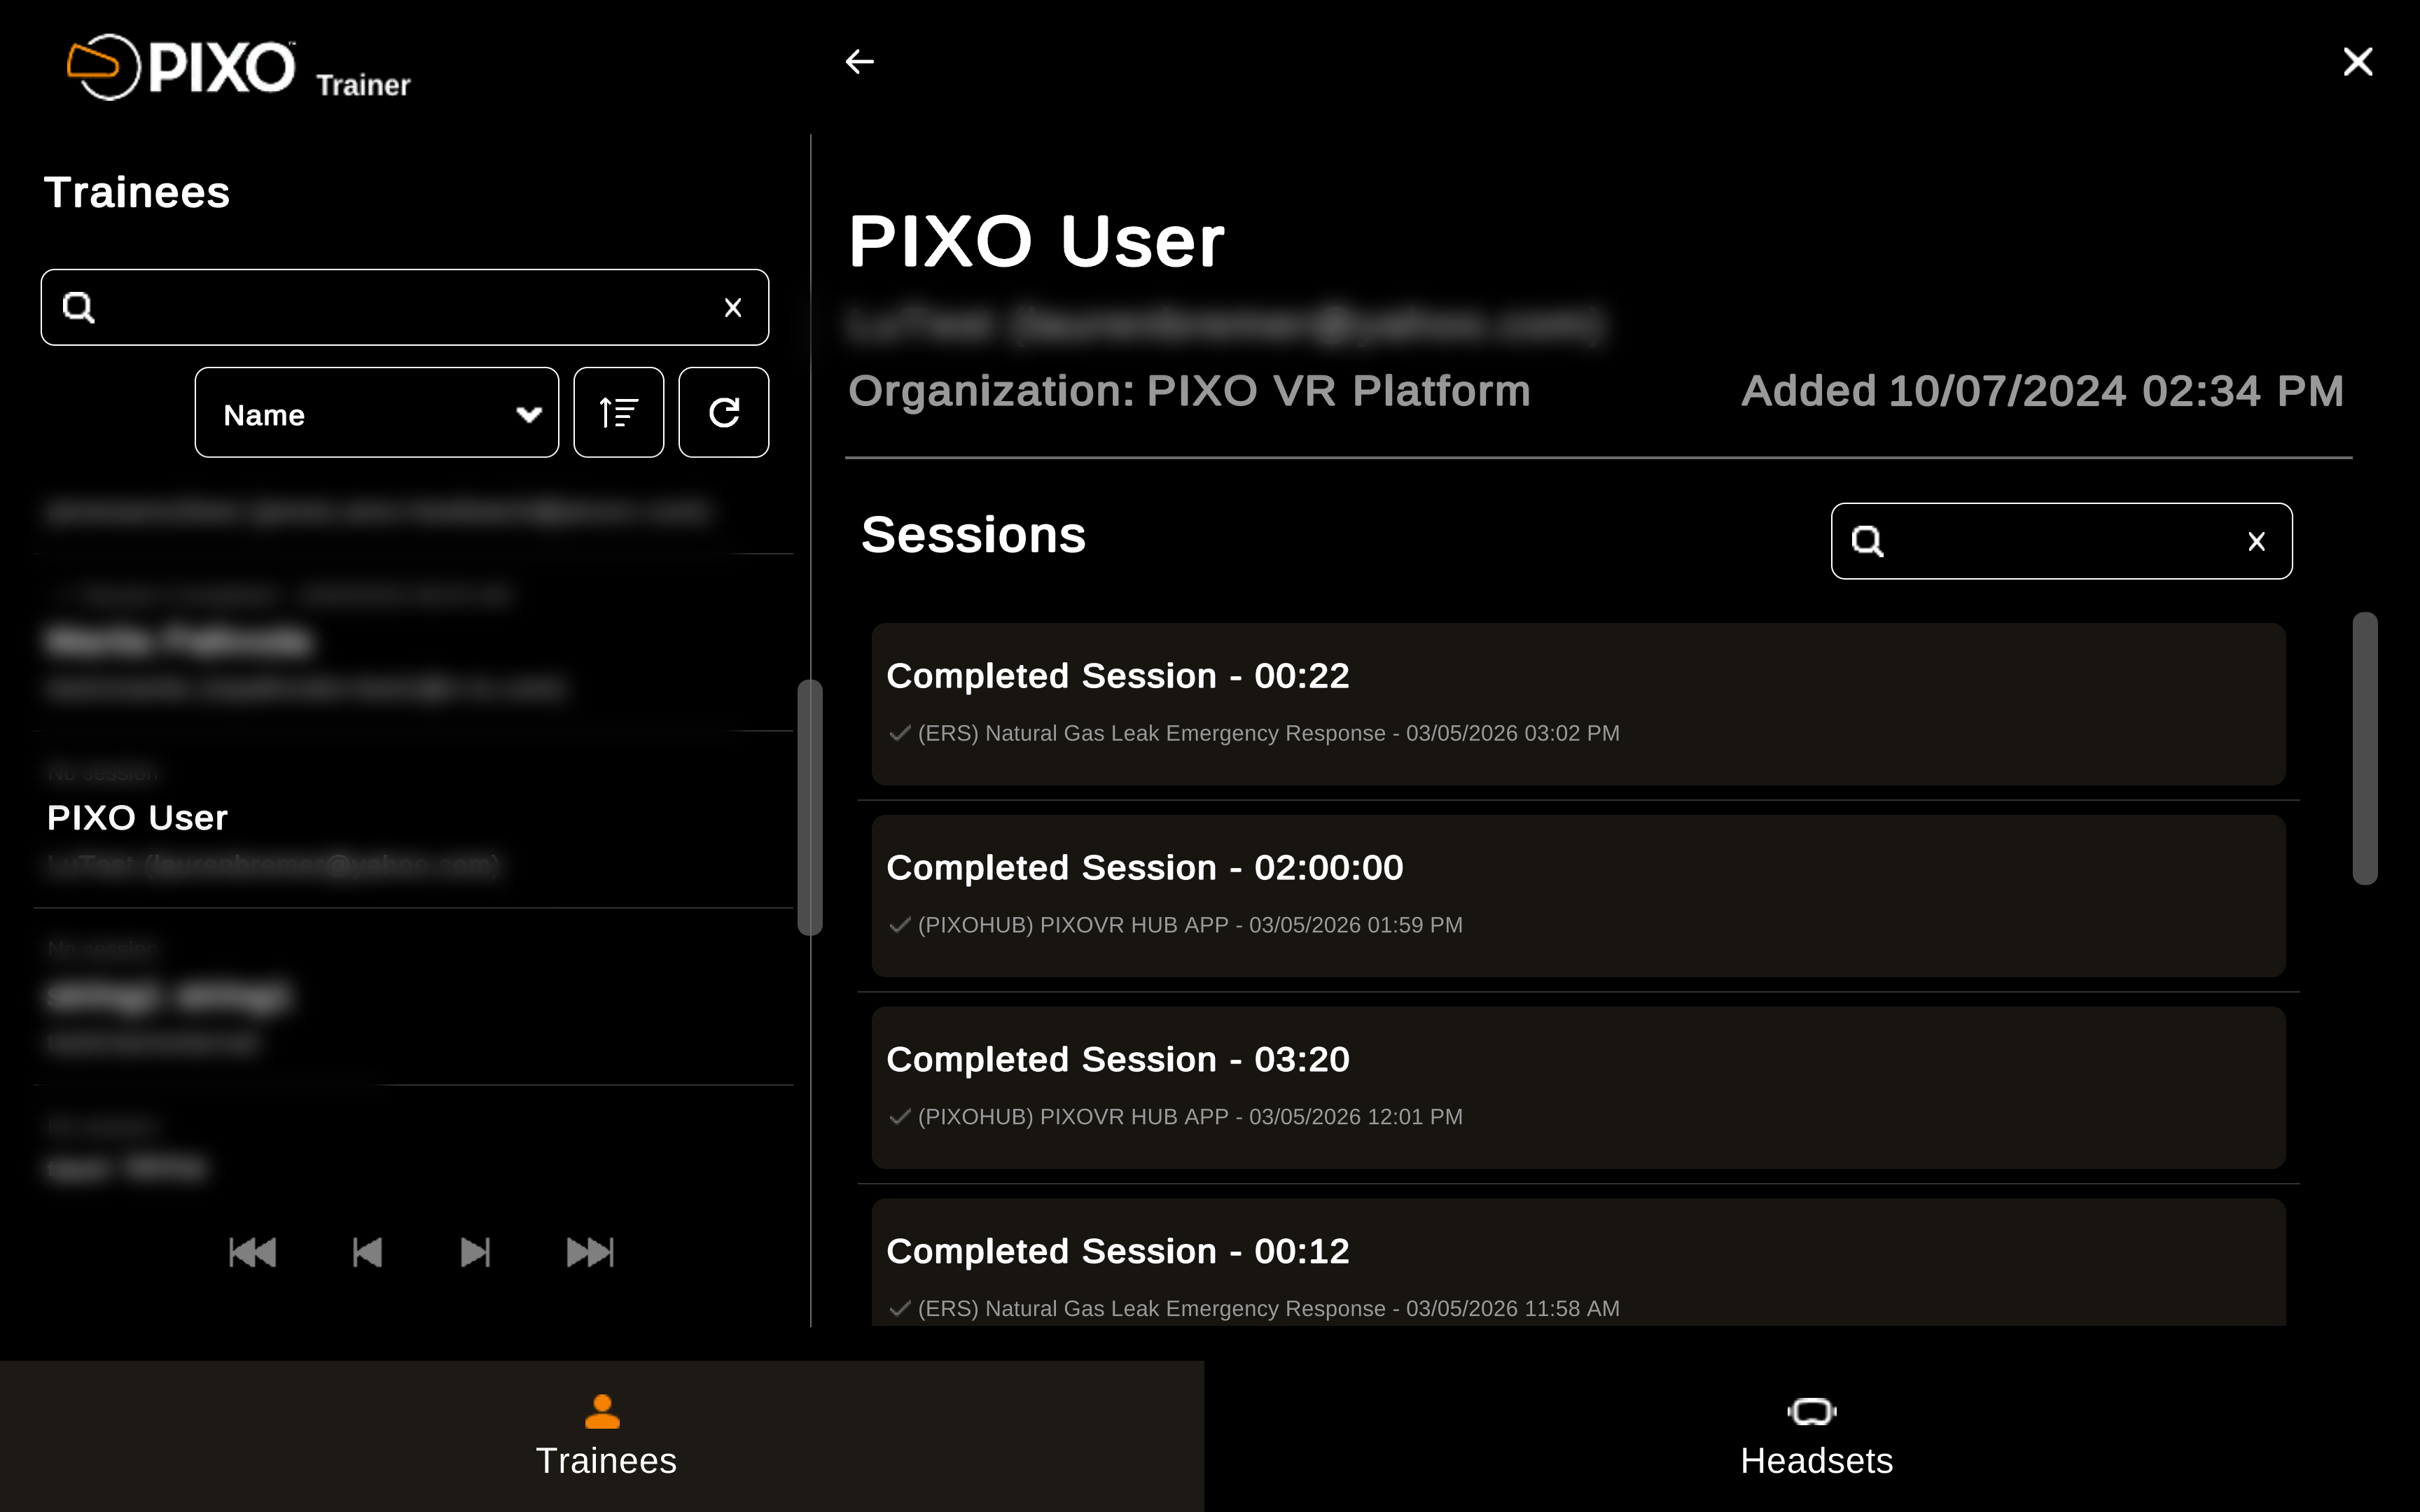
View Session Data
After selecting a trainee, scroll down to view their session data:
Headsets Tab
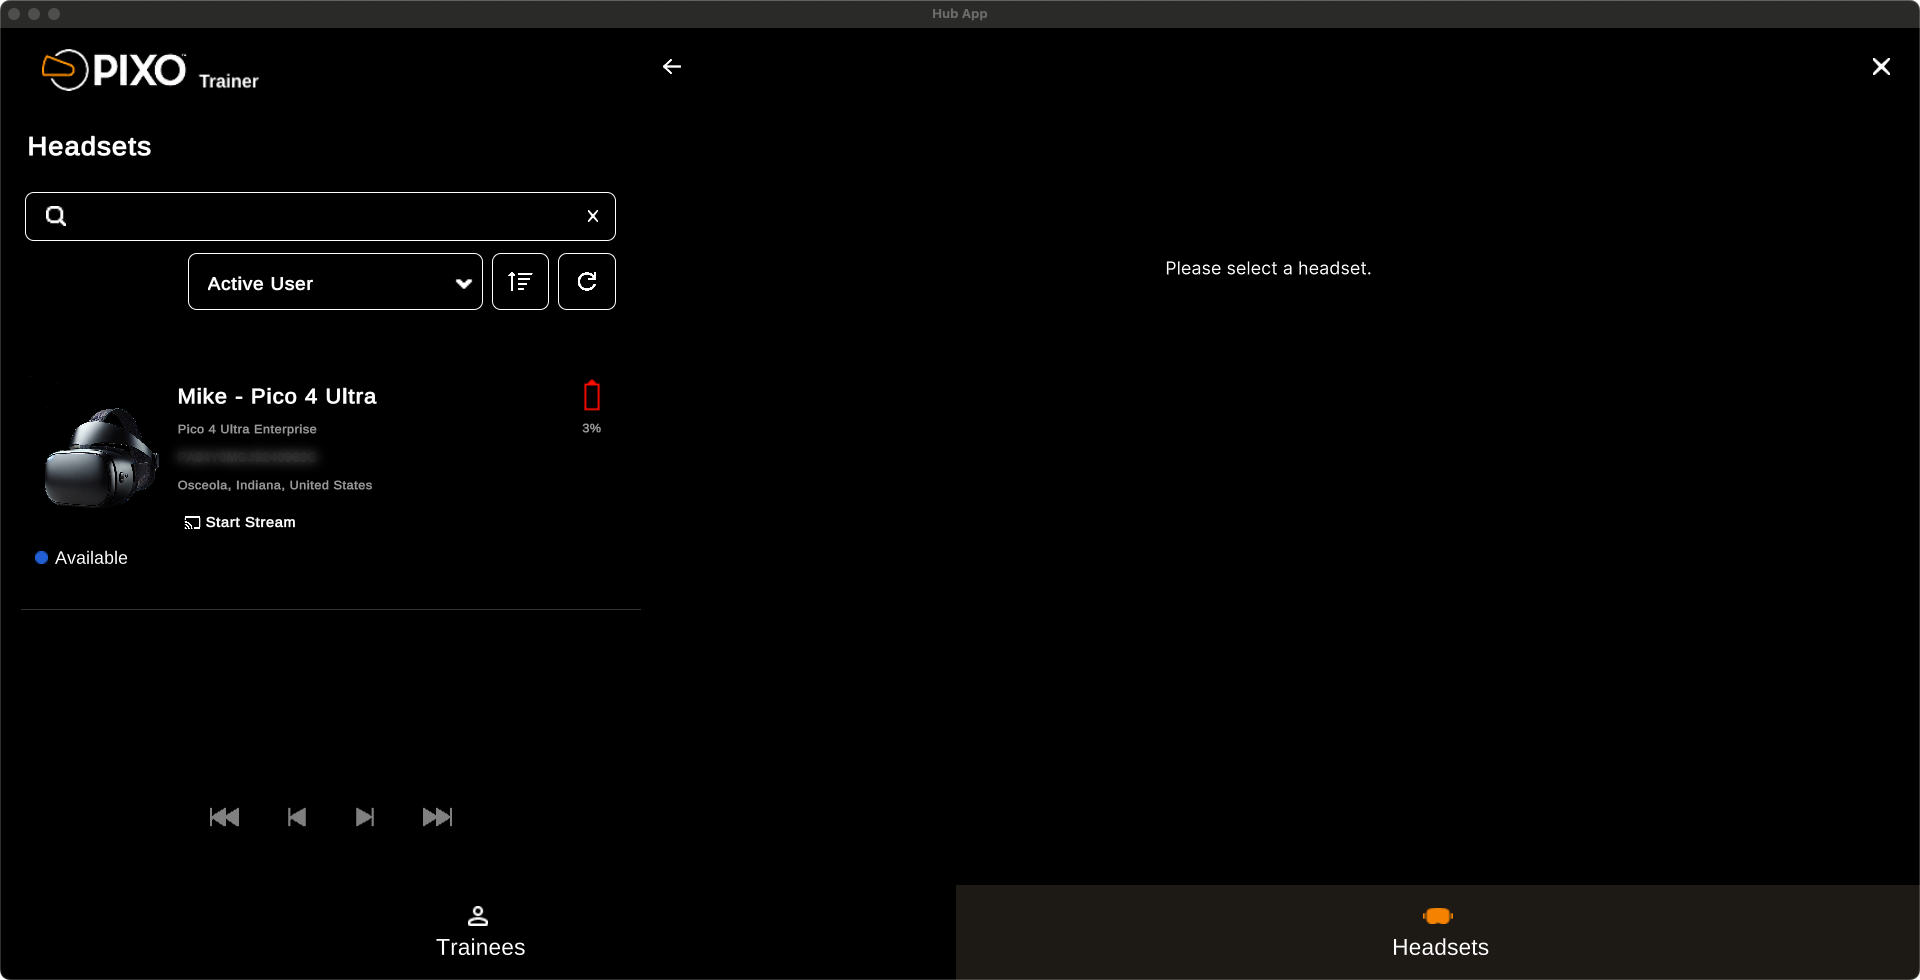
Use the Headsets tab to view the status of each device in your organization and assist trainees by streaming their headset view.
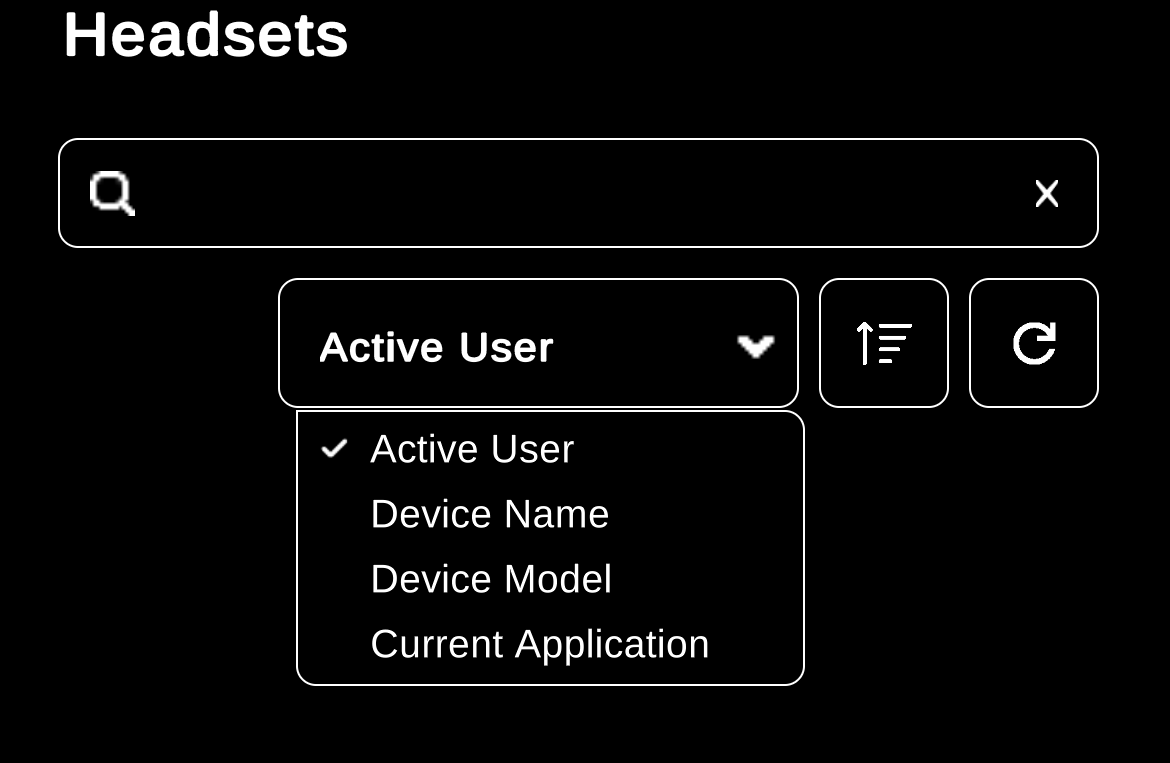
Start by selecting a headset from the list. Use the search bar or select the "Active User" dropdown menu to filter by activity, device name, device model or current app:
After selecting a headset, you can view additional information:
-
Device Name
-
Serial Number
-
Device Location
-
Battery Level
-
Status (online/offline)
-
Device Type
-
Current App in Use
-
Current User
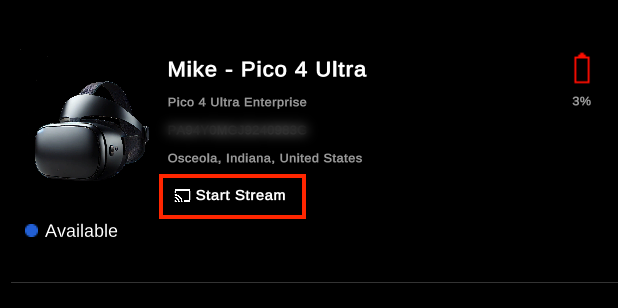
Start a Stream
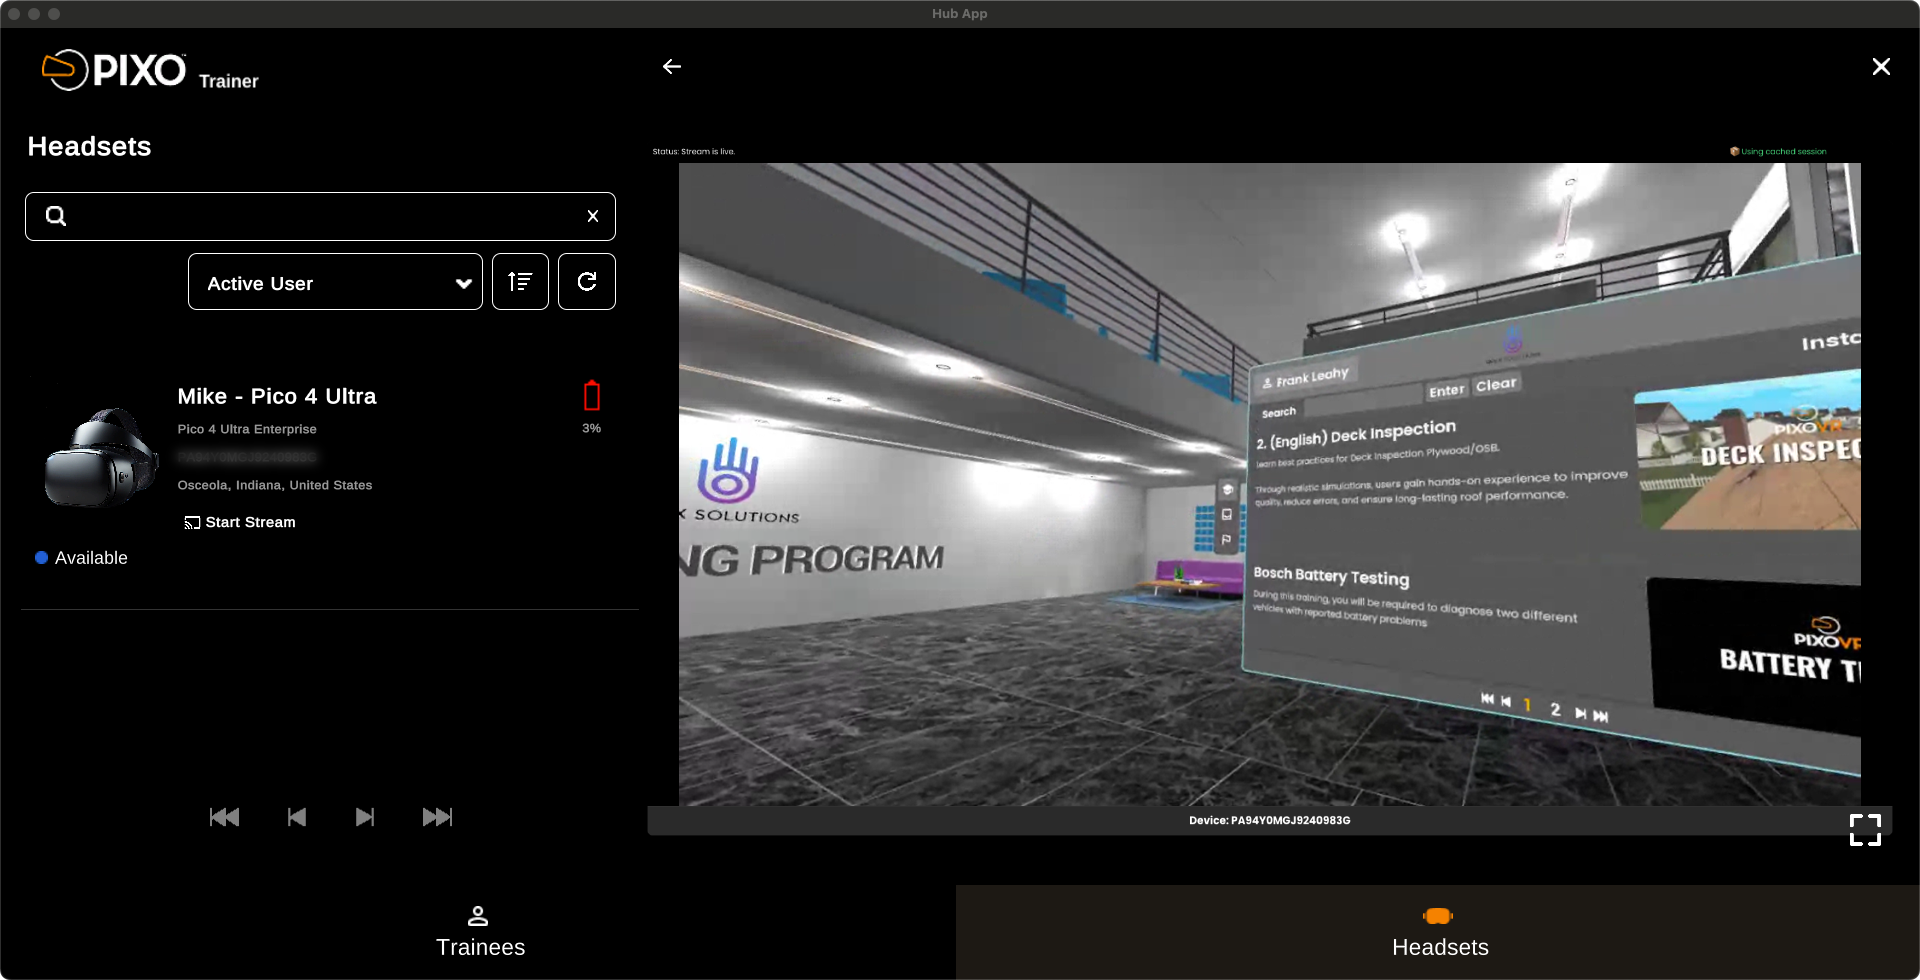
To start a stream, find an online headset under the "Headsets" list and click "Start Stream":
You can then use the headset's stream to assist the trainee with remote support and troubleshooting.
Questions and Support
If you have any issues, please contact our tech support team at [email protected]

