

Program Overview
In this virtual reality scenario, you will have access to a simulated workspace focused on completing the required tasks of inspecting a customer reported gas leak in their basement. Using available tools and resources, you must determine the source of the leak and take the appropriate steps to resolve the issue.
For a video walkthrough of the module, click this link: ILI Walkthrough
Core Learning Objectives
-
Leak Investigation — Performing the necessary steps to locate a potential leak source
-
Hazard Recognition — Notifying and dealing with Hazards
- Reporting / Documentation — Step taken / resolution / documentation / marking location of leak / use of warning tag
Tools
- Laser Pointer — To interact with menus and objects in this experience, aim your laser pointer at the item you wish to interact with and pull the trigger on your controller to select it.
-
CGI Tool — To take a reading, aim the tool and pull the trigger on your controller
-
Soap Bubbles — Once you find an area with an abnormal reading, pull out the Soap Spray from your toolbox to test for a leak. If bubbles appear, there is a leak. If there are no bubbles, the leak is coming from somewhere else.
-
Crayon Tool — If you discover a leak, use the Crayon Tool from the toolbox to mark the leak’s location with an "X" by pulling the trigger on your controller.
-
Voltage Pen — To inspect a meter for electric current, place the pen tip near the meter to detect if it is electrified. If present, the tip will light up red and beep.
User Controls
HTC Vive Pro and Focus Plus Headsets
- Menu Buttons
-
Long Hold – Toggle Wrist Menu
-
Short Press with Empty Hand – Toggle Laser Pointer
-
- Trackpads – Teleport, Select Option in Wrist Menu
- Grip Buttons – Grab / Release Tools
- Triggers – Use Selected Tool / Laser Pointer
See below for button positions on HTC Vive Pro controllers.

PICO & Meta Quest Headsets
- Trigger – Use Equipped Object, Use Laser Pointer
- Grip Buttons – Grab / Release Object
- X,A – Teleport
- Y,B – Toggle Wrist Menu (Long Hold), Toggle Laser Pointer (Short Press)
- Thumbsticks – Select Option in Wrist Menu
See below for button positions on Meta Quest controllers.

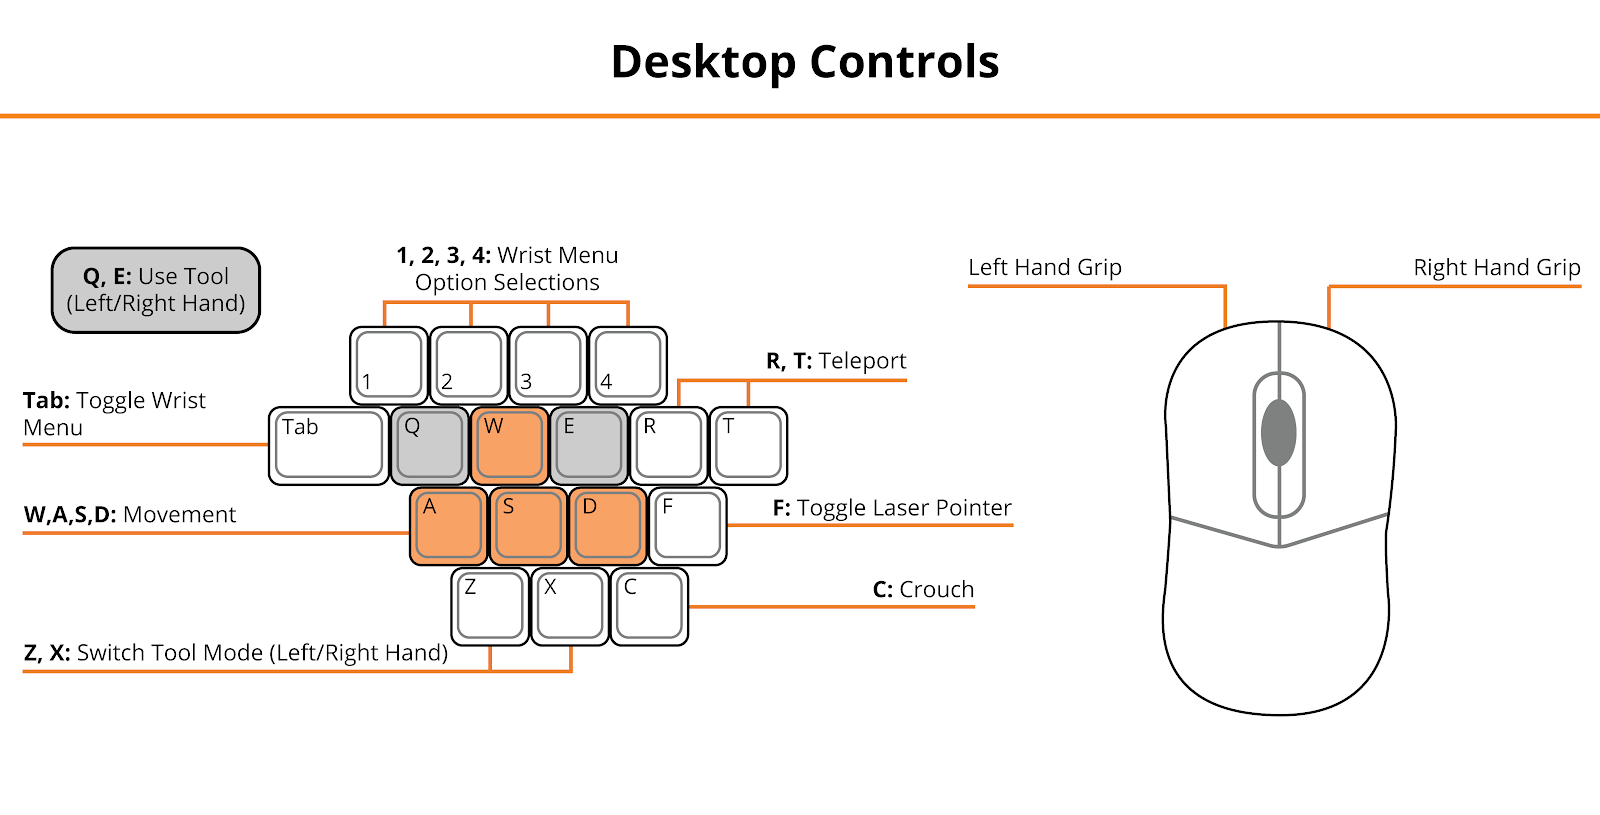
Desktop
- Mouse Left Click, Right Mouse Click – Left Hand Grip / Right Hand Grip
- Q, E – Engage Tool
- Tab – Open/Close Wrist Menu
- 1, 2, 3, 4 – Select Option in Wrist Menu
- R, T – Teleport
- F – Toggle Laser Pointer
See below for the desktop diagram.
Entering the Experience
Login and Authentication
To use this experience, you must log in using a PIXO account created by the organization’s administrator, or by a PIXO VR Representative. The login must be performed from a headset that is connected to the internet for authentication to work successfully.
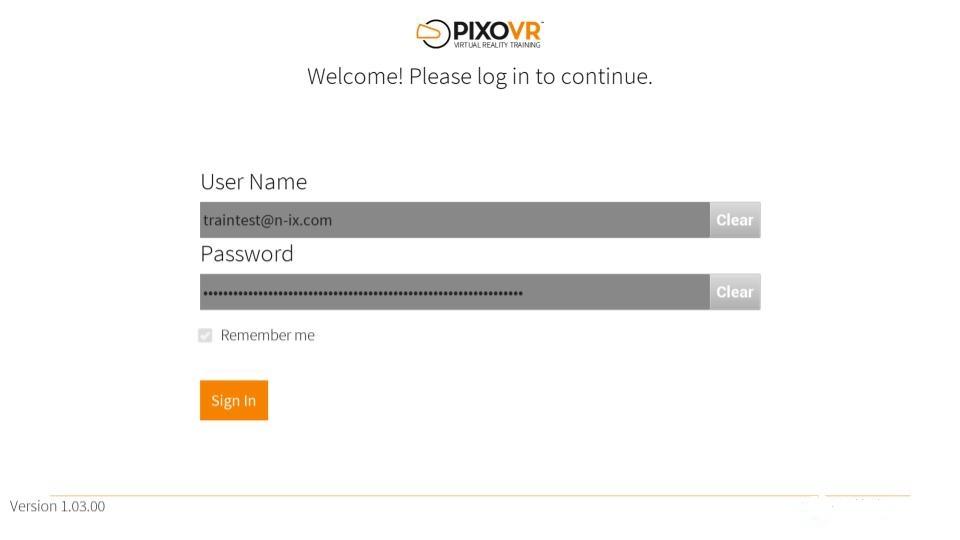
Tip: Select the Remember me flag to save your login credentials for your next session.
-
Enter your PIXO credentials in the corresponding fields, then select Sign In.
-
Once logged in, you will proceed to the tutorial.
Tutorial
The Tutorial will cover the basics of operation in virtual reality, including teleportation, motion controllers, and using buttons.
To exit the tutorial, open your Wrist Menu and select the Exit Tutorial option.
Lobby
After completing the tutorial, you will proceed to the lobby, where you can choose between replaying the Tutorial, or starting a session in Single Player or Multi-User mode.
Additionally, the menu to the right of the mode selection menu allows instructors to build a specific scenario. The instructor can select the scenario, whether or not the user has access to hints, how many AOCs they will run into, as well as which AOCs they will have.

Experience Walkthrough
A Work Order will appear in front of you detailing the problem. The customer will state that they think there is a gas and might say where they think it’s coming from.
- When finished reviewing the work order, use your laser pointer to close the window.
-
Open your Wrist Menu. Your Wrist Menu can be used for various functions:
-
Communication – There are six options to communicate with:
-
Evacuate Immediately, Hazardous Condition Present
-
No Leak Found
-
Leak found, Company Action Taken
-
Leak found, Customer Action Required
-
CO Leak found, Appliances Disconnected
-
Leak Investigation Required Outside – Select if a gas leak was found in the floor drains or wall cracks
-
-
Exit Experience – Exit the scenario
-
Work Order – Restates where the customer suspects a gas leak
-
Toolbox – Access tools. The available tools are:
-
Sense-it Tool
-
Soap Bubbles
-
Crayon Tool
-
Voltage Pen
-
Flashlight
-
-
Controls Reminder – View the controls within the module
-
-
While in the Wrist Menu, select Toolbox and then select the CGI Tool. The tool will be placed in your left hand.
-
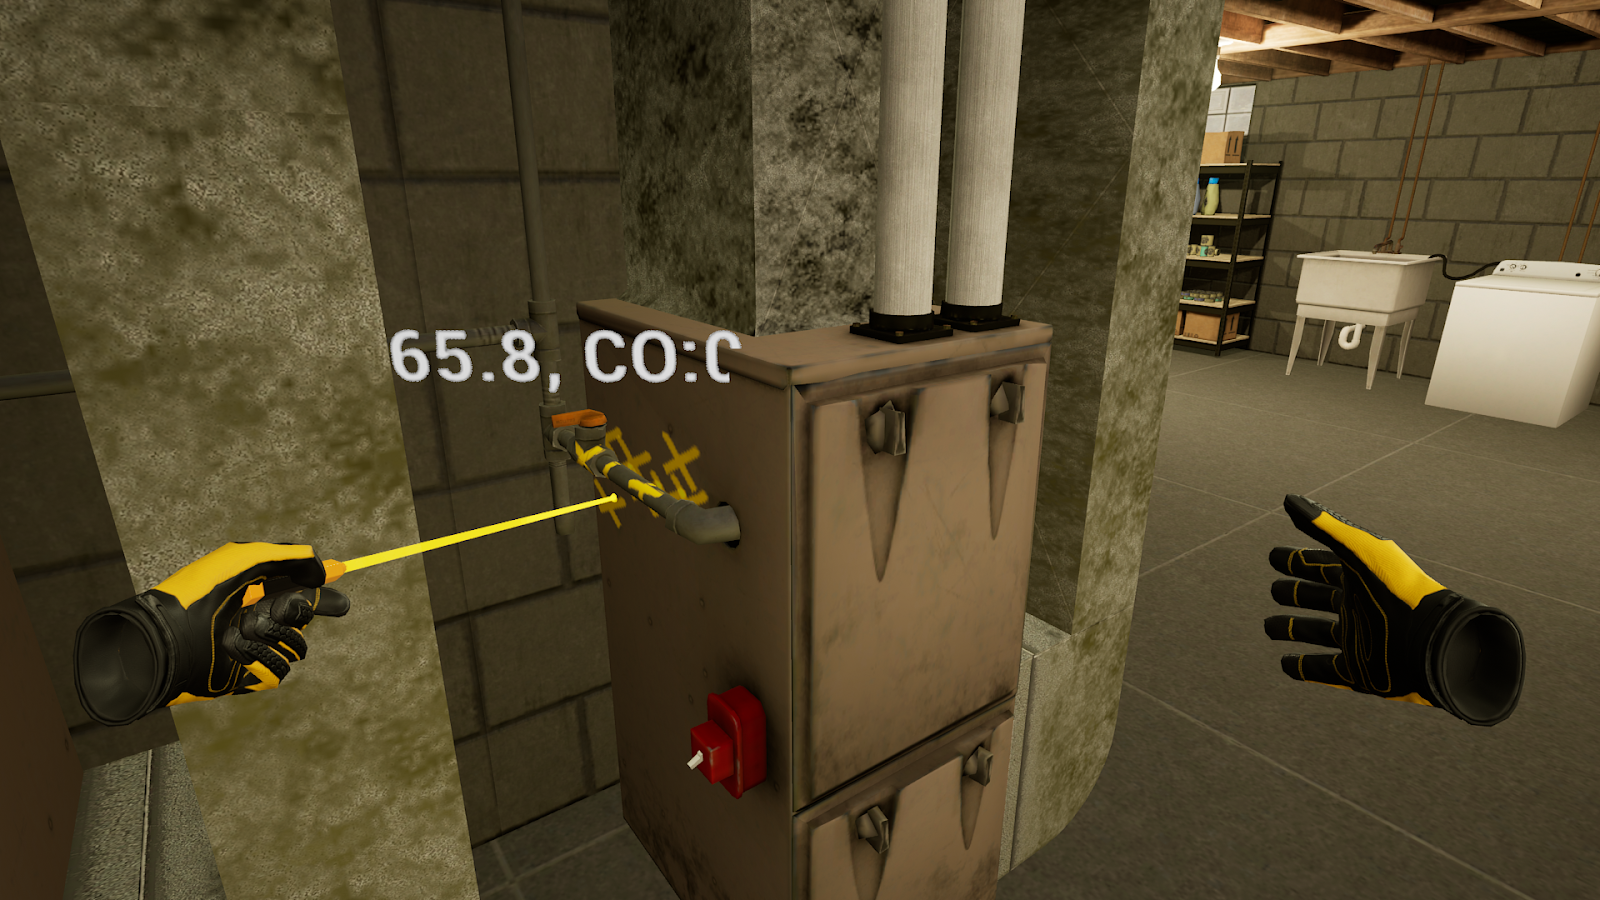
Before doing anything else, you must check the air in case of a carbon monoxide gas leak. This is the first action that you will be completing in the module because in a real life scenario, you would need to check the air or else you would risk passing out if a leak with evacuation levels is present.
-
Your tool will display the PPM and LEL readings of the air. If the reading is too high (27% LEL or 200 PPM CO), you should evacuate without looking for the leak by going back into Wrist Menu > Communication and choosing to evacuate and notify emergency services.
-
If the percentage is low, go around the room and try to find the leak by taking continuous readings.
-
If the percentage is zero, inspect the appliances. Depending on what has spawned into the scenario, the leak could be coming from boilers, washers, dryers, water heaters, furnaces, wall cracks, floor drains or the gas piping from the meter throughout the basement to each appliance.
-
-

-
Some scenarios will have hazards such as a gas can or moldy laundry that are closely placed next to or blocking access to an appliance. When found, you can select it with the laser pointer and ask the customer to remove it, then mark the item as a hazard. Sometimes this will be the only objective in the module, as the appliance could be sucking in the smell from the hazard, and therefore would be the source of the smell.

-
Once you find an area with an abnormal reading, pull out the Soap Spray from your toolbox to test for a leak. If bubbles appear, there is a leak. If there are no bubbles, the leak is coming from somewhere else.

-
If you discover a leak, you should use the Crayon Tool from the toolbox to mark the leak’s location (only one “x” is necessary).
-
Next, use the laser pointer to select the appliance’s gas valve and shut off the gas. If a leak is found outside of an appliance, such as the ceiling piping, shut off the gas meter in order to shut off the gas.
-
When finished, pull up the Communication menu and select the most accurate diagnosis.
-
Once you select an option in the communication menu, you will complete the module and be transported to the Review Room.
Review Performance
In the Review Room, you can view if you passed or failed. The window also details step-by-step procedures that you either followed correctly or forgot to do depending on if you passed or failed.
The scoring card is separated by five sections: Detection, Handling, Marking, Reporting, and Hazard Recognition.
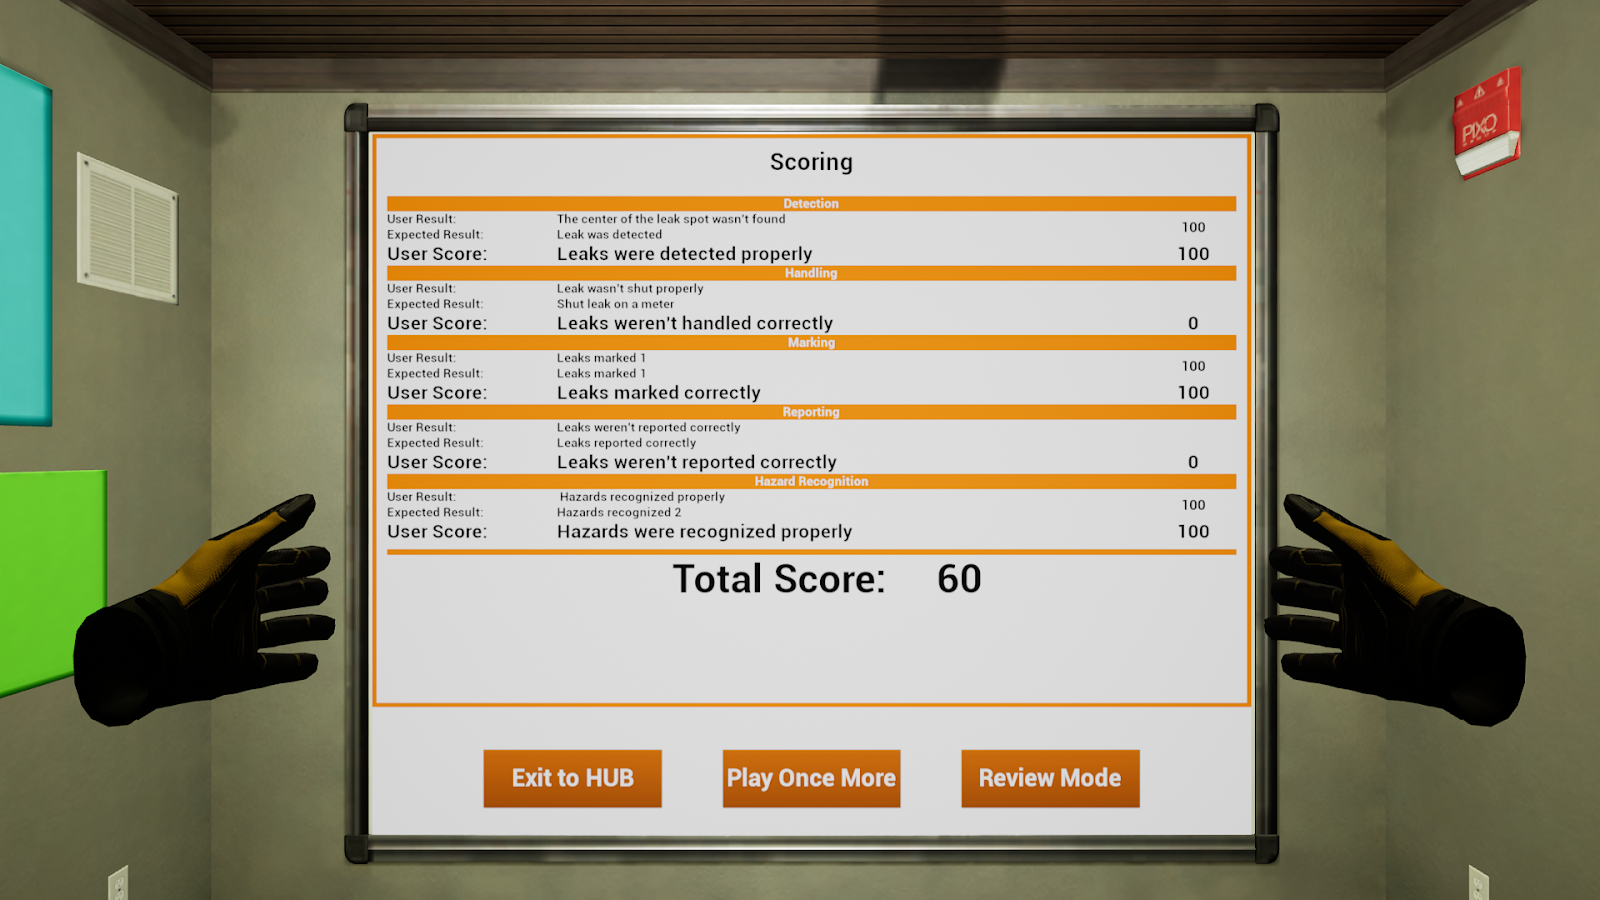
At the bottom of the Scoring Window, you can choose to Exit to the HUB, play another random scenario, or review the scenario you just completed to find what was done incorrectly through Review Mode.
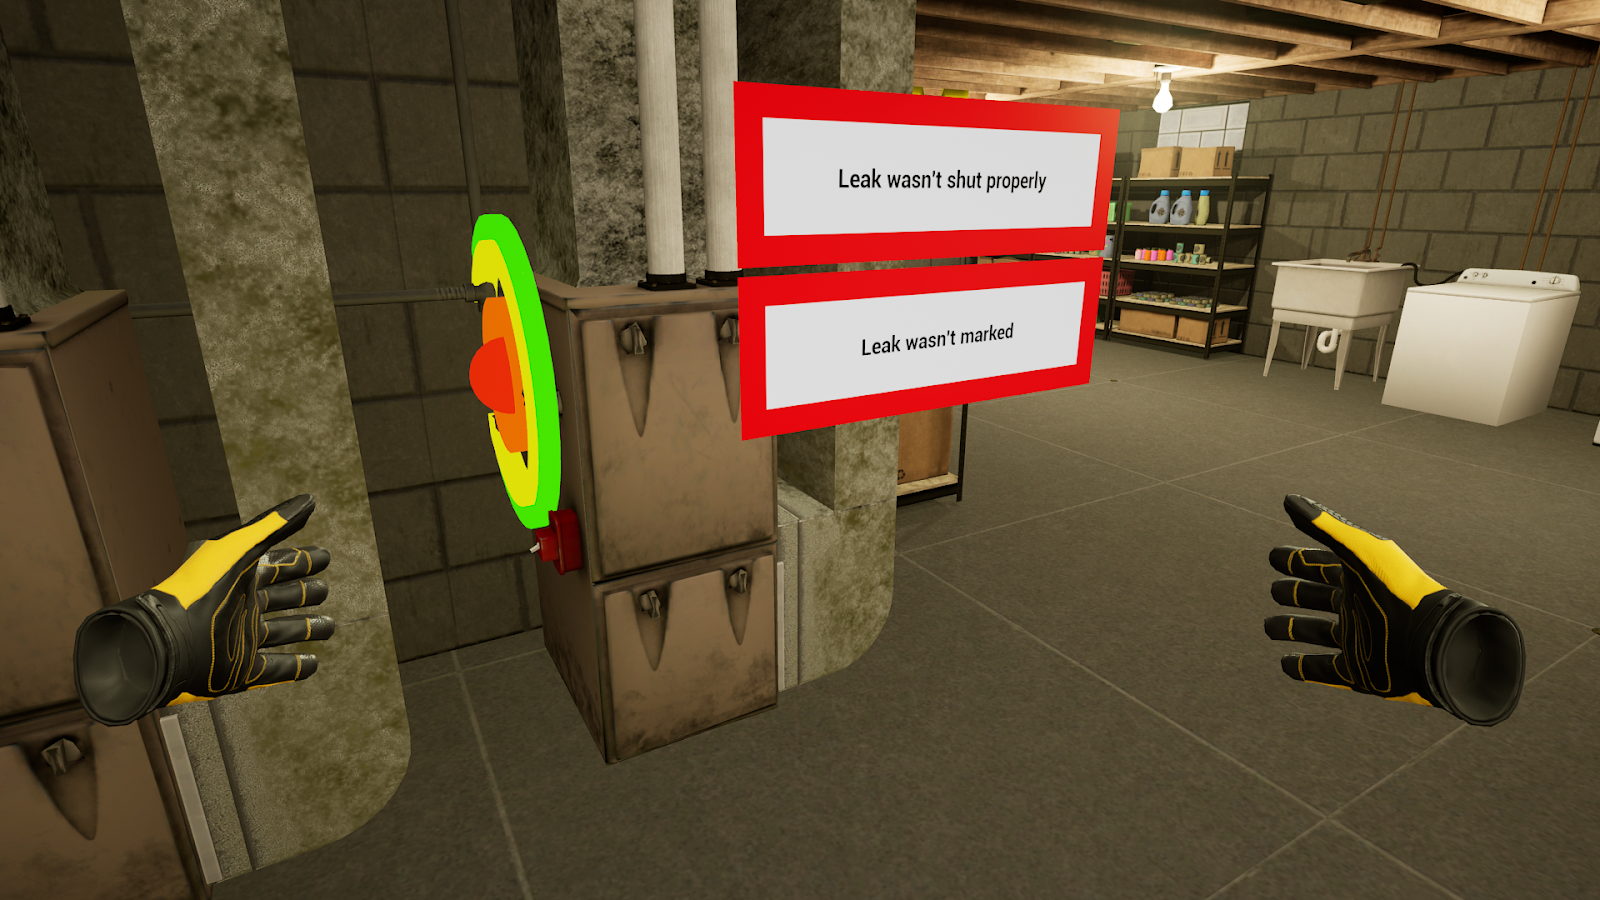
Review Mode
In Review Mode, you cannot use your tools. Anything that you missed in your investigation will be highlighted:
-
Green — Completed Correctly
-
Yellow — Completed with Partial Defects / Errors
-
Red — Missed / Incorrectly Completed Items
When finished reviewing, open your Wrist Menu and select Exit to Hub.
Questions and Support
If you have any issues, please contact our tech support team at [email protected]

