

Program Overview
The Ladder Safety module provides you with the ability to practice ladder safety in a safe virtual environment. You will receive a non-trade-oriented task, such as hanging a sign or changing a lightbulb and proceed to inspect the work area. Then, you will determine the type of ladder needed, inspect the ladder, and once you have an appropriate ladder, proceed to perform the task to completion.
While performing the task, you will also be assessed on your placement and if you are obeying rules such as reaching, leaning, and other common errors.
Core Learning Objectives
-
Area Survey — while not directly graded, you should survey the area to determine if hazards are present and the height of the ladder you will need
-
Ladder Selection — the ladder selected should be appropriate for the task
-
Ladder Inspection — inspect the ladder to determine if it is damaged and has appropriate markings to determine if it is acceptable for use
-
Ladder Setup — was the ladder used as intended, or was it leaned against a wall?
-
Ladder Use — did you climb hand over hand, stay within the confines of the rails, and stop 1-2 rungs from the top?
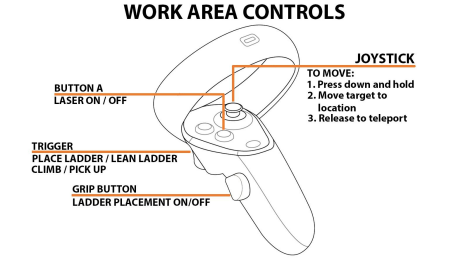
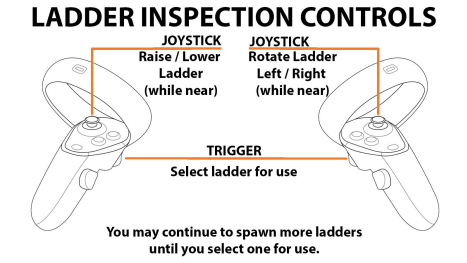
User Controls
Meta Quest, HTC VIVE Focus 3 & PICO Headsets
-
X, A Buttons — Toggle Laser Pointer
-
Triggers — Select / Grab / Place Object
-
Thumbsticks
-
Both Hands — Teleport
-
Left Hand — Raise / Lower Ladders
-
Right Hand — Rotate Ladders
-
-
Grip Buttons — Activate Placement Mode
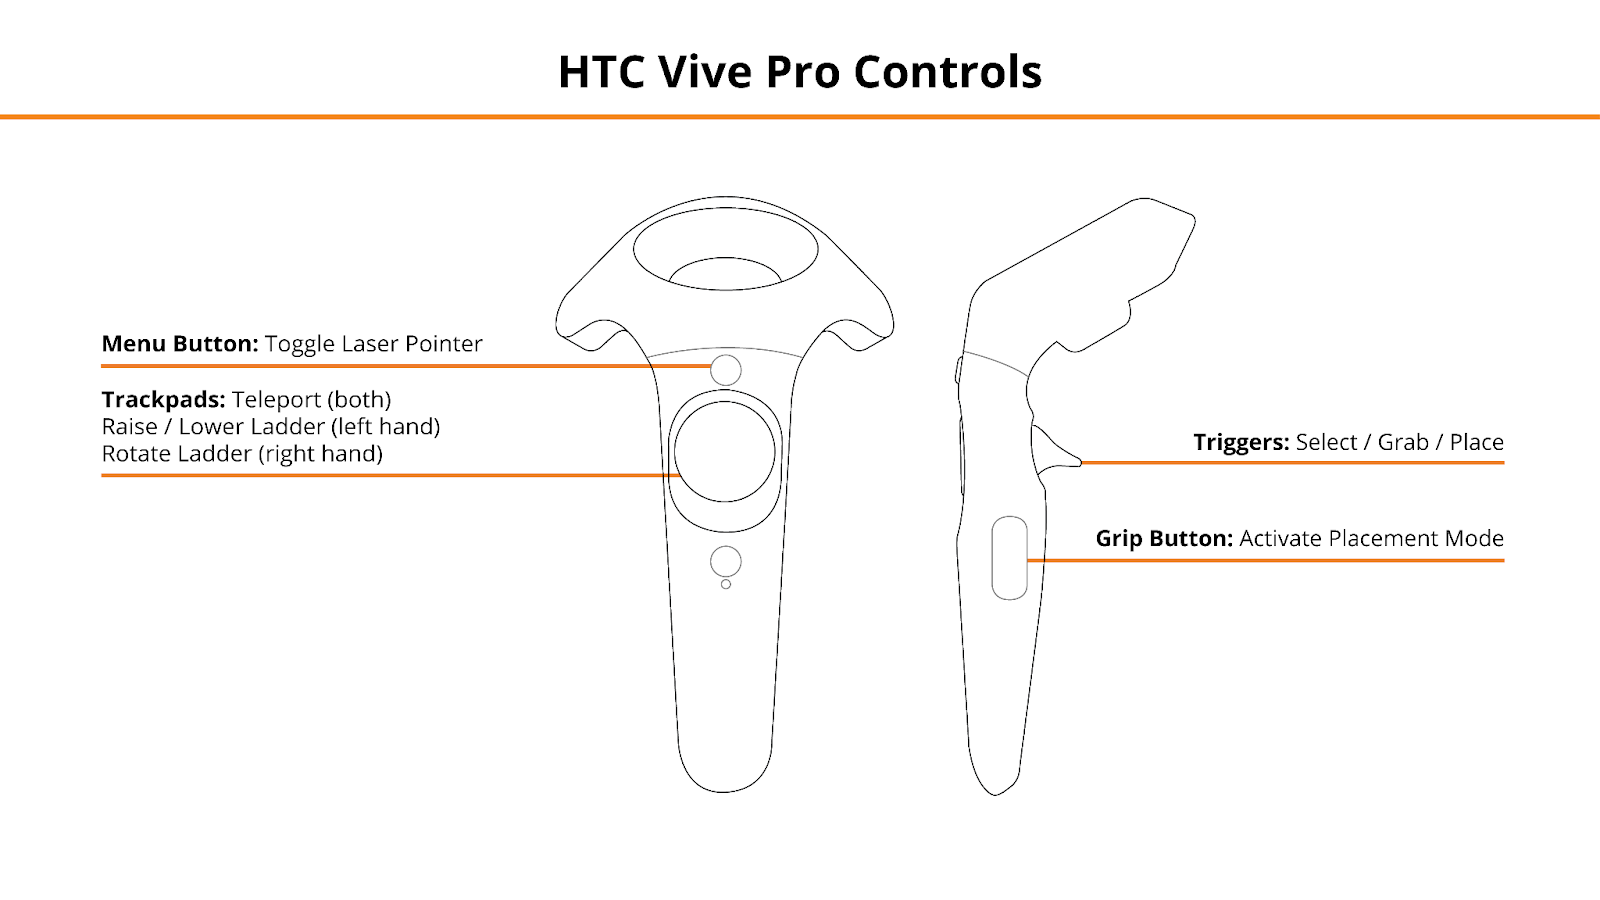
HTC VIVE Pro + Focus Plus Headsets
-
Menu Button — Toggle Laser Pointer
-
Triggers — Select / Grab / Place
-
Trackpads
-
Both Hands — Teleport
-
Left Hand — Raise / Lower Ladders
-
Right Hand — Rotate Ladders
-
-
Grip — Activate Placement Mode (VIVE Pro users will need to press BOTH grips on their controllers to activate ladder placement mode)
Functionality
General Indicators
| Hint Menus |
Each room has menus that display room controls and mission briefings. |
| Blue Circular Cursor |
Indicates which ladder is currently being inspected during ladder inspection. |
| Green Arrow |
Indicates that the ladder is at a safe angle for climbing during ladder placement. Straight and Extension ladders only. |
| Red Arrow |
Indicates that the ladder is NOT at a safe angle for climbing; you will fail if you attempt to climb the ladder. Straight and Extension ladders only. |
| Bouncing Arrow |
Indicates where supply bags should be placed. |
Tools
-
Laser Pointer — to interact with menus in the experience, use your laser pointer
-
To activate Ladder Placement Mode, activate your laser pointer first, and then press the Grip Button on your controller.
-
Tip: When attempting to climb ladders or grip objects such as light bulbs, make sure to disable your laser pointer first.
-
-
Virtual Hands — to activate the green buttons, press them with your virtual hands
Exiting a Scenario
To exit a scenario, press the Exit buttons in each room:
-
Exit to Hub — sends you back to the lobby/scenario selection screen
-
Log Out — closes the application and sends you back to the Login screen
Entering the Experience
Login and Authentication
To use this experience, you must log in using a PIXO account created by the organization’s administrator, or by a PIXO VR Representative. The login must be performed from a headset that is connected to the internet for authentication to work successfully.
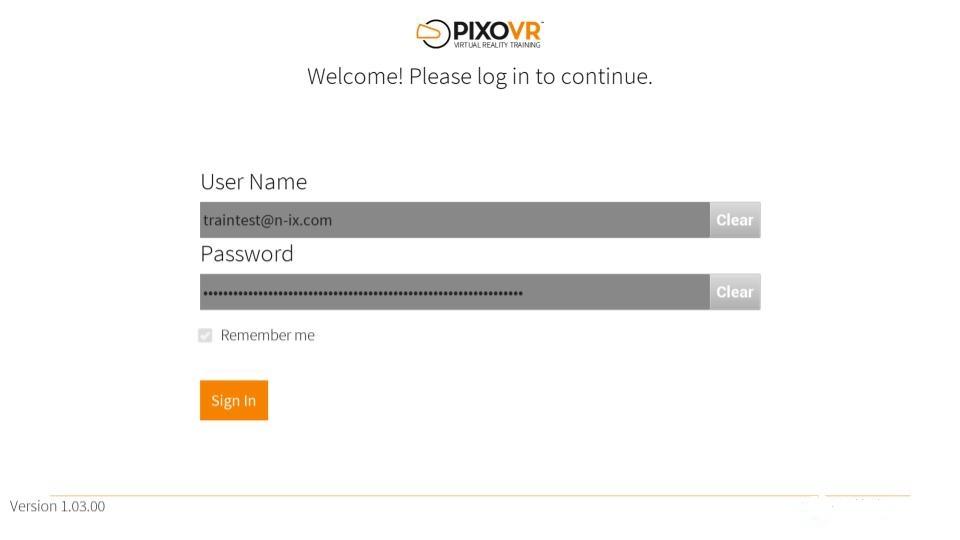
Tip: Select the Remember me flag to save your login credentials for your next session.
-
Enter your PIXO credentials in the corresponding fields, then select "Sign In".
-
Once logged in, you will proceed to the Welcome Staging Area to watch the Welcome Video.
Lobby
After logging in, you will proceed to the lobby, where you can choose between:
-
Tutorial — plays an onboarding video on the wall to the right
-
Random Experience — launches a random scenario
-
Experiences 1-11 — launches a specific scenario
Tip: Use the left and right arrows to navigate between pages:

Tip: You can also toggle between Imperial and Metric measurement units by using the "Units of Measurement" toggle in the bottom right corner:

Experience Walkthrough
-
Receive Work Assignment(s)

-
Inspect Work Area — Note any obstacles, hazards, or ladder height requirements
-
Remove hazards by targeting them with your Laser Pointer and pulling your controller Trigger.
-

-
Select Ladder Specifications for the Task(s)
-
Using the green buttons, select a ladder material, type, and height.
-

-
Press the "Spawn Ladders" Button
- Inspect Ladders for Defects
- If all ladders have defects, you may spawn more by pressing "Spawn Ladders" again.

-
Select an Appropriate Ladder
- Tip: Once you select a ladder for use, you will not be able to spawn ladders again. The task will fail if you select a ladder that is faulty.
- Collect Supplies for the Task and Place in Bucket

-
Proceed to the Work Area
-
Set up Ladder
-
Press the Grip Button on your controllers to activate Ladder Placement Mode.
-

-
Safely Climb Ladder and Perform Task(s)
- Tip: Make sure not to lean too far forward while performing task(s), as leaning too far can cause a ladder leaning failure/fall.

- Review Performance
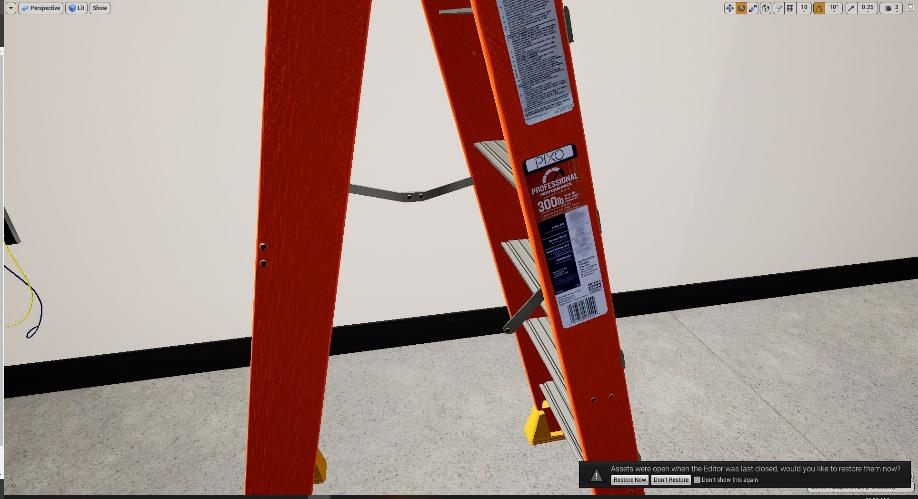
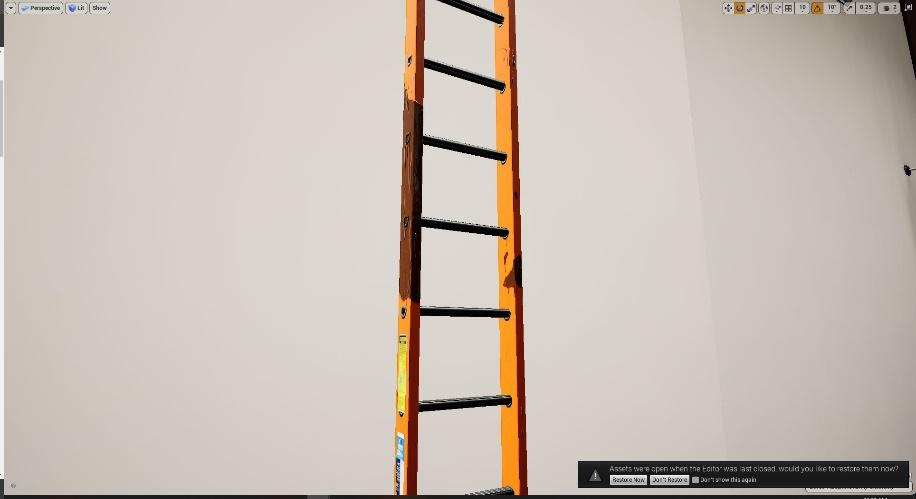
Possible Inspection Failures
The following is a list of the different inspection failures that can be encountered.
Note: Only a single ladder type is shown in each image, but the effect is similar or identical on other ladder material types if it can occur.
|
Ladder Error |
Image Reference |
|
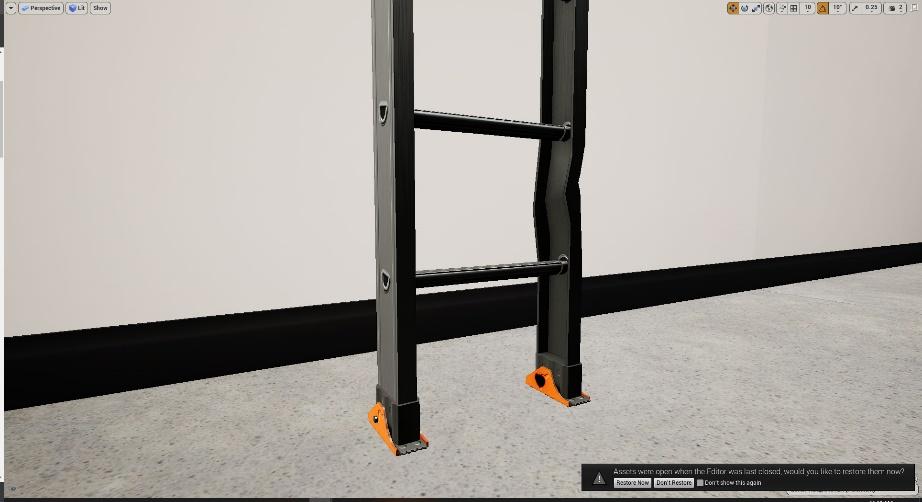
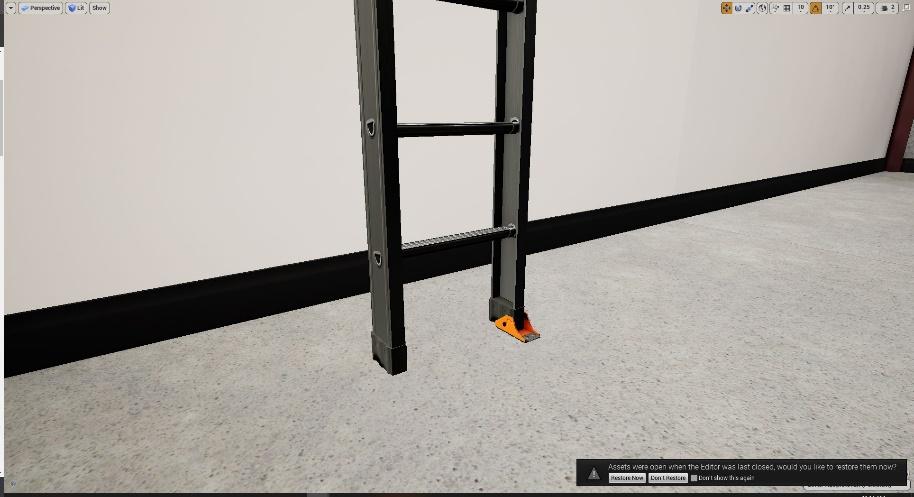
Bent Frame
Ladder Types:
|
|
|
Bolted on Part
Ladder Types:
|
|
|
Cleat — Broken
Ladder Types:
|
|
|
Cleat — Missing
Ladder Types:
|
|
|
Extension Lock — Missing
Ladder Types:
|
|
|
Extension Lock — Bent
Ladder Types:
|
|
|
Label — Missing
Ladder Types:
|
|
|
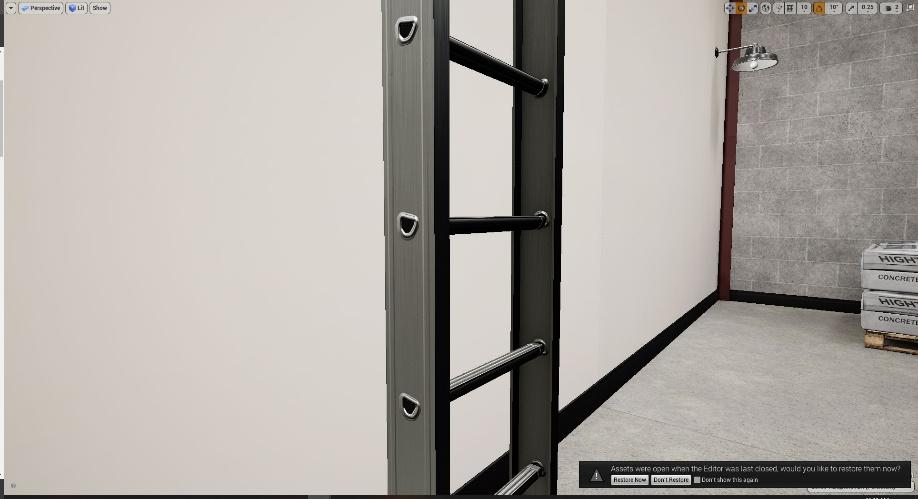
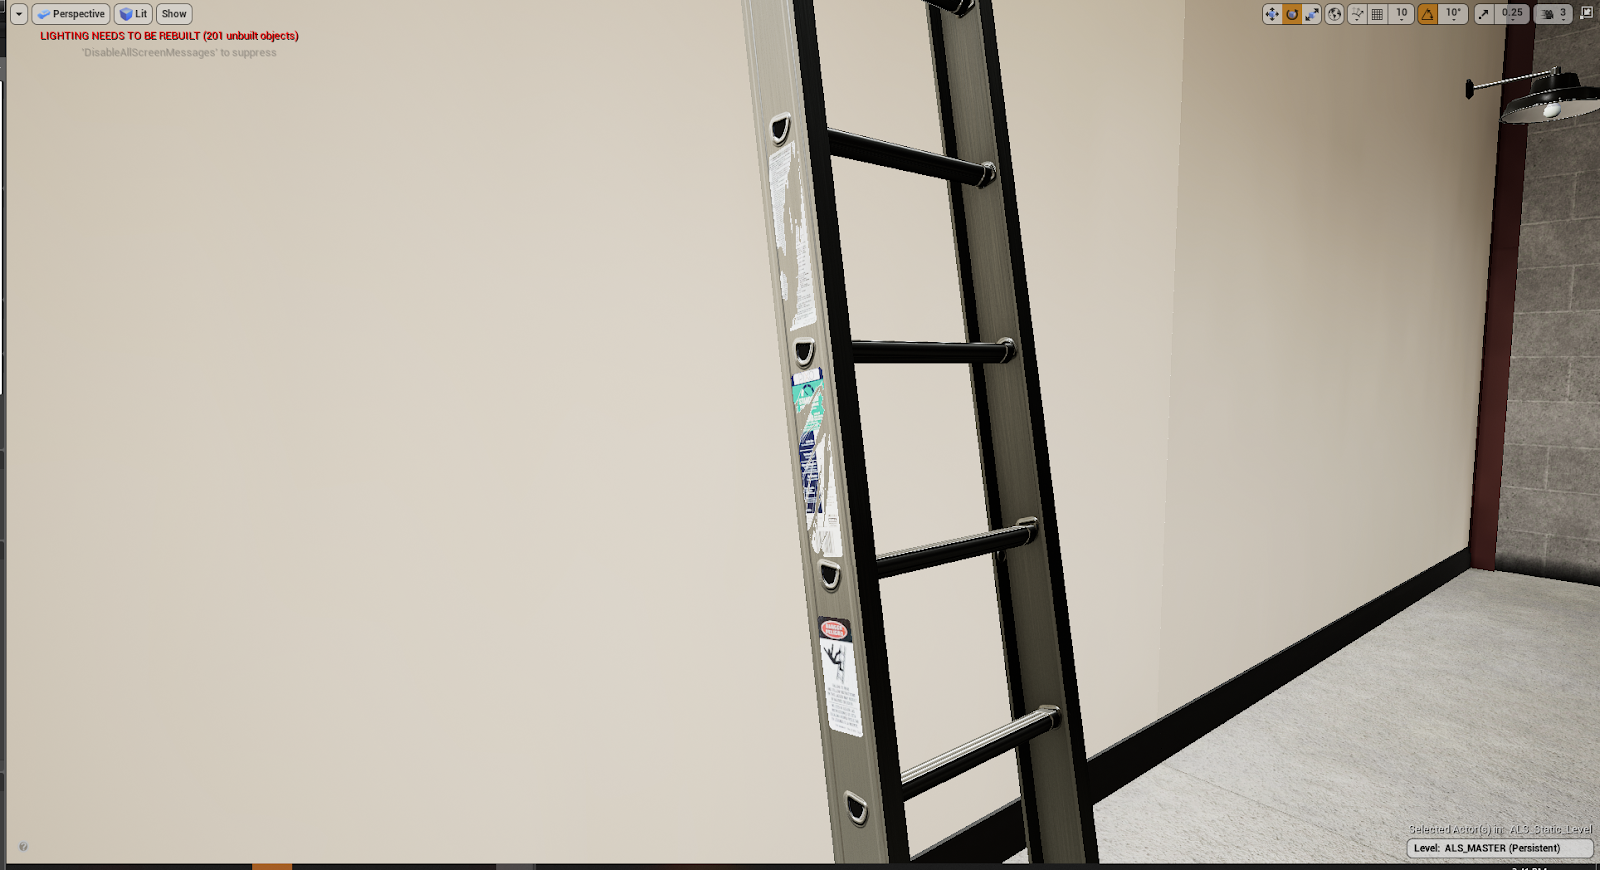
Label — Scratched
Ladder Types:
|
|
|
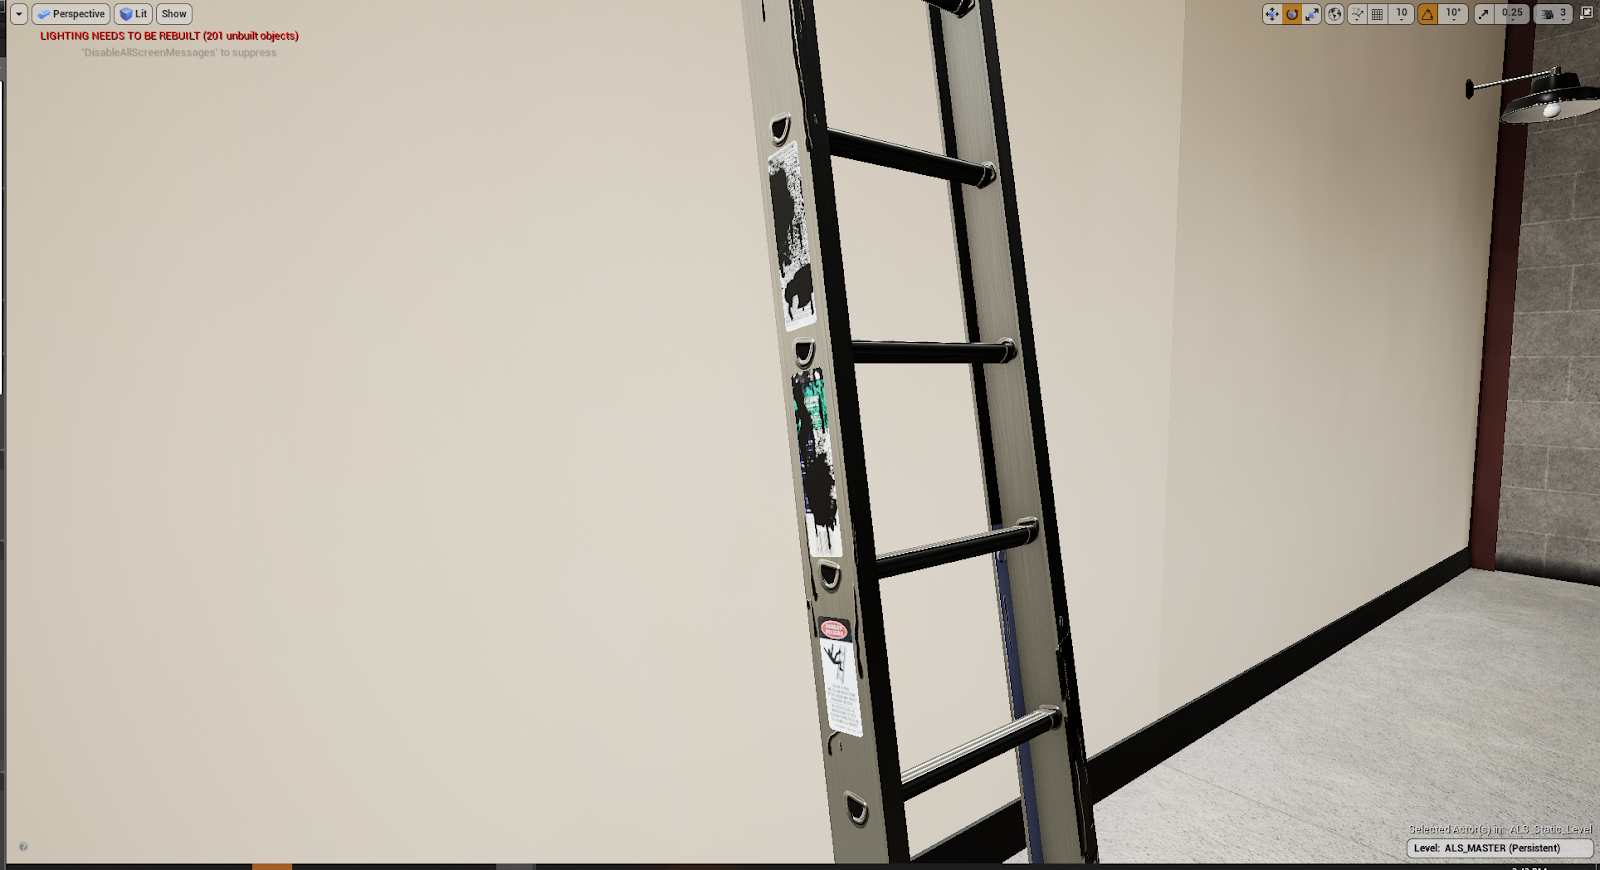
Label — Painted Over
Ladder Types:
|
|
|
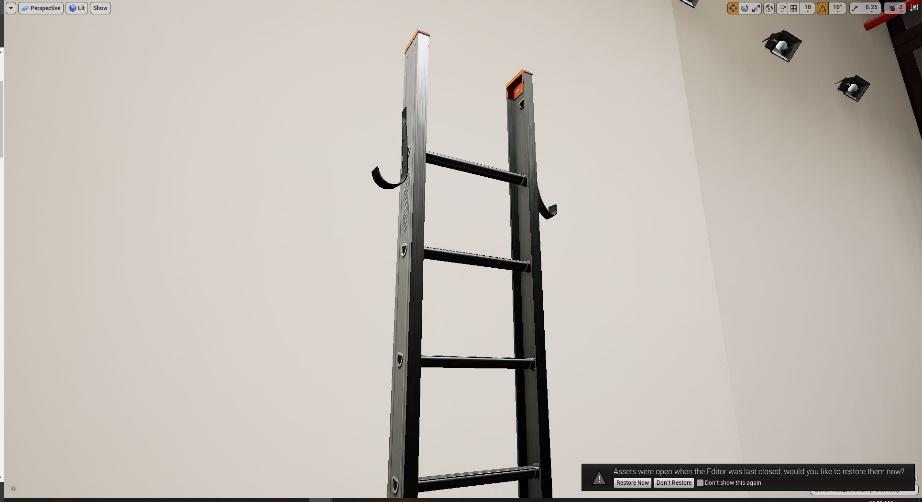
Lock Arms — Bent
Ladder Types:
|
|
|
Lock Arms — Broken
Ladder Types:
|
|
|
Lock Arms — Missing
Ladder Types:
|
|
|
Oil and Dirt
Ladder Types:
|
|
|
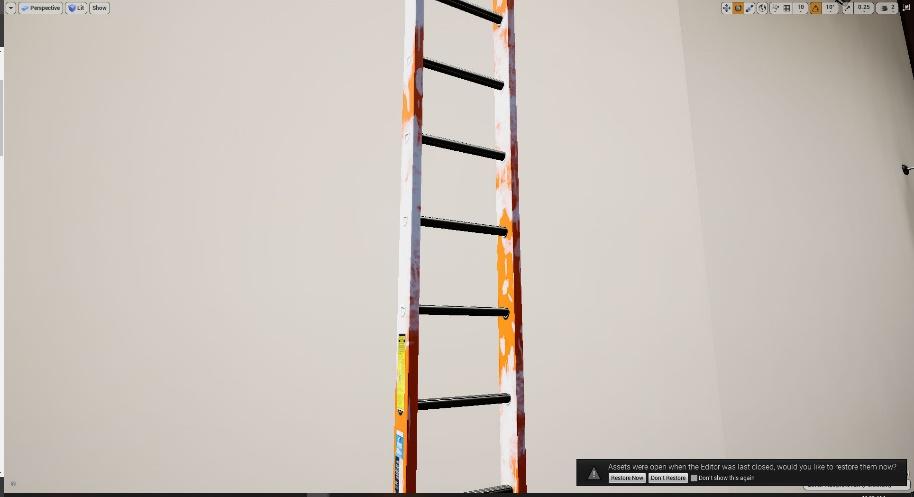
Paint
Ladder Types:
|
|
|
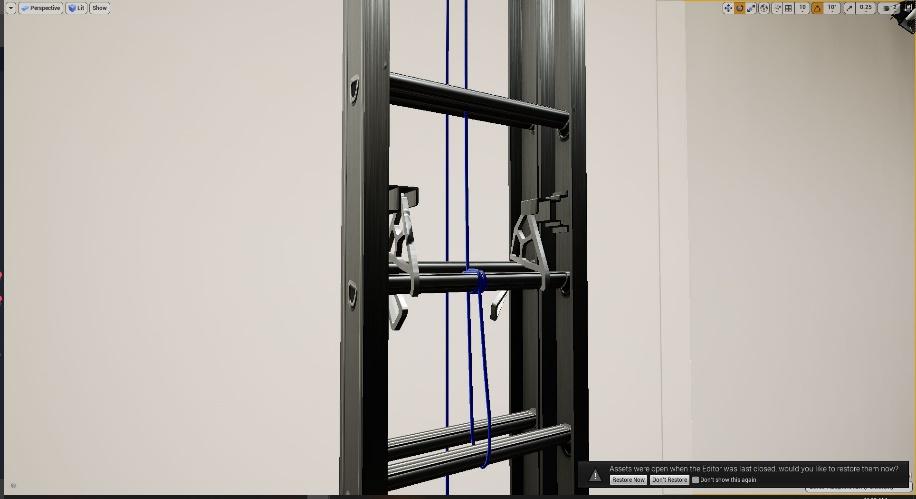
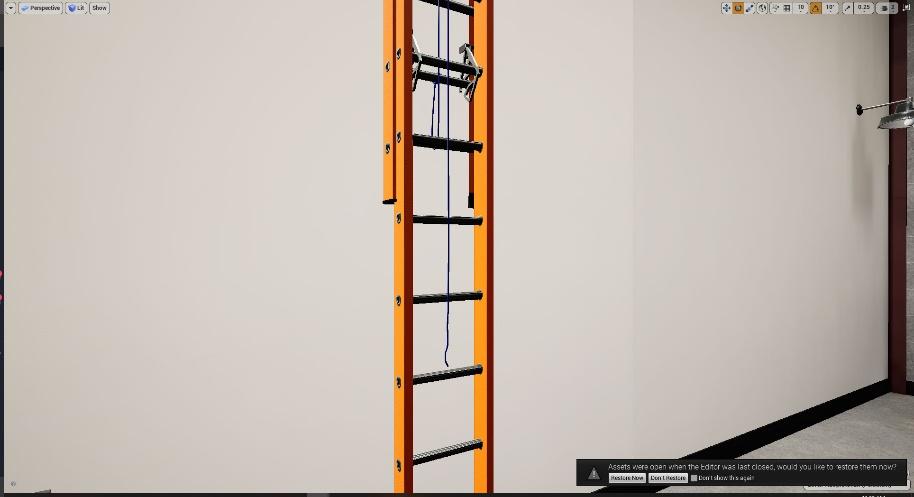
Pull Rope — Broken
Ladder Types:
|
|
|
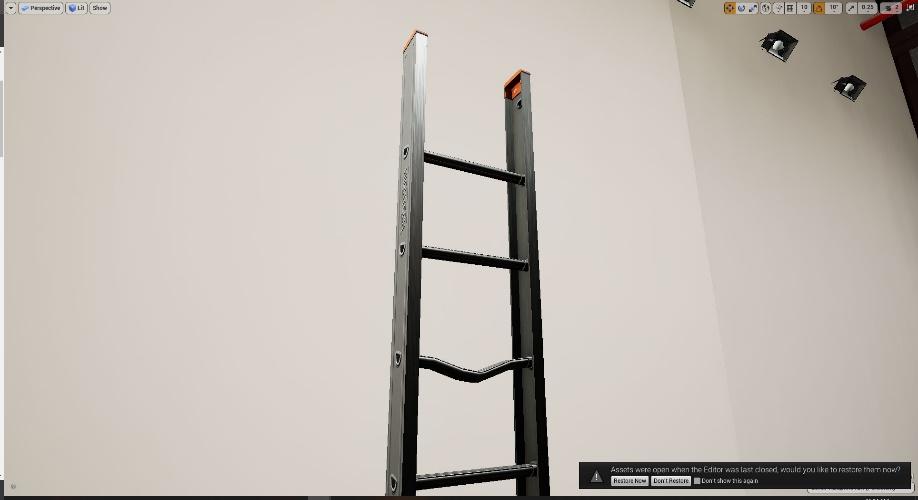
Rung — Bent
Ladder Types:
|
|
|
Rung — Missing
Ladder Types:
|
|
|
Fiberglass — Cracked
Ladder Types:
|
|
|
Fiberglass — Frayed
Ladder Types:
|
|


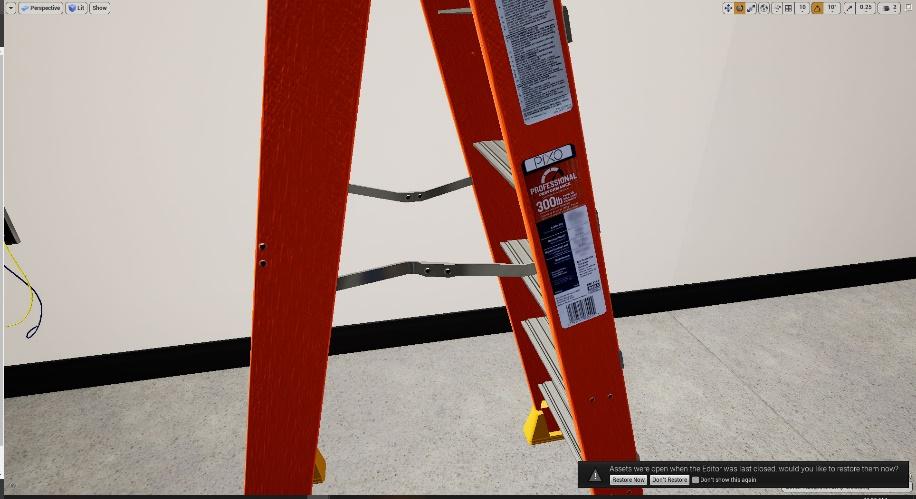


Ladder Labels
Below is an example of each label that can appear. Only the red professional ladder label is correct.

Experience End
After each scenario, you are taken to an ending area where you will be given your outcome.
-
If you fail, you will be told why you failed (inspection, falling, etc)
-
To prevent user complacency, the exact reason will not be given for inspection (broken rung, etc), only that you failed to inspect the ladder completely.

Questions and Support
If you have any issues, please contact our tech support team at [email protected]

