

Program Overview
In this scenario, participants will focus on inspecting a customer’s gas meter in their basement. Using available tools, you must determine the physical condition and serviceability of the gas meter. This module is designed to support a multi-user system.
For a video walkthrough of the module, click this link: IMI Walkthrough
Core Learning Objectives
-
Gas Meter Inspection — Taking the necessary steps to identify its malfunctions
-
Abnormal Operation Condition (AOC) Recognition — Notifying and dealing with AOCs
-
Reporting & Documentation — Step Taken / Resolution / Documentation
Tools
- Laser Pointer — To interact with menus and objects in this experience, aim your laser pointer at the item you wish to interact with and pull the trigger on your controller to select it.
-
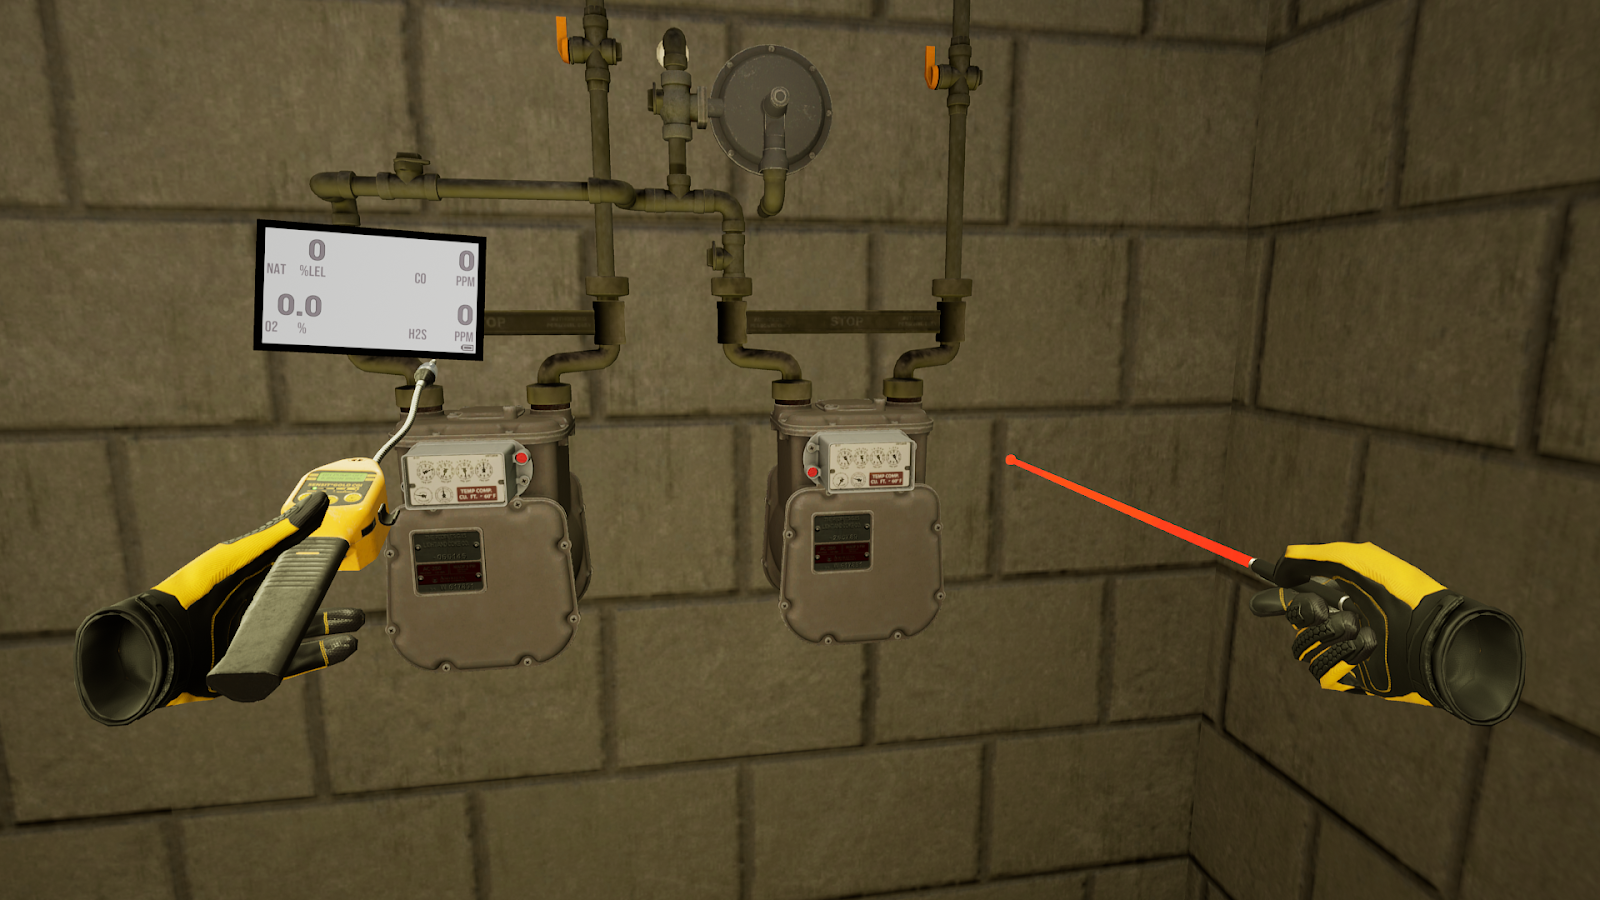
CGI Tool — To take a reading, aim the tool and pull the trigger on your controller
-
Voltage Pen — To inspect a meter for electric current, place the pen tip near the meter to detect if it is electrified. If present, the tip will light up red and beep.
User Controls
HTC Vive Pro and Focus Plus Headsets
- Menu Buttons – View Assigned Meter Number / Swap to Voltage Pen
- Trackpads – Teleport, Select Option in Wrist Menu
- Grip Buttons – Grab / Release Tools
- Triggers – Use Selected Tool / Laser Pointer
See below for button positions on HTC Vive Pro controllers.

PICO & Meta Quest Headsets
- Trigger – Use Equipped Object, Use Laser Pointer
- Grip Buttons – Grab / Release Object
- X,A – Teleport
- Y – View Assigned Meter Number
- B – Swap Tools
- Thumbsticks – Select Option in Wrist Menu
See below for button positions on Meta Quest controllers.

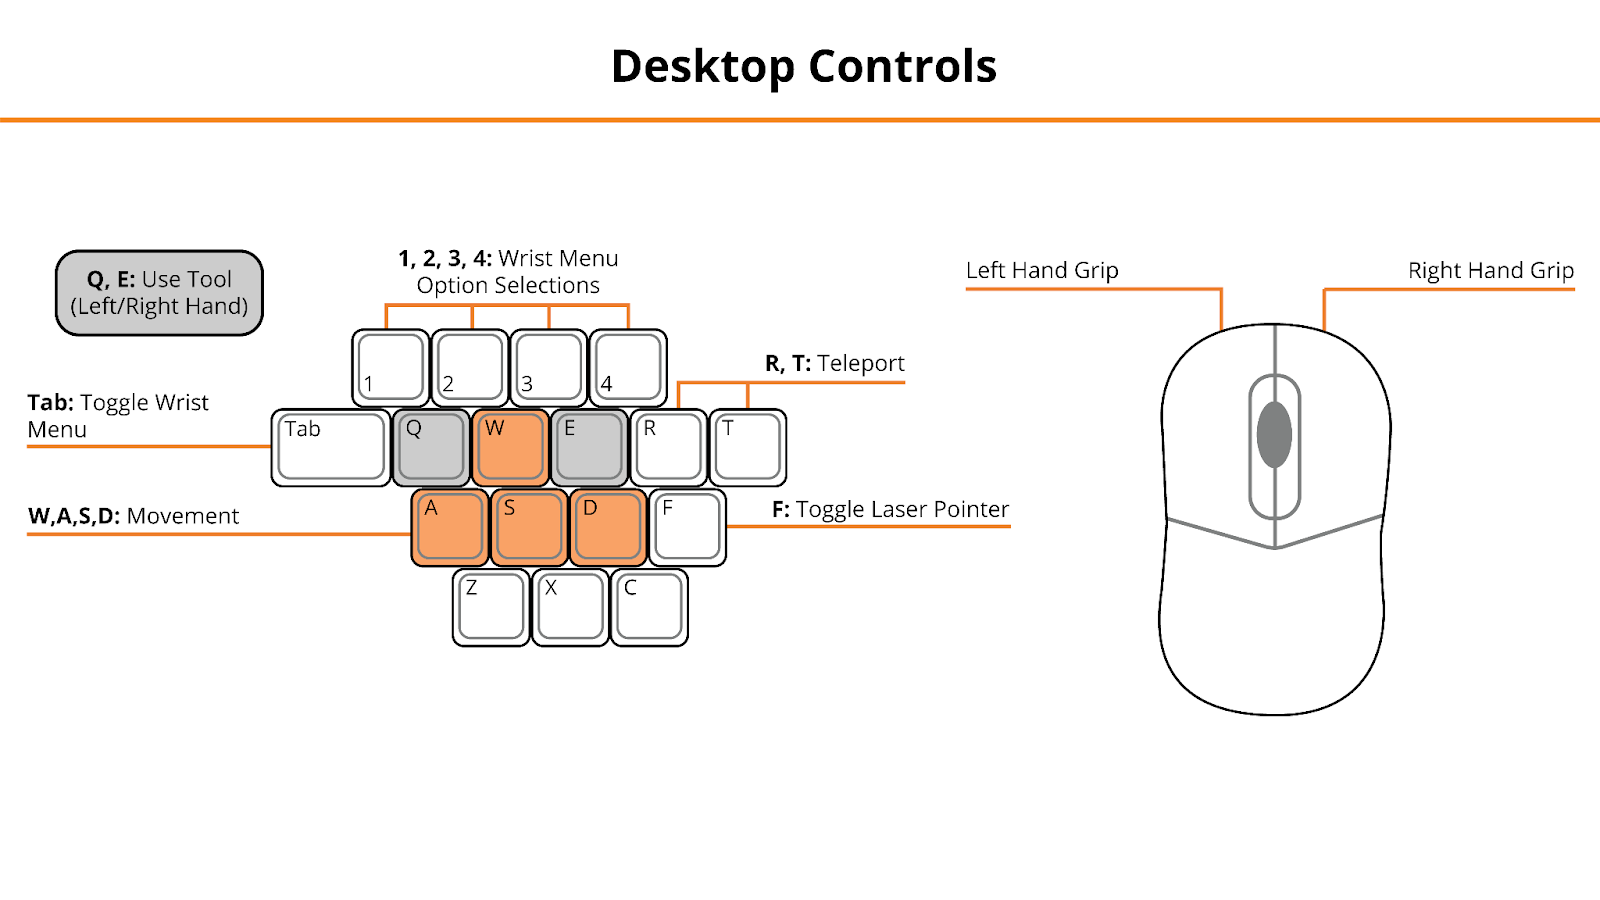
Desktop
- Mouse Left Click, Right Mouse Click – Left Hand Grip / Right Hand Grip
- Q, E – Select, Engage Tool
- Tab – Open/Close Wrist Menu
- 1, 2, 3, 4 – Select Option in Wrist Menu
- R, T – Teleport
- Z, X – Swap to Voltage Pen
- F – Toggle Laser Pointer
See below for the desktop diagram.
Entering the Experience
Login and Authentication
To use this experience, you must log in using a PIXO account created by the organization’s administrator, or by a PIXO VR Representative. The login must be performed from a headset that is connected to the internet for authentication to work successfully.
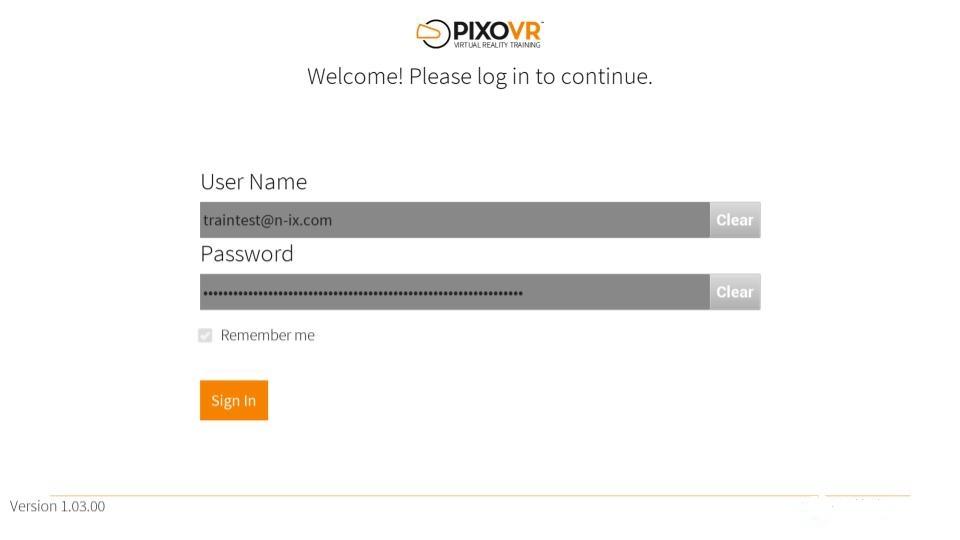
Tip: Select the Remember me flag to save your login credentials for your next session.
-
Enter your PIXO credentials in the corresponding fields, then select Sign In.
-
Once logged in, you will proceed to the lobby.
Lobby
After logging in, you will proceed to the lobby, where you can select between Tutorial, a Random Module, or Choose a Scenario:
-
Tutorial — Covers the basics of operation including teleportation, motion controllers, and using buttons.
-
If you want to train in a specific module, you can select between:
-
Centerline Leak
-
Excavation Ignition
-
Excavation Blowing
-
Excavation Burning
-
-
Otherwise, select Random Module.
Once you have selected which module you would like to play, choose between Single User or Multi User Modes.

Experience Walkthrough
-
Answer the following Question: “What is the CGI Calibration requirement for performing an Inspection?”
-
Select Monthly.
-

-
Read and close the Work Order
-
Check the area for AOCs. Possible AOCs:
-
Extreme AOCs
-
Extreme Hoarder — Basement covered in boxes, magazines, clothes etc.
-
Basement Flooding
-
Walled Gas Meter
-
Electrified Meter
-
-
Light AOCs
-
Water Puddle
-
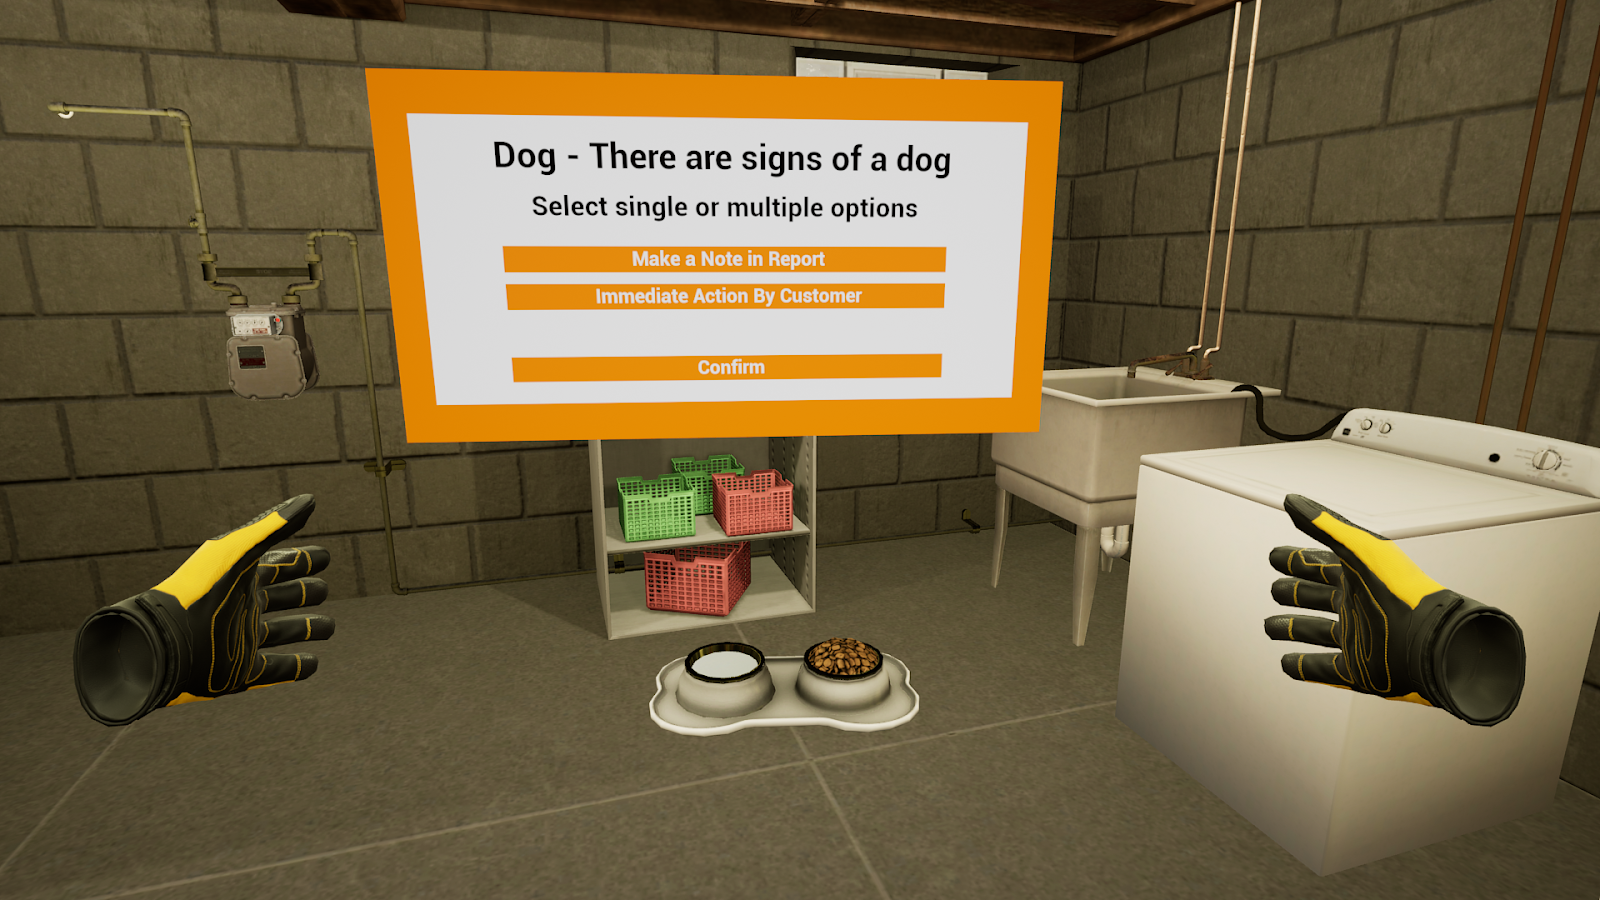
Dog or Signs of Dog in Basement
-
Light Hoarder — Piles of clothes, boxes, magazines in front of the meter
-
-
-
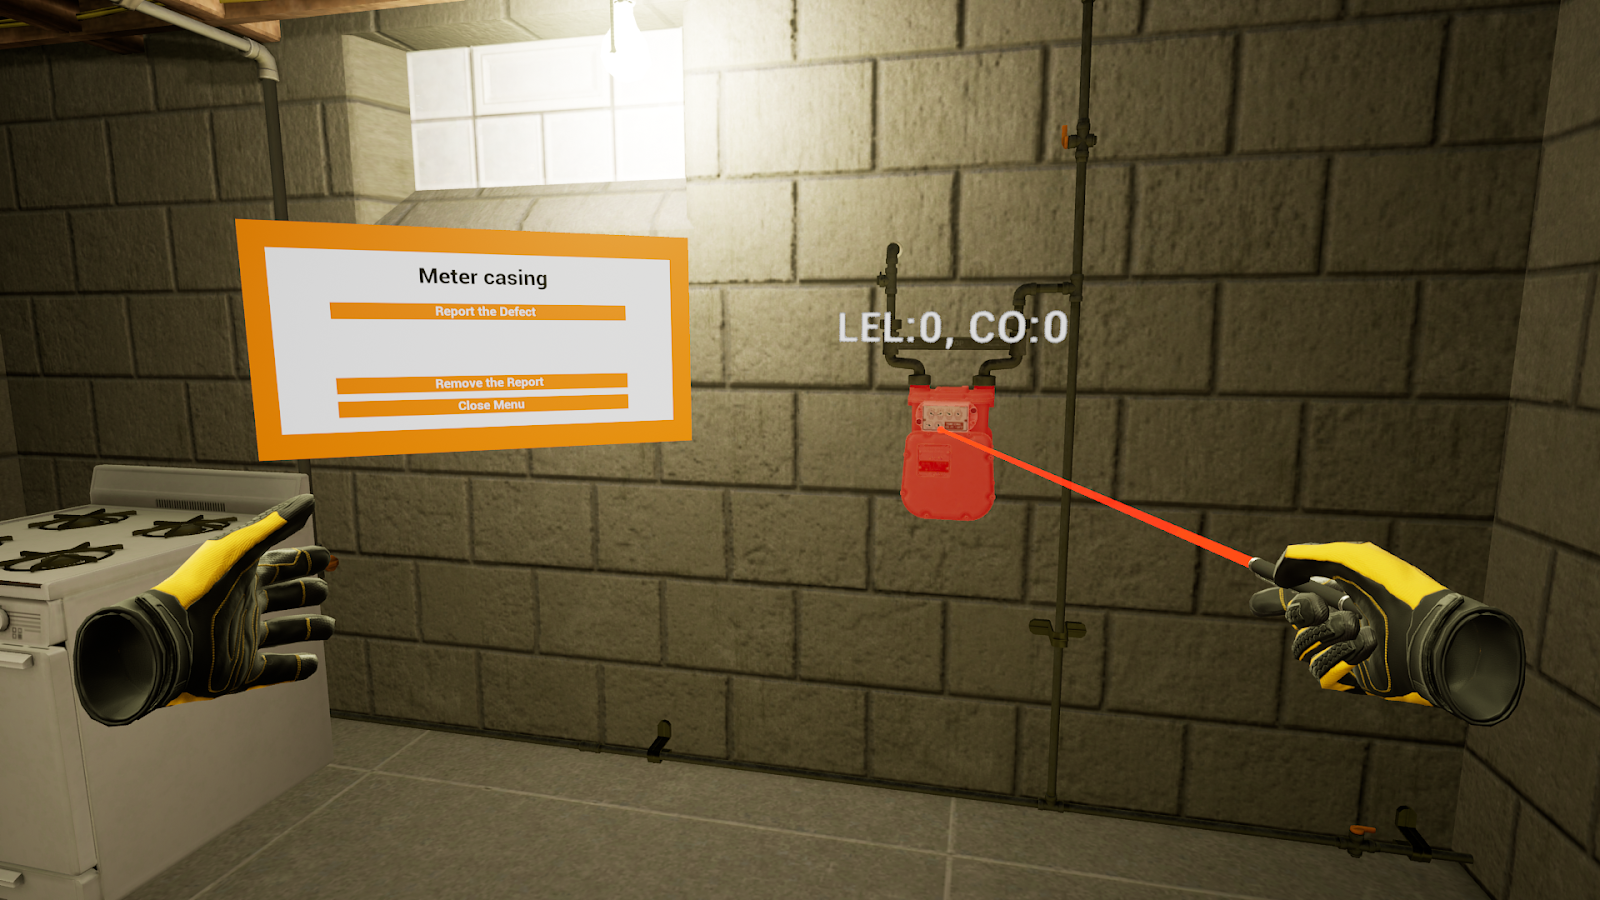
Document AOCs and Ask the customer to remove them. To do this, select the AOC with your Laser Pointer.
-
For Extreme AOCs — Select Can’t Complete Inspection, then Immediate Action by Customer
-
For Light AOCs — Select Make a Note in Report
-
-
Inspect Meter for electric current using Voltage Pen
-
The Voltage Pen is located in the Toolbox. This can be accessed by opening your Wrist Menu and selecting the Tool Box icon.
-
To inspect the meter, place the pen tip near a meter to detect if it is electrified. If present, the tip will light up red and beep.
-
If voltage is detected, report it as an AOC and end the inspection.
-
-
Verify that the Meter Number matches the number on the Work Order
-
Visually inspect all key elements of the Meter Assembly. To visually inspect, you must observe all elements of the meter with your “eyes” for about half of a second.
-
Possible Defects:
-
Wrong Meter Number
-
Mild Corrosion
-
Severe Corrosion
-
Gas Leak
-
Missing Seals
-
Missing Dial
-
Broken Dial
-
Illegal Bypass
-
Magnets on Meter
-
Improper Use
-
No Pipe Hangers
-
-
-
Sweep Piping
-
Sweep should trace the whole pipe and happen above the pipe with CGI Tool.
-
If closeted, perform a high low sweep around the cabinet and perimeter.
-
-
Document any Defects and Declare the appropriate Follow-up Action
-
Exit through Wrist Menu > Communication Menu, then select Complete Inspection
-
After each inspection, you will go to the Review Room to review your results. You will complete (10) scenarios total.
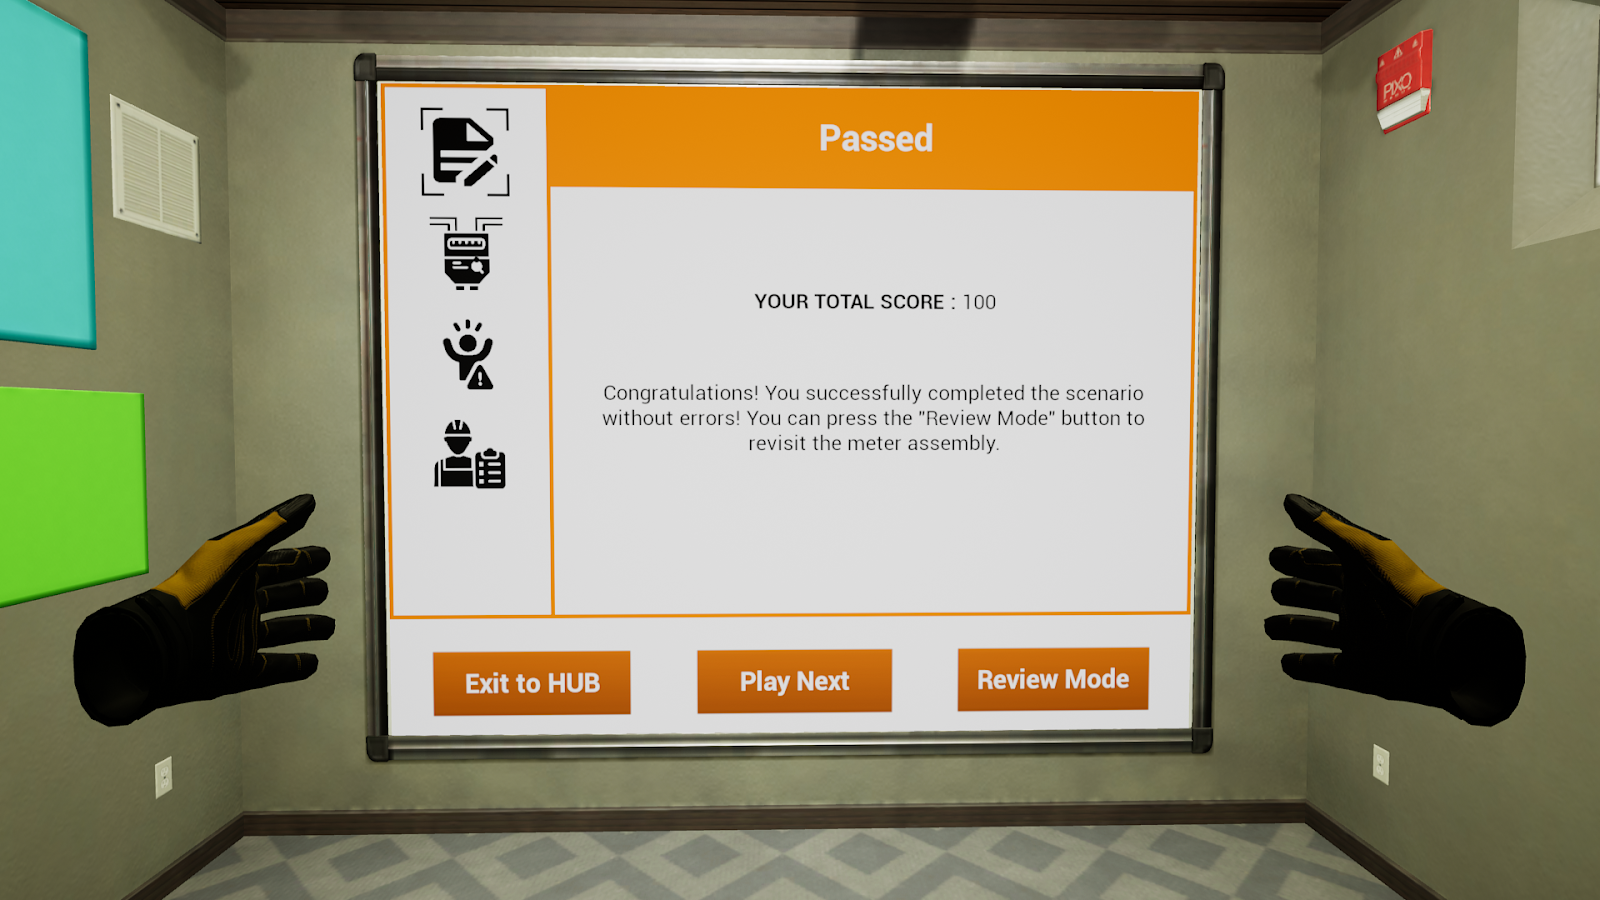
Review Performance
When finished with a scenario, you are taken to a grading room and shown your results. If you wish to, you can revisit the scenario to review what was missed in Review Mode.
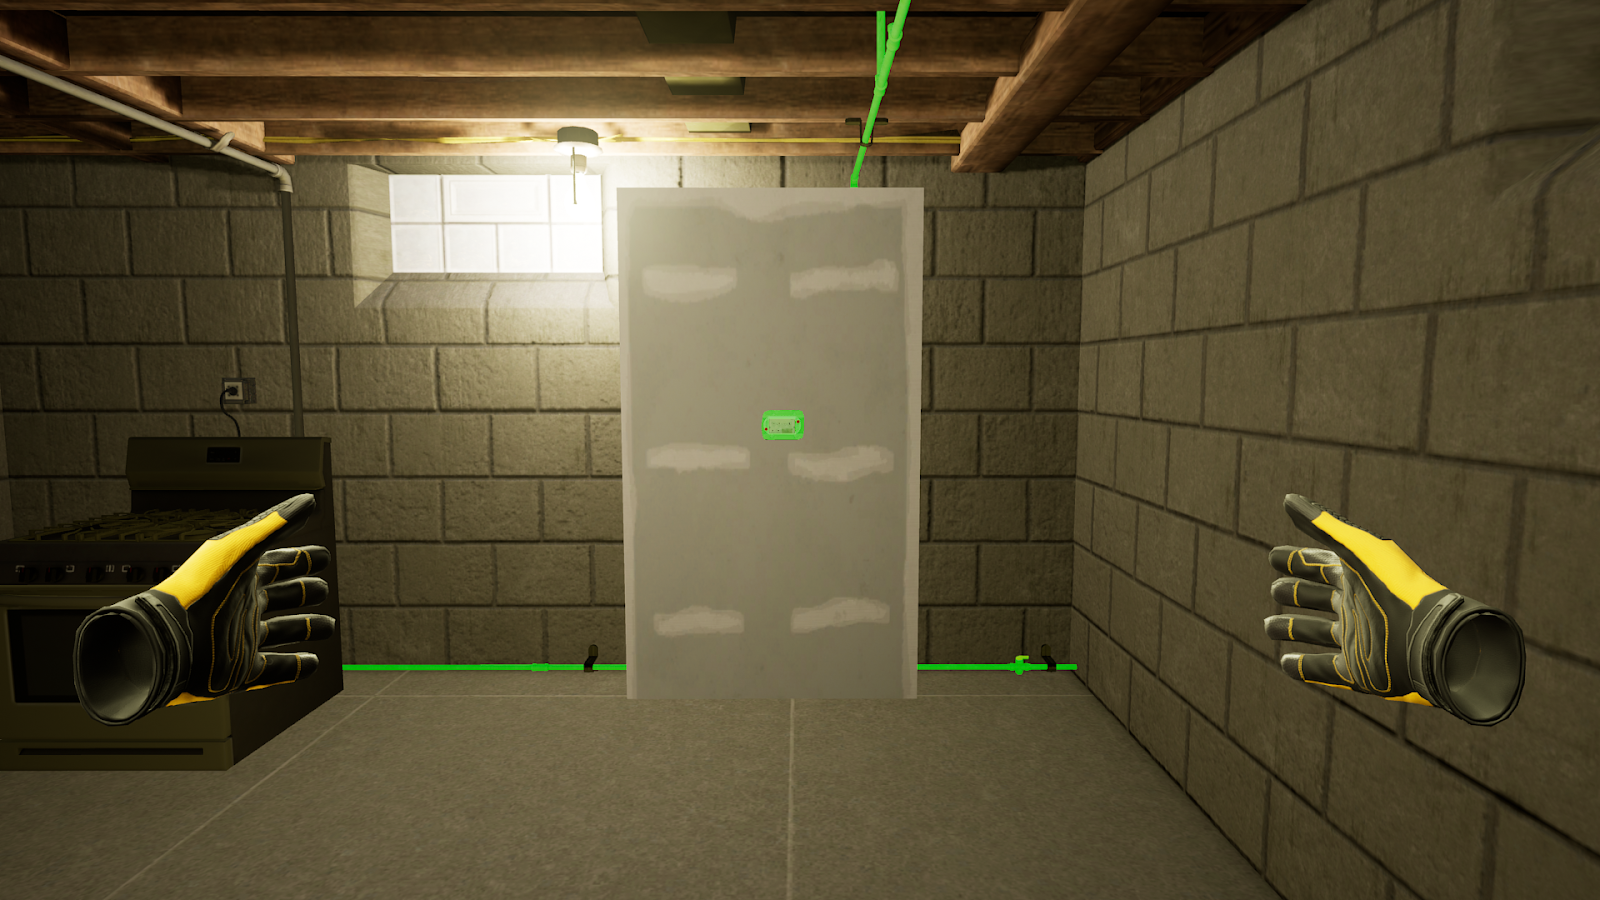
Review Mode
In Review Mode, you'll be able to see the scene you just completed with highlights:
-
Green — Completed Correctly
-
Yellow — Completed with Partial Defects / Errors
-
Red — Missed / Incorrectly Completed Items
When finished reviewing, select Wrist Menu > Exit Game to return to the review room.
Questions and Support
If you have any issues, please contact our tech support team at [email protected]

