

Program Overview
In this scenario, you will have access to a simulated gas line in an outdoor environment, where you will focus on completing the required task of looking for Abnormal Operation Conditions (AOCs) along a mile long stretch of line, as well as inspecting, documenting, and correctly reporting any found AOCs.
Core Learning Objectives
-
Line Patrol — understand inspection requirements for above and below ground lines
-
AOC — accurately recognize and react to AOCs
-
Documentation — correctly document AOCs
-
Report — report AOCs to correct persons
Tools
How to use each tool in the Toolbox: (open Wrist Menu > Toolbox to access)
-
Laser Pointer — To interact with menus in this experience, aim your laser pointer at the item you wish to interact with and pull the trigger on your controller to select it.
-
Gas Detector — To inspect a meter for electric current, place the pen tip near the meter to detect if it is electrified. If present, the tip will light up red and beep.
-
Camera — To zoom in on far away objects.
Functionality
Truck
To enter the truck, teleport into the vehicle. You will know if you are successfully teleporting into the truck when the teleportation circle becomes larger around the vehicle.

To accelerate, press the trigger on your controller. Note: You won't be able to reverse or turn the car in any direction, as you are on a set course.
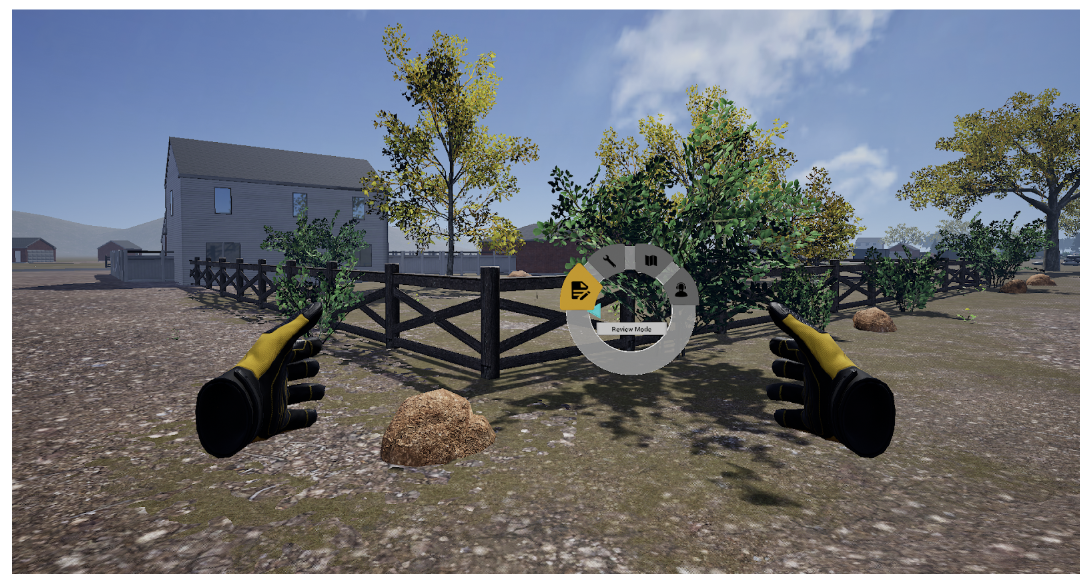
Wrist Menu
Utilize your Wrist Menu to assist you throughout the module:
- Review Mode — ends the module and sends you to the Review Hub
- Tool Menu — contains a gas detector, camera, and a wrench
- Reference Documents — contains an Area Map and the Work Order for reference
- Dispatch Menu — contains reporting options
User Controls
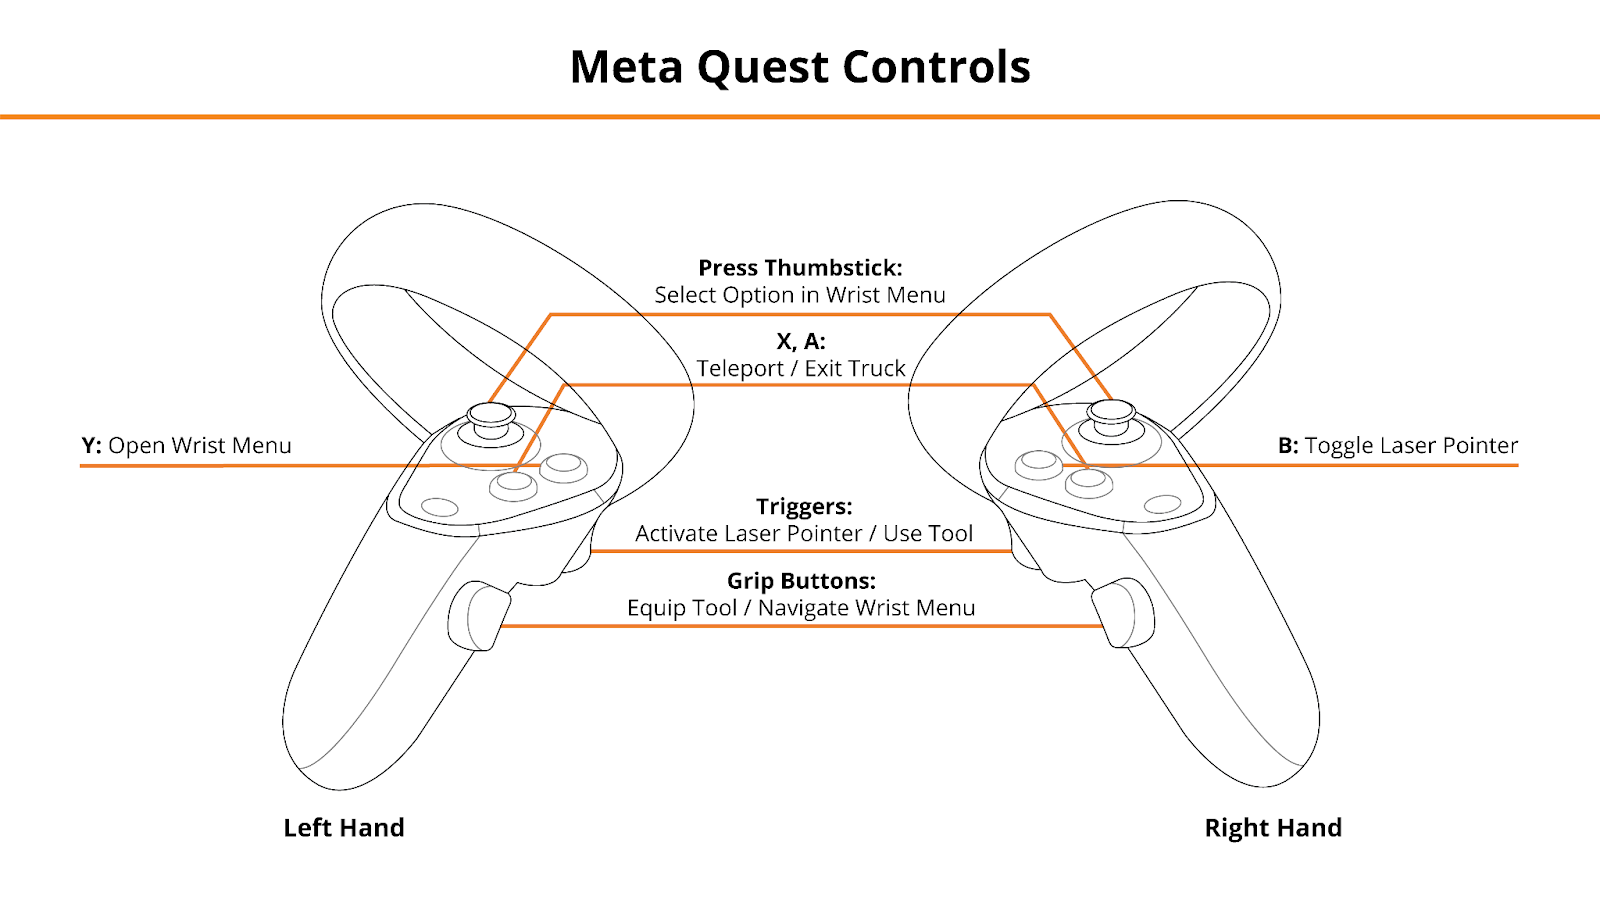
PICO & Meta Quest Headsets
-
Triggers — Use Equipped Object Camera Zoom, Take Gas Reading, Accelerate Car
- Grip Buttons — Grab / Release Object, Navigate Wrist Menu
- X,A — Teleport, Exit Vehicle
- Y — Open Wrist Menu
- B — Toggle Laser Pointer
- Press Thumbsticks — Select Option in Wrist Menu
See below for button positions on Meta Quest controllers.
HTC Vive Pro and Focus Plus Headsets
- Menu Buttons
-
Long Hold — Toggle Wrist Menu
-
Short Press with Empty Hand — Toggle Laser Pointer
-
- Trackpads — Teleport, Select Option in Wrist Menu
- Grip Buttons — Grab / Release Tools
- Triggers — Use Selected Tool / Laser Pointer
See below for button positions on HTC Vive Pro controllers.

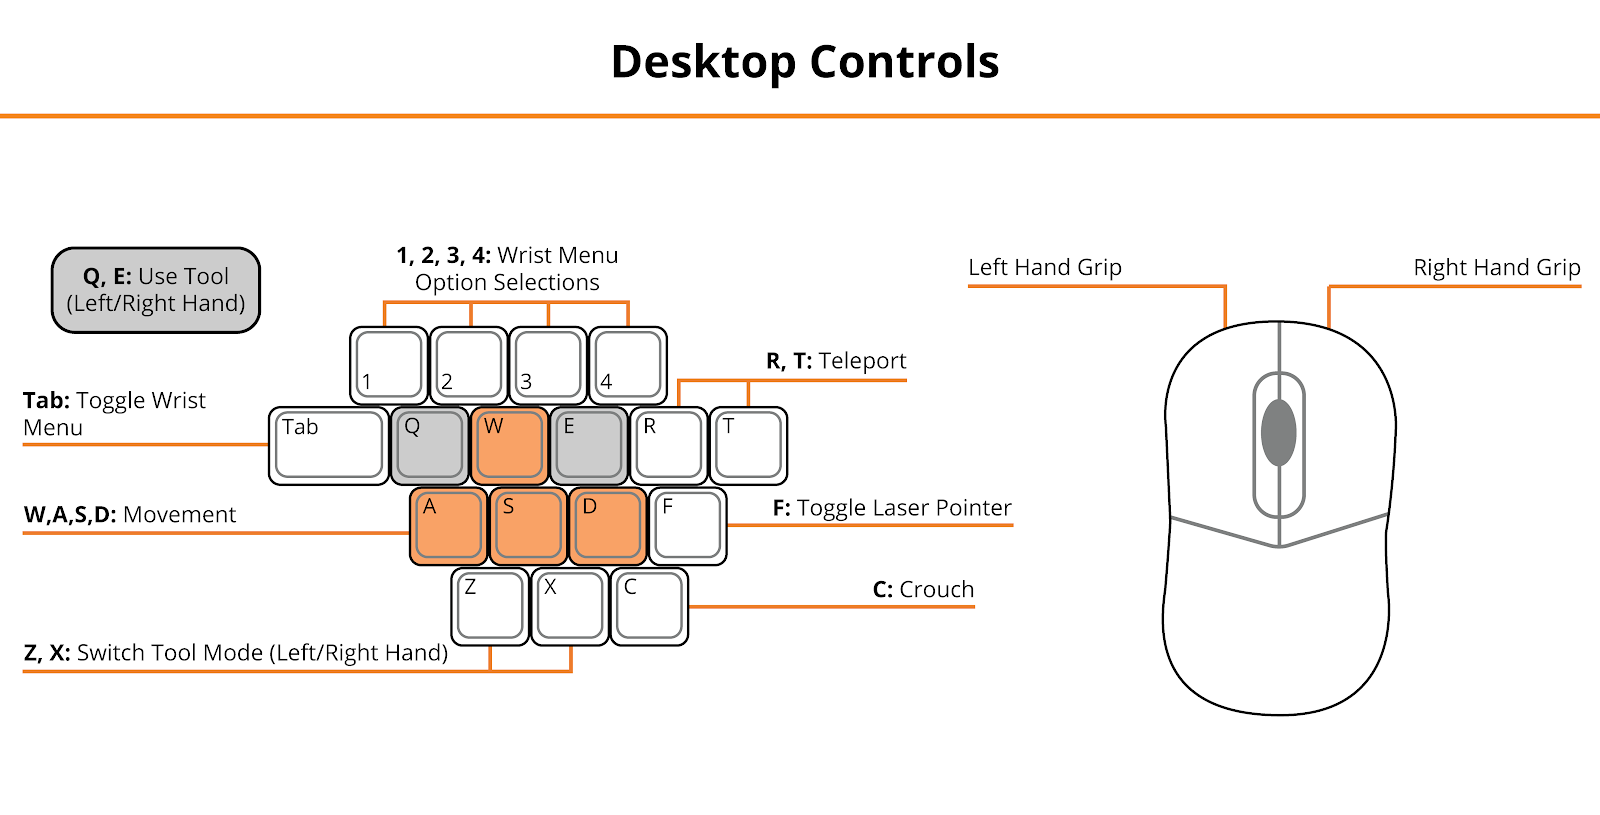
Desktop
- R, T — Teleport, Exit Vehicle
- F — Toggle Laser Pointer
- Mouse Left Click, Right Mouse Click — Left Hand Grip / Right Hand Grip
- Q, E — Engage Tool
- Tab — Open/Close Wrist Menu
- 1, 2, 3, 4 — Select Option in Wrist Menu
See below for the desktop diagram.
Entering the Experience
Login and Authentication
To use this experience, you must log in using a PIXO account created by the organization’s administrator, or by a PIXO VR Representative. The login must be performed from a headset that is connected to the internet for authentication to work successfully.
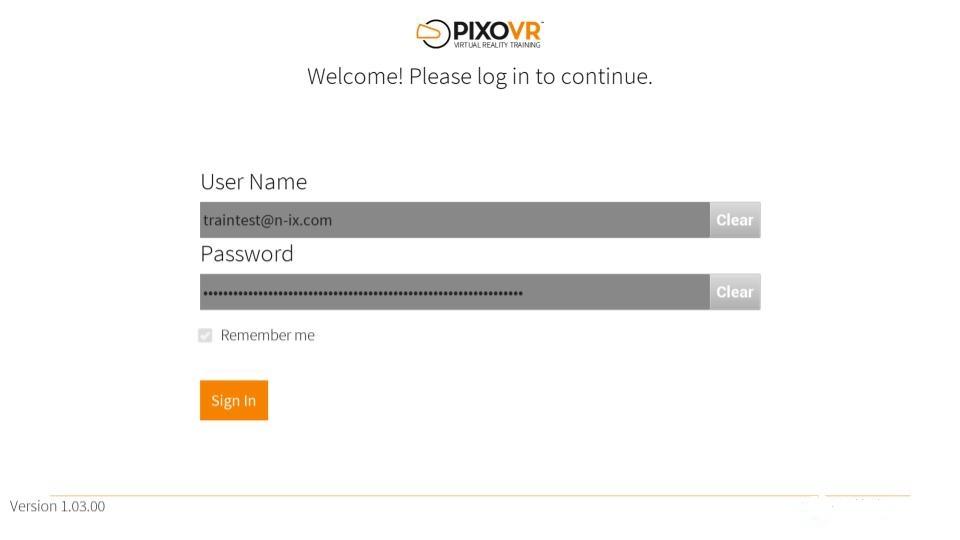
Tip: Select the Remember me flag to save your login credentials for your next session.
-
Enter your PIXO credentials in the corresponding fields, then select Sign In.
-
Once logged in, you will proceed to the tutorial. This will cover the basics of operation including teleportation, motion controllers, and using buttons.
-
After completing the tutorial, you will proceed to the lobby.
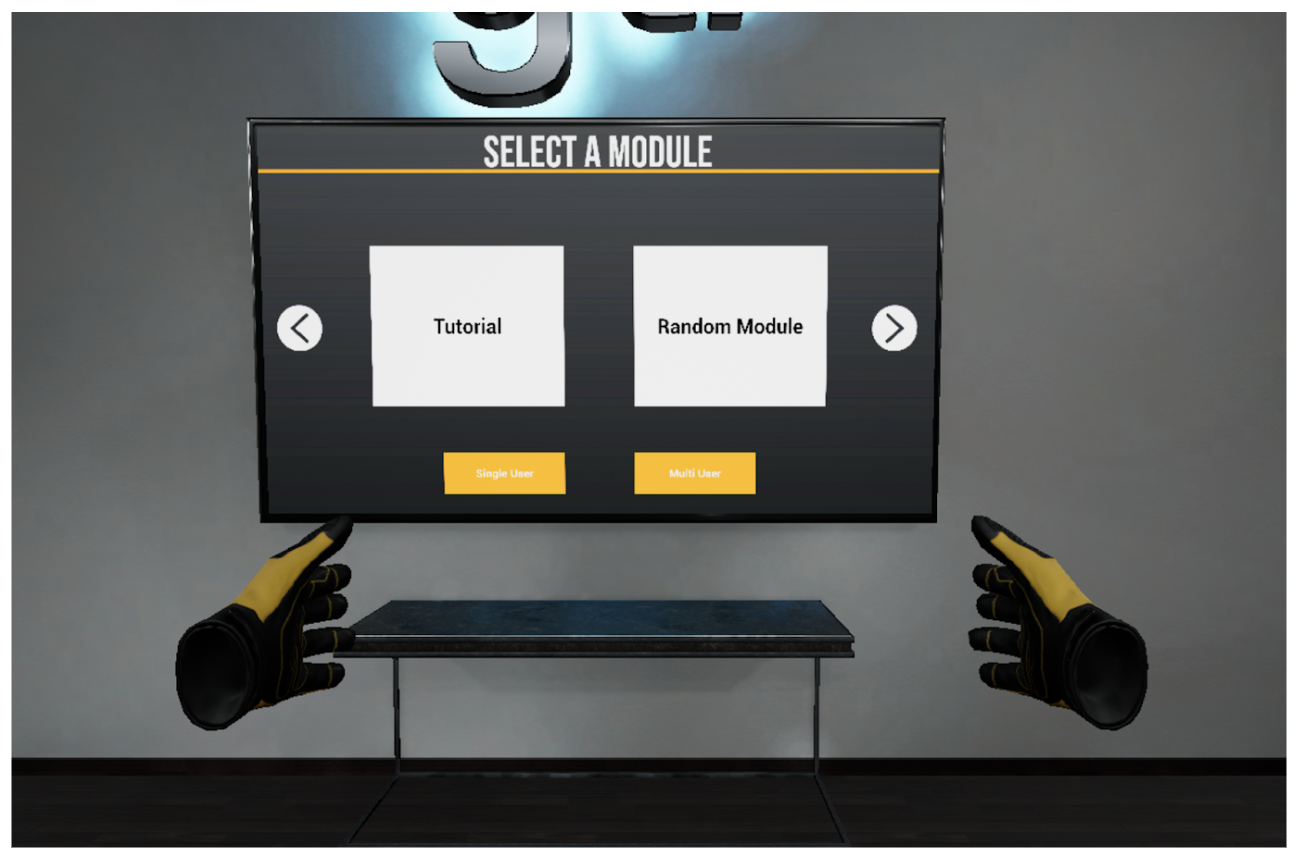
Lobby
After completing the tutorial, you will proceed to the lobby, where you can choose between:
- Tutorial — replays the tutorial
- Random Module — launches a random scenario
- Residential, Dirt Road & Bridge — launches a specific scenario
Note: Use the left and right arrows to navigate between pages.
Once you have selected which module you would like to play, choose between Single User or Multi User modes.
Experience Walkthrough
To complete the scenarios, follow the sequence below:
-
Read and dismiss the work order using your laser pointer.
-
If there are no AOCs present immediately, enter the truck by teleporting into the vehicle and drive the route until a possible AOC is found.
-
To enter the truck, teleport into it. You will know if you are successfully teleporting into the truck when the teleportation circle becomes larger around the vehicle.
-
-
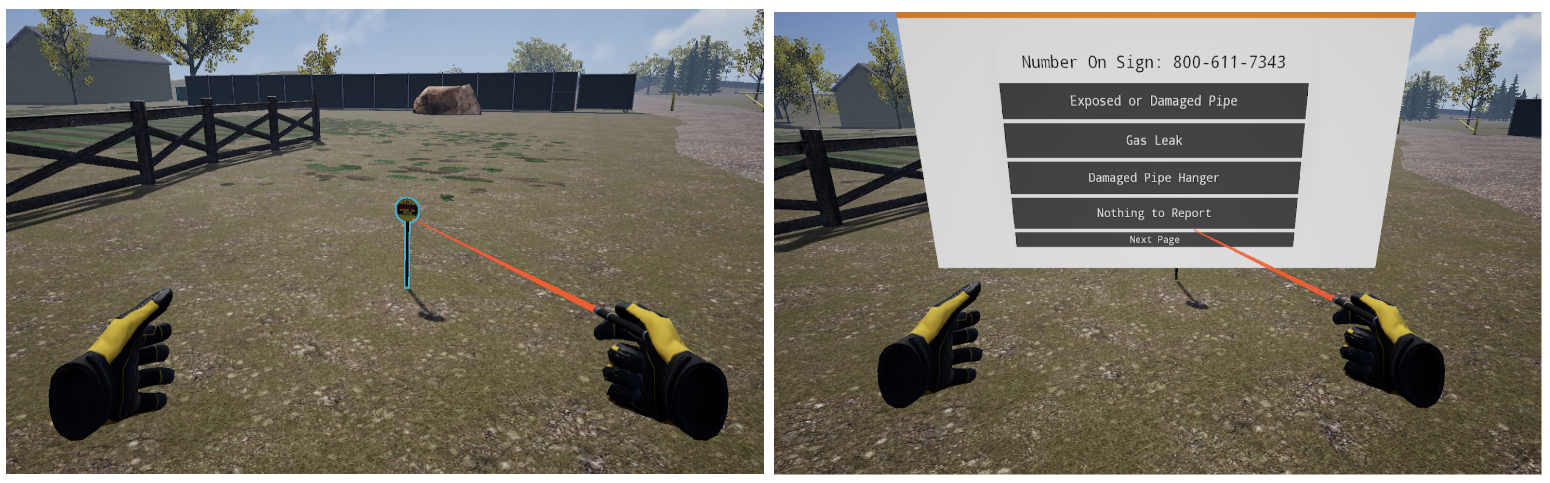
Investigate and document any AOCs.
-
Inspect the AOC on foot and select it with your laser pointer.
-
Choose the documentation option most applicable to the AOC you selected. Options include:
-
Exposed or damaged pipes
-
Gas leak
-
Broken blowing
-
Locked gate
-
Damaged marker
-
Unacceptable sign
-
-
-
After documenting an AOC, report it to the correct person(s) for the situation through Wrist Menu > Communication Menu.
-
Ensure correct markers, warnings, and stickers are present, or replace them by selecting the object and selecting Replace.
-
Return to the vehicle and continue along the route.
-
Once you reach the end and finish reporting all AOCs, the scenario will end.
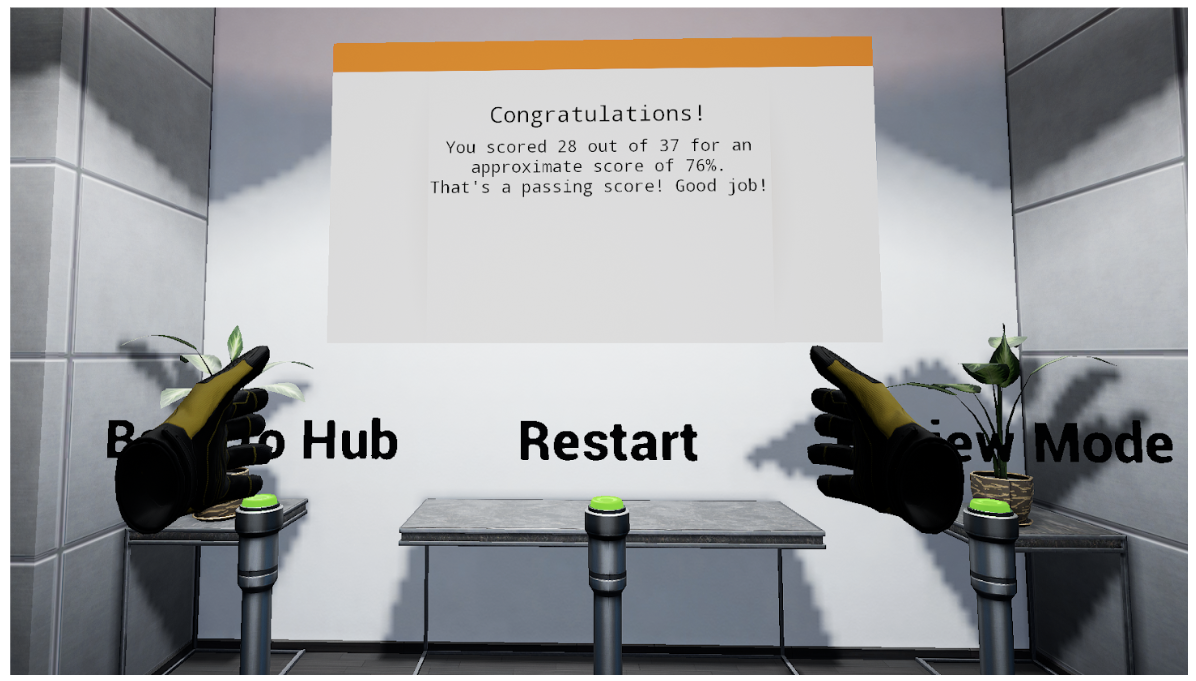
Review Performance
When finished with a scenario, you are taken to a grading room and shown your results. If you wish to, you can revisit the scenario to review what was missed in Review Mode.
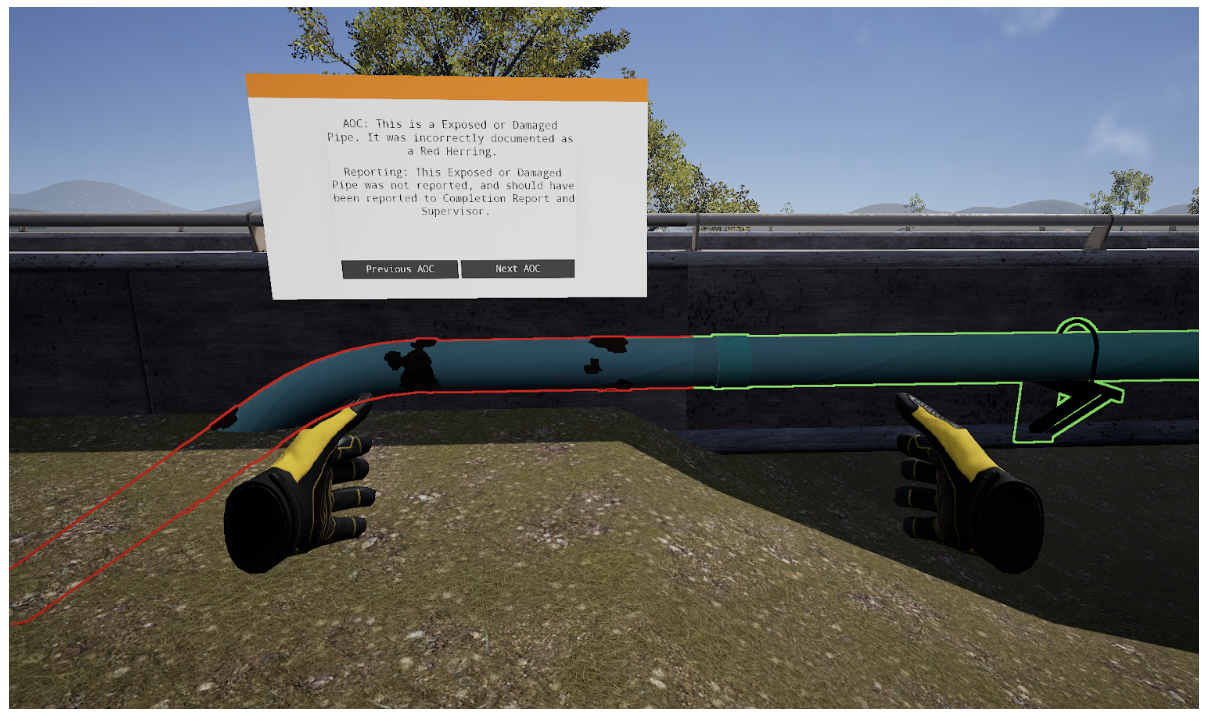
Review Mode
While in review mode, you’ll go back to the scene to view each AOC that was present. You can toggle between each AOC to see their location and correct documentation.
When finished reviewing, you can choose to Restart the module or exit Back to Hub.
Questions and Support
If you have any issues, please contact our tech support team at [email protected]

