

Program Overview
Use real life training and methods in a virtual environment to locate underground pipelines, mark them properly, and identify any AOCs. If an AOC is recognized, deal with the AOC appropriately for the type of AOC. The final step will involve documentation and reporting of pipeline locations, markings, and any AOCs.
To see a video of the module, click this link: FLAM Sizzle Reel
Core Learning Objectives
-
Locating — Finding the underground gas pipeline
-
Marking — Use of provided tools to mark the location of the pipe
-
AOCs and Hazards — Effectively dealing with AOCs and Hazards
-
Reporting / Documentation — Step Taken / Resolution / Documentation
Functionality
Wrist Menu
Use the Wrist Menu for additional help within the module:
-
Reference Material — references Service Map and Work Order
-
Locate Complete — ends scenario and takes you to the Review Room
-
Tool Box — access various tools that will assist you in completing the scenario
-
Tip: See the Tools section for instructions on using each tool.
-
-
Communication — contact various personnel to communicate status
-
Tip: Press the "Confirm" button to finish making a selection.
-
Tools
-
Laser Pointer — to interact with menus and objects in this experience, aim your laser pointer at the item you wish to interact with and pull the trigger on your controller to select it.
-
Dynatel Pipe Locating Tool — to locate facilities: drop the tool on the ground and hold the receiver perpendicular to ground, then sweep the area. Continue to sweep the area until the signal stops. Detailed Steps:
-
Using the Locate Tool in Conductive Mode
-
Turn transmitter power on
-
Set mode switch to Conductive
-
Turn receiver power on
-
Connect red lead to facility by connecting to known direct connection location
-
Extend black ground lead from transmitter, perpendicular to the pipe
-
Insert ground rod into ground, connect black cable to grounding rod
-
Hold receiver perpendicular to ground, then sweep area
-
Compare locates from both scans. If both locates agree, the locate is accurate.
-
If not, perform the scan using a different conductor, or using the inductive locate method instead.
-
-
Verify confidence by performing a depth measurement
-
-
Using the Locate Tool in Inductive Mode
-
Turn transmitter power on, then set mode switch to Inductive
-
Place transmitter on the ground over the assumed location of the line
-
Move away from transmitter to avoid “Air-Lock”, then begin scanning area
-
To scan, walk towards the facility, holding the receiver vertical and perpendicular to the ground. The signal will increase as the receiver nears the line, so they should continue until the signal stops.
-
Once signal stops, move back towards the line and sweep receiver using smooth movements
-
-
Make temporary mark at location with the loudest tone, then scan again
-
Verify confidence by performing a depth measurement
-
-
-
Flag Shooter — to mark facilities, aim the flag shooter and press the controller trigger to drop a flag.
-
Voltage Pen — to inspect a meter for electric current, place the pen tip near the meter to detect if it is electrified. If present, the tip will light up red and beep.
-
Distance Measuring — to measure distance, aim and pull the controller trigger. After pulling the trigger, floating distance markers will appear.
User Controls
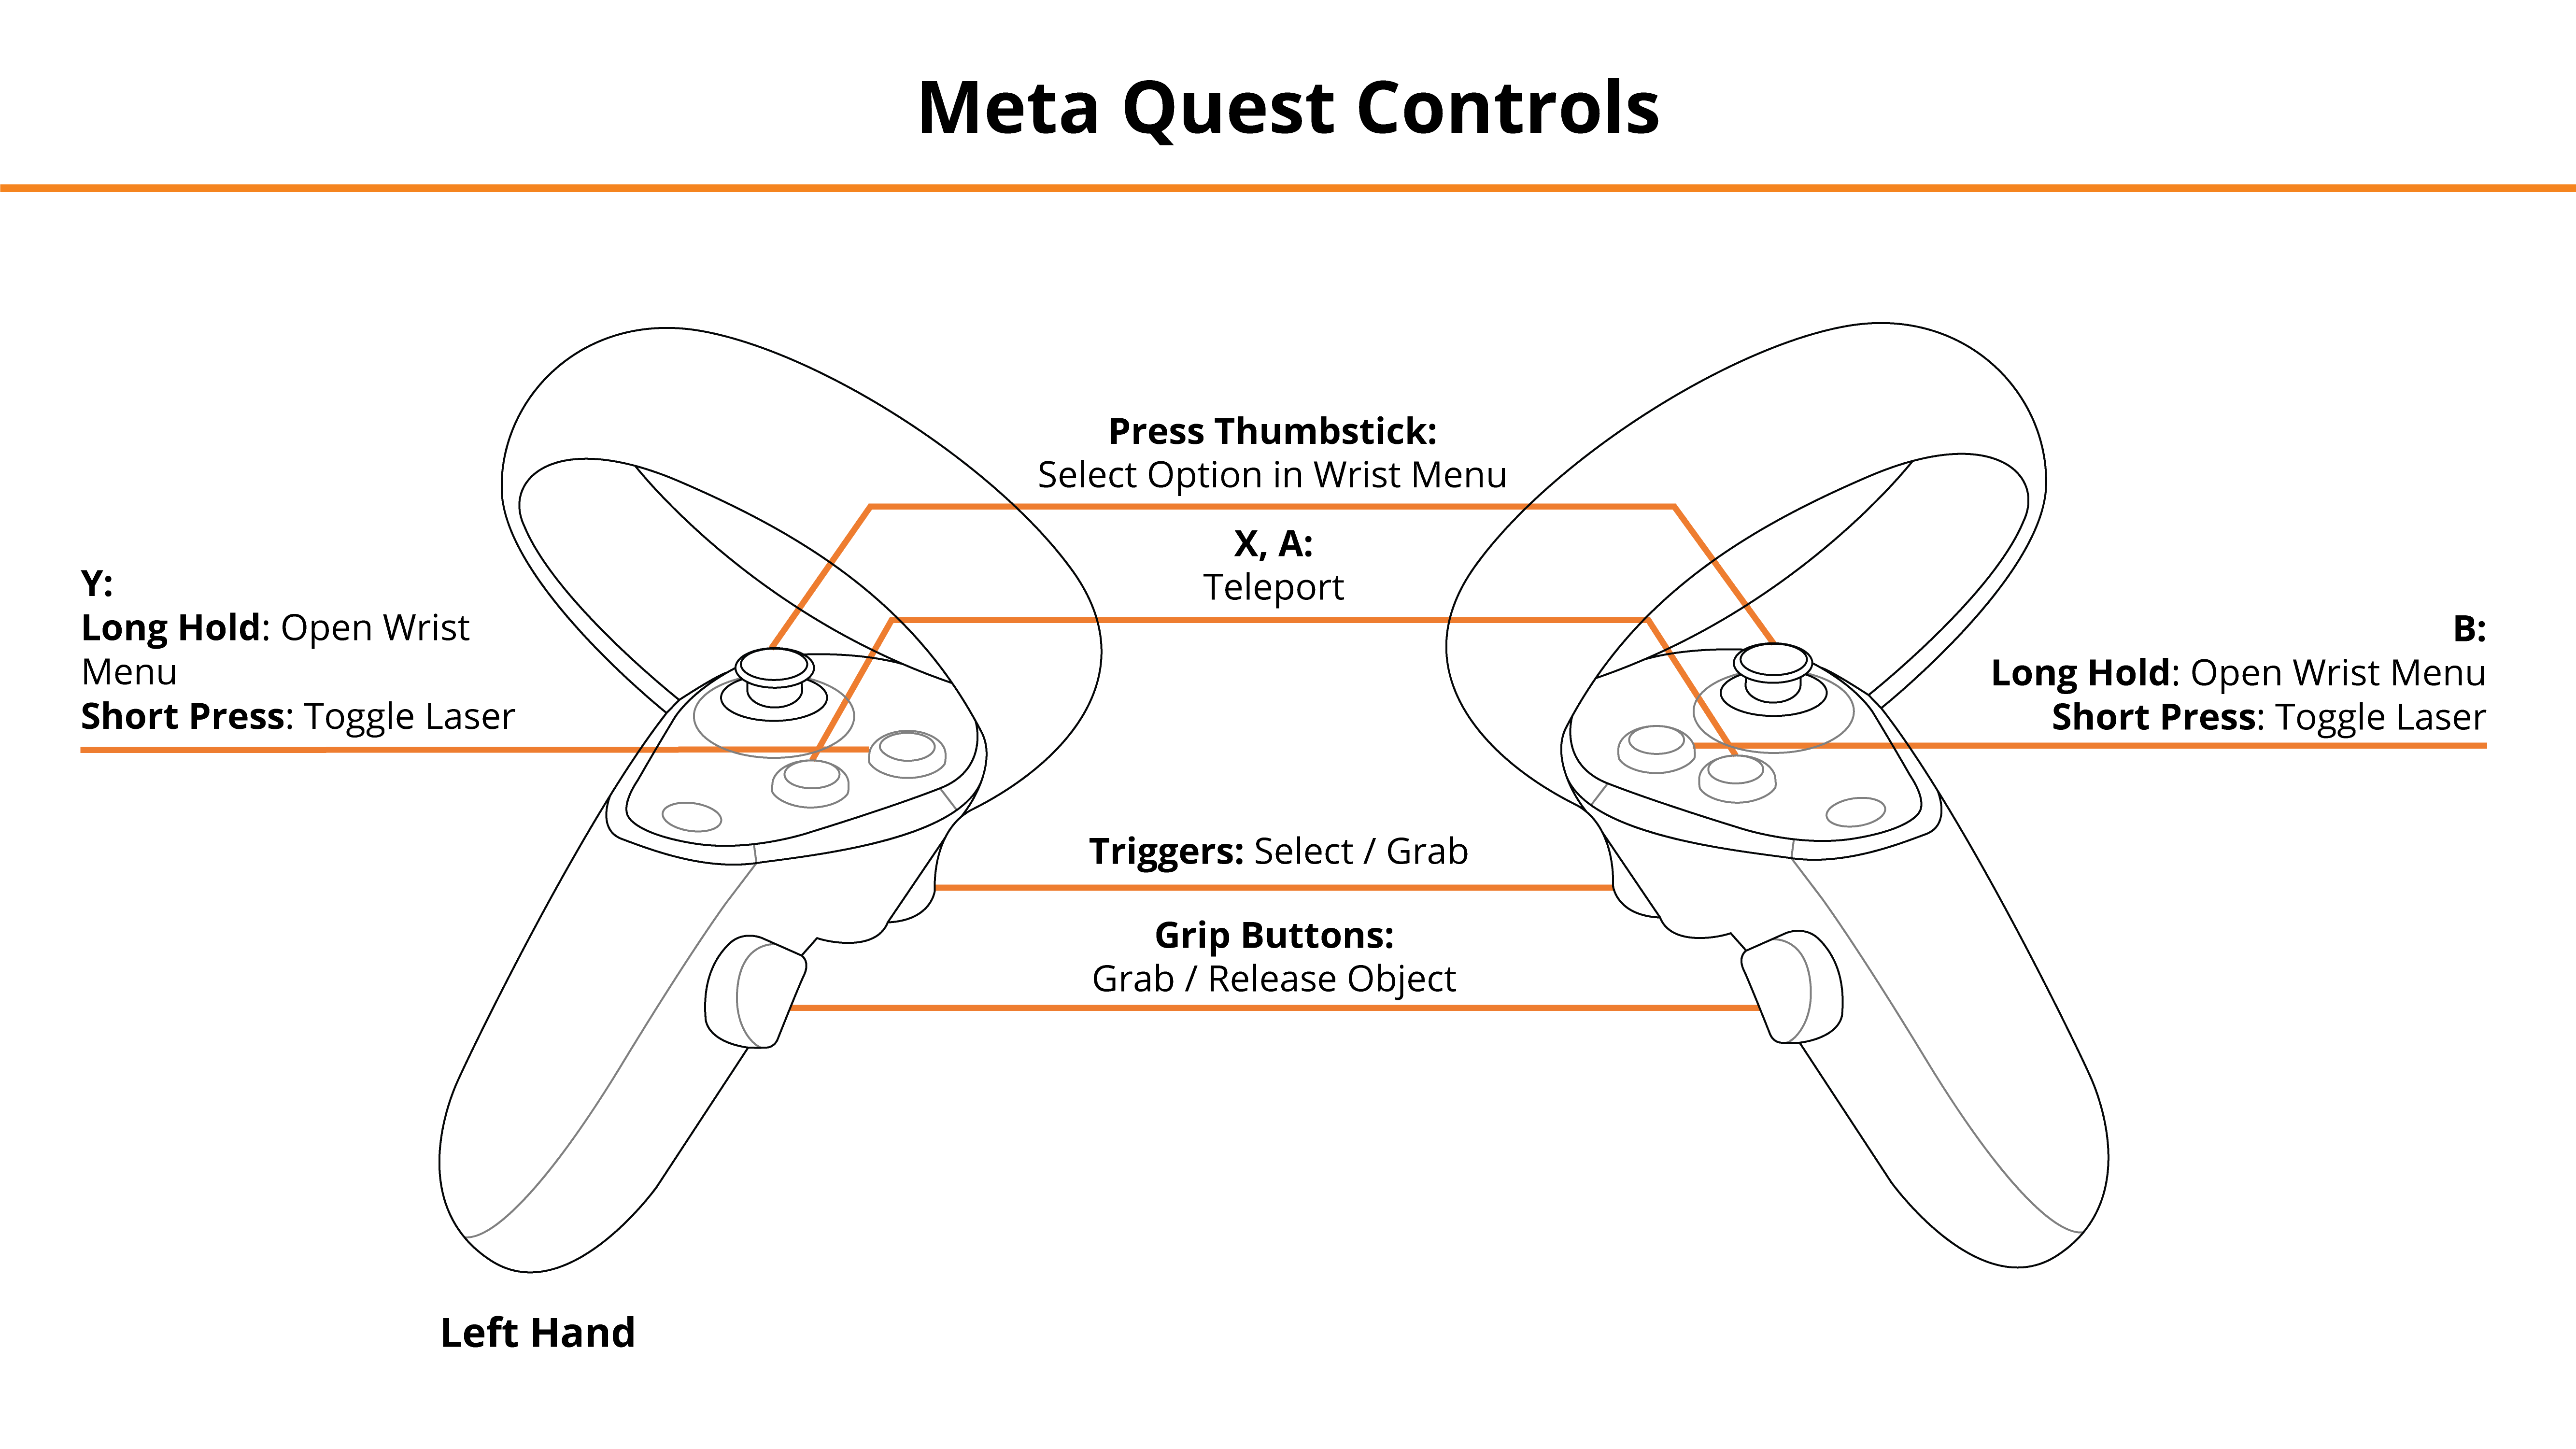
PICO & Meta Quest Headsets
- Triggers — Use Equipped Object, Use Laser Pointer
- Grip Buttons — Grab / Release Object
- X, A — Teleport
- Y, B
- Long Hold — Toggle Wrist Menu
- Short Press w/ Empty Hand — Toggle Laser Pointer
- Short Press w/ Tool — Switch Tool Mode
- Thumbsticks — Select Option in Wrist Menu
See below for button positions on Meta Quest controllers.
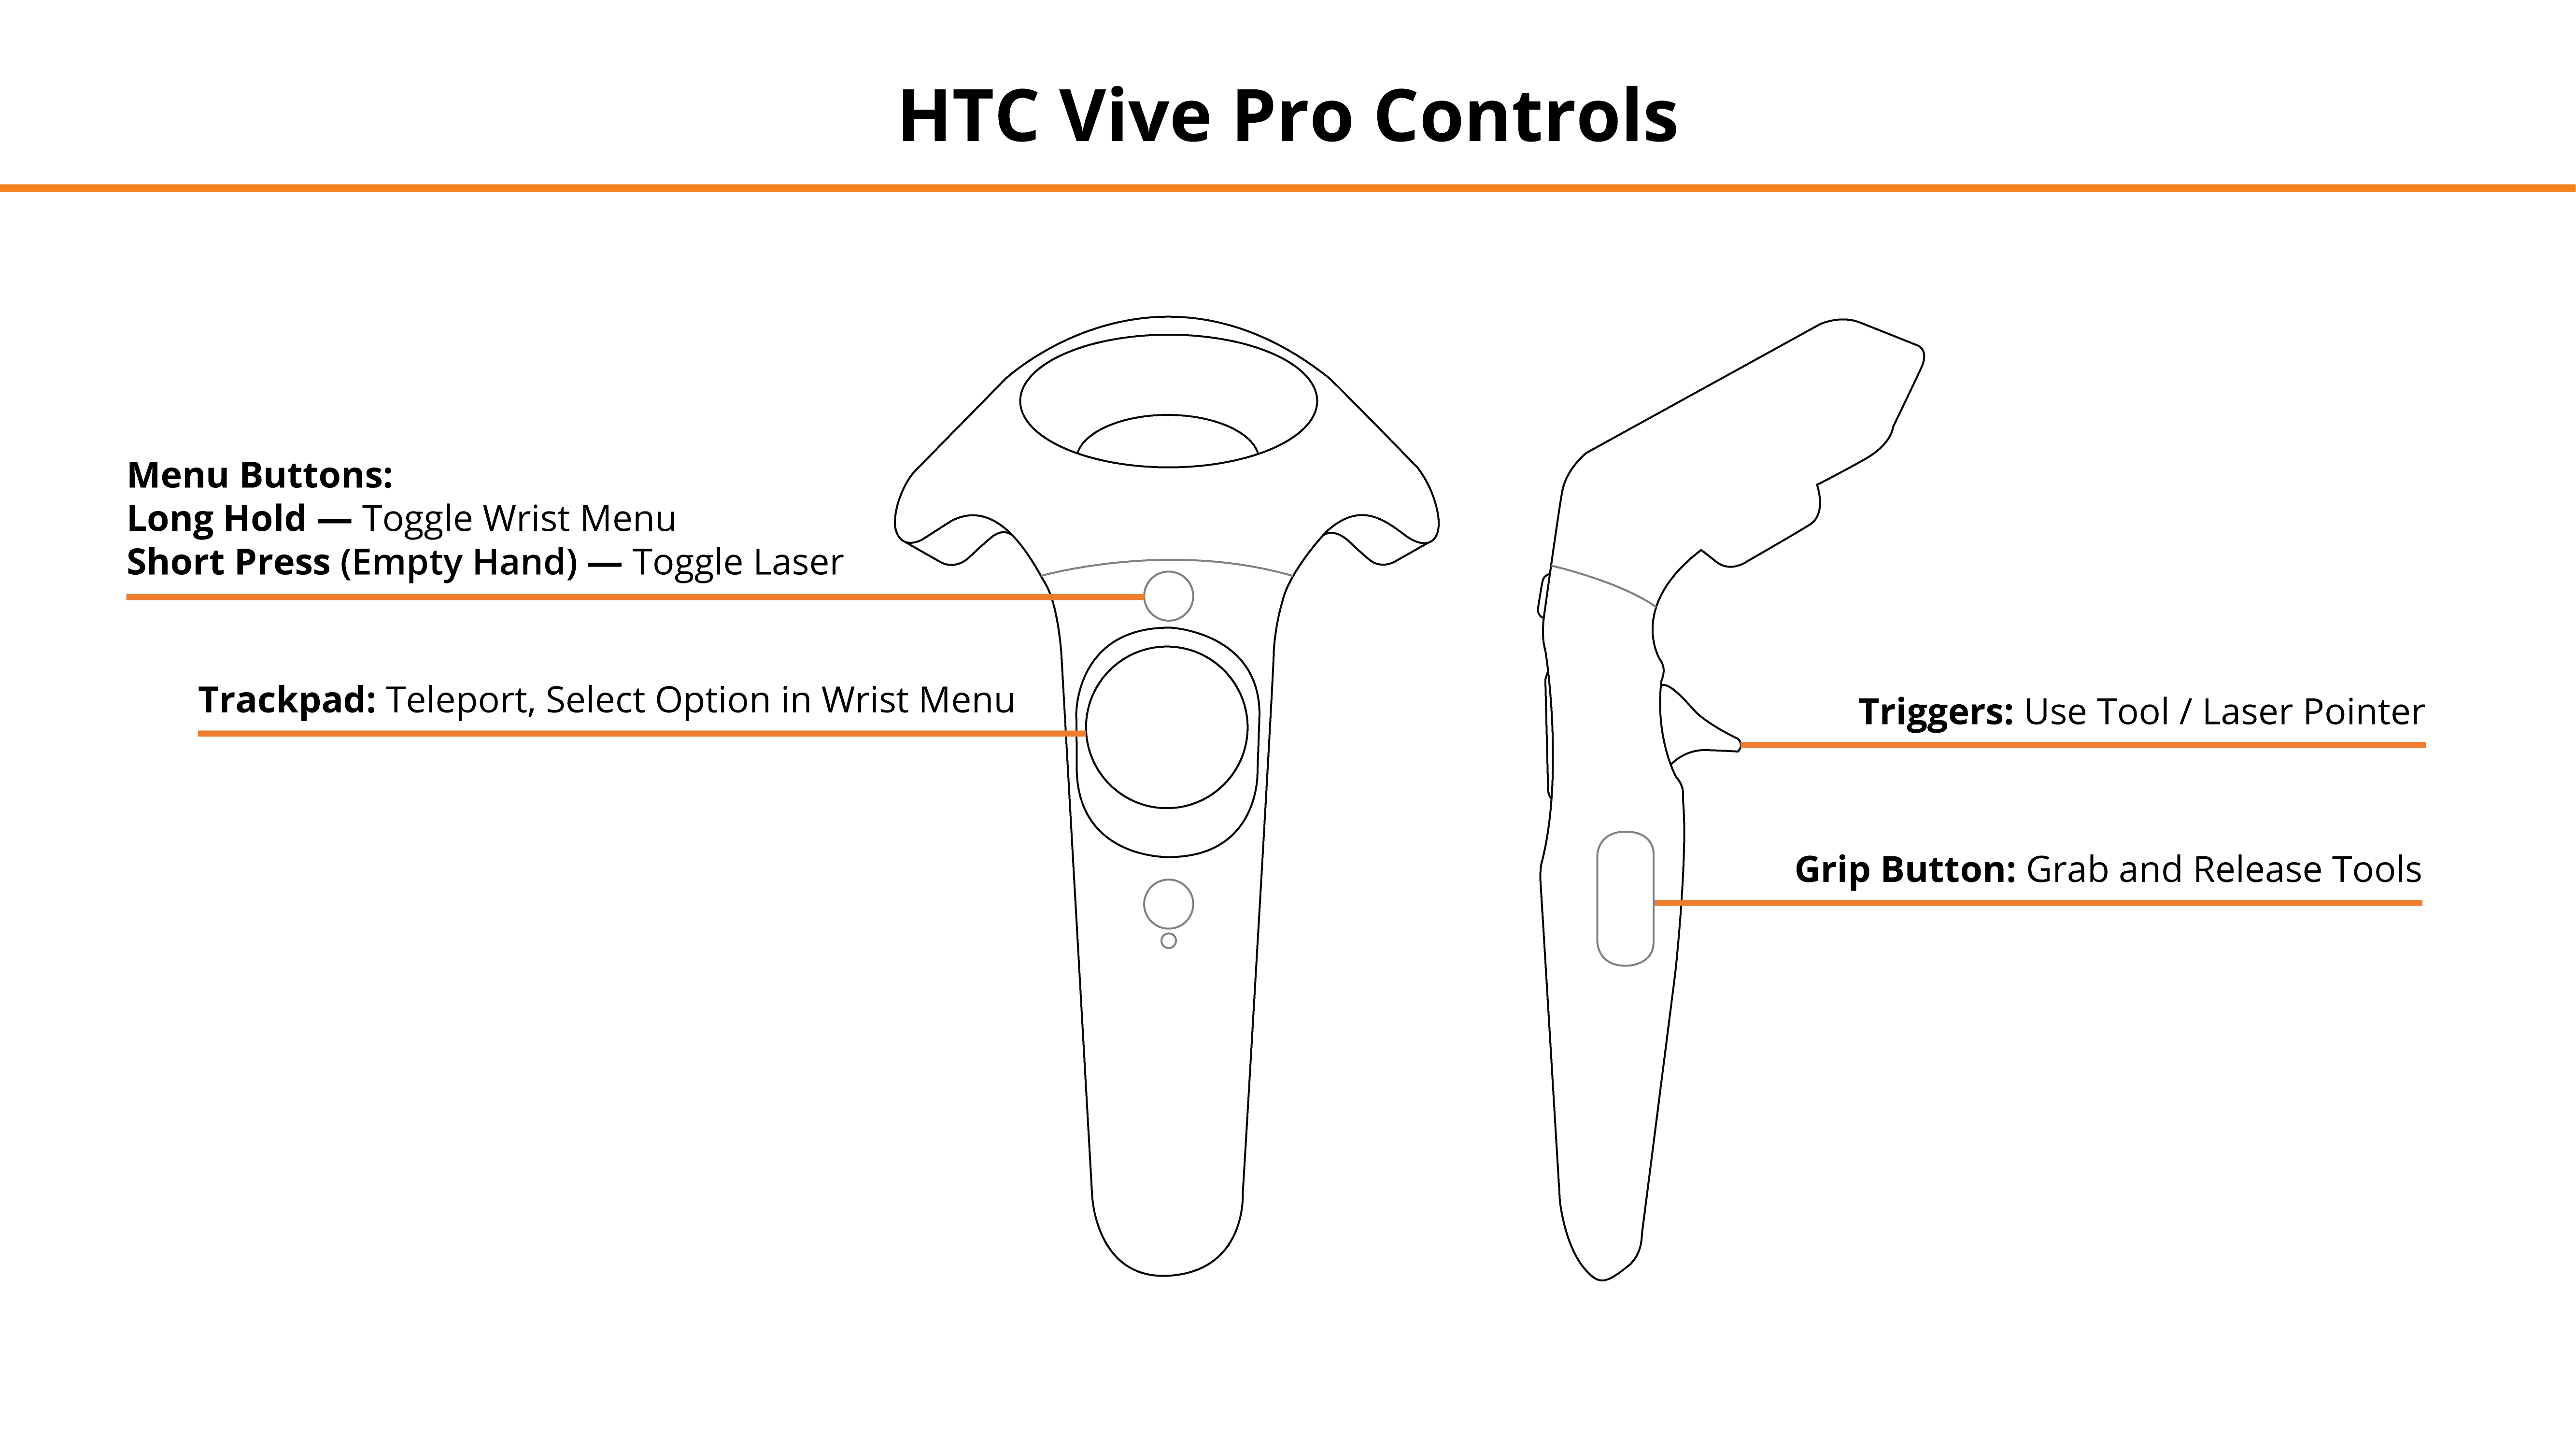
HTC Vive Pro and Focus Plus Headsets
- Menu Buttons
- Long Hold — Toggle Wrist Menu
- Short Press w/ Tool — Switch Tool Mode
- Short Press w/ Empty Hand — Toggle Laser Pointer
- Trackpads — Teleport, Select Option in Wrist Menu
- Grip Buttons — Grab / Release Tools
- Triggers — Use Selected Tool / Laser Pointer
See below for button positions on HTC Vive Pro controllers.
Desktop
- W, A, S, D — Movement
- R, T — Teleport (alternative movement option)
- Mouse Left Click, Right Mouse Click — Left Hand Grip / Right Hand Grip
- Q, E (left/right hand) — Select, Engage Tool
- Z, X (left/right hand) — Switch Tool Mode
- Tab — Toggle Wrist Menu
- 1, 2, 3, 4 — Select Option in Wrist Menu (double tap)
- F — Toggle Laser Pointer
See below for the desktop diagram.

Entering the Experience
Login and Authentication
To use this experience, you must log in using a PIXO account created by the organization’s administrator, or by a PIXO VR Representative. The login must be performed from a headset that is connected to the internet for authentication to work successfully.
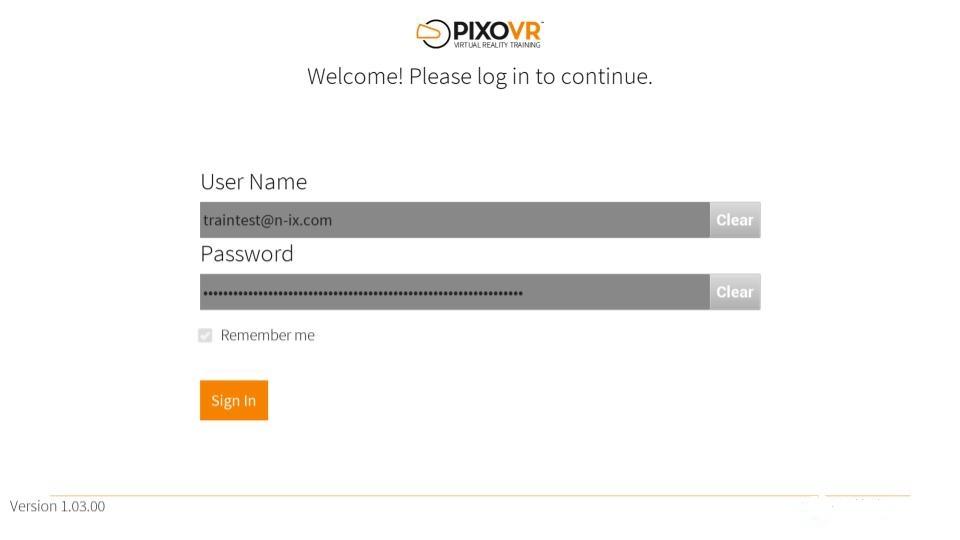
Tip: Select the Remember me flag to save your login credentials for your next session.
-
Enter your PIXO credentials in the corresponding fields, then select Sign In.
-
Once logged in, you will proceed to the tutorial. This will cover the basics of operation including teleportation, motion controllers, and using buttons.
Lobby
After completing the tutorial, you will proceed to the lobby. Select between replaying the Tutorial or starting a new scenario in Single User or Multi-User mode.

Instructor Mode
Alternatively, Trainers can use the "Add Scenario" screen on the right to build a specific scenario. See the FLAM Trainer Guide for more information.
Experience Walkthrough
-
Open and read the Work Order.
-
Review the Facility Map to confirm location and head to the Customer's address (select "Show Facility Location").
-
Note: The facility location might not match the map. If this happens, report the mismatch to Dispatch through your Wrist Menu.
-
-
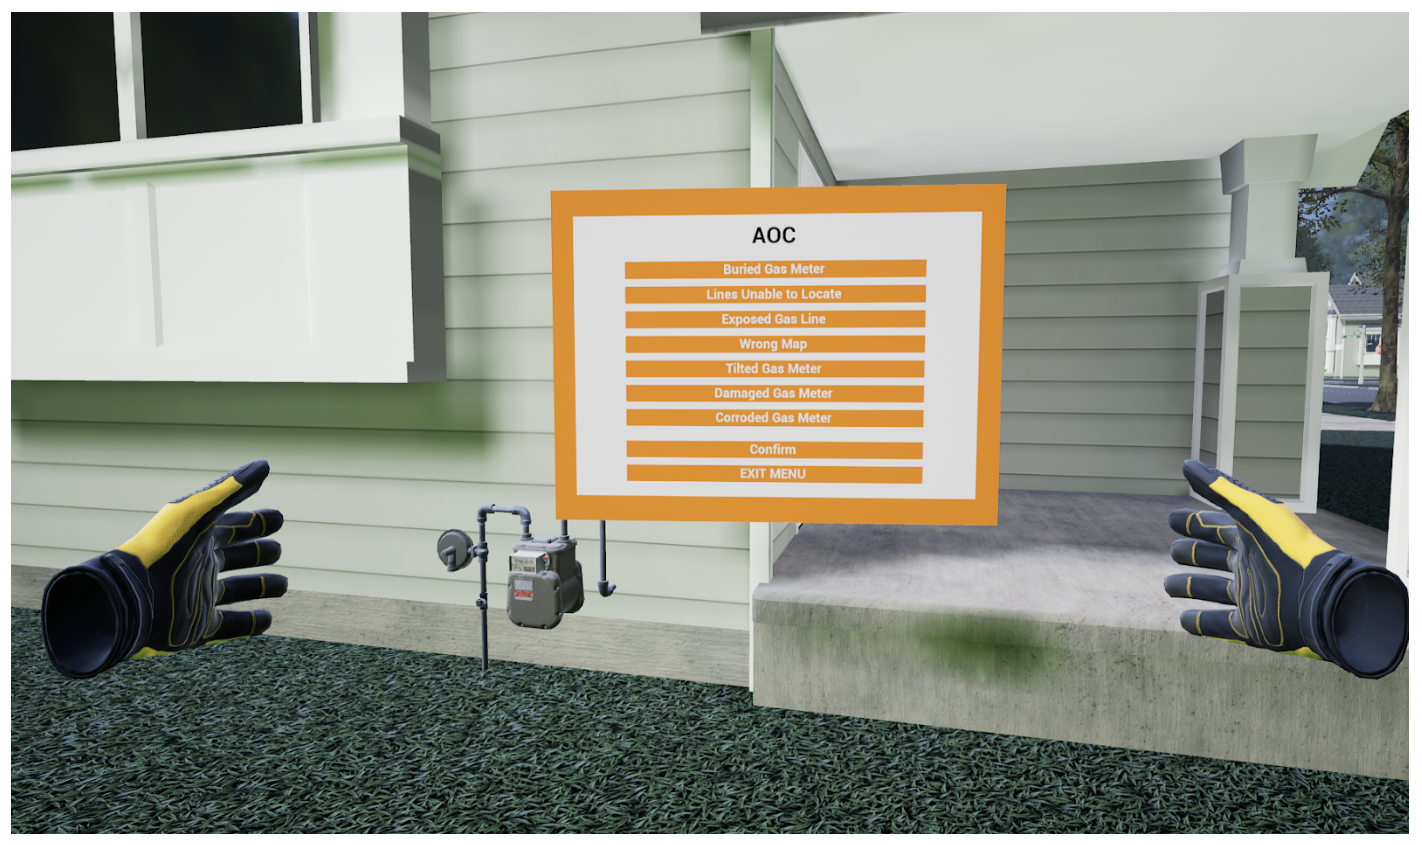
Identify Hazards or AOCs.
-
Hazard Examples:
-
Vicious dog in the yard with meter / Dog sign
-
Locked gate
-
-
AOC Examples:
-
Buried gas meter
-
Unable to locate main or service lines
-
Incorrect map
-
Exposed gas line
-
Missing / Stolen meter
-
Tilted / Damaged meter
-
-
-
If a Hazard or AOC is found, report to appropriate personnel for the situation through Wrist Menu > Communication Menu.
-
Locate Facilities using Dynatel Pipe Locating Tool (Wrist Menu > Tool Box).
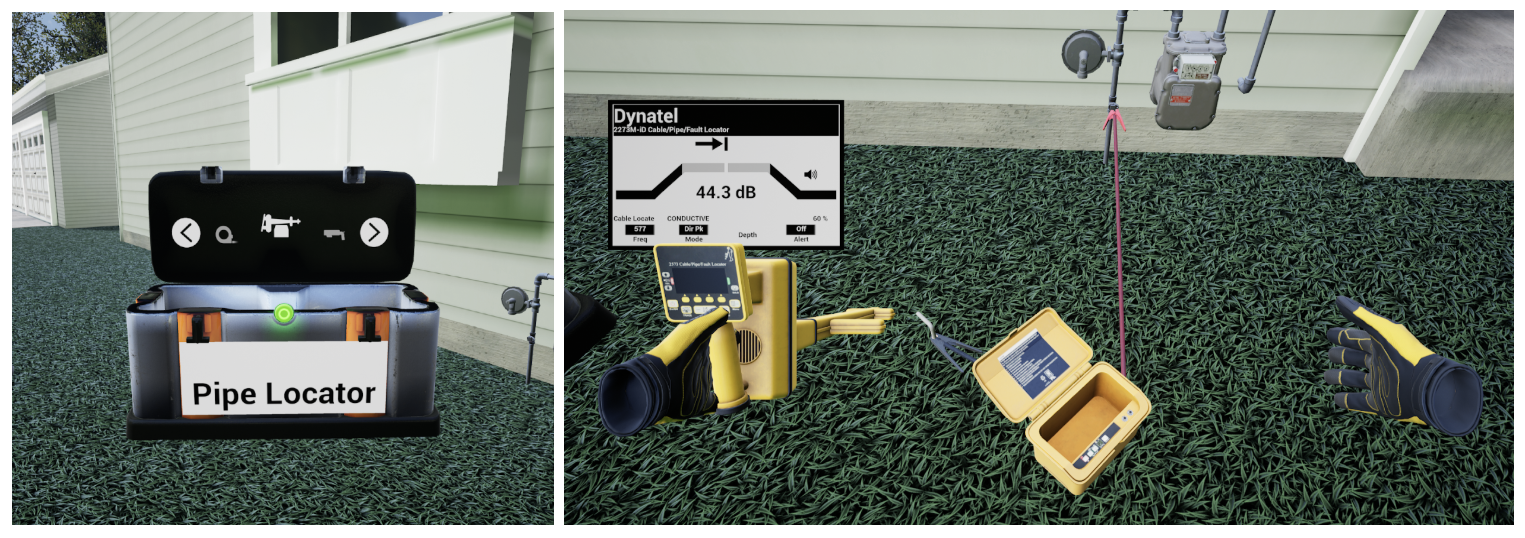
-
Drop the tool on the ground to activate it.
-
Using the Locate Tool in Conductive Mode:
-
Turn transmitter power on, then set mode switch to Conductive
-
Turn receiver power on
-
Connect red lead to facility by connecting to known direct connection location
-
Extend black ground lead from transmitter, perpendicular to the pipe
-
Insert ground rod into ground, connect black cable to grounding rod
-
Hold receiver perpendicular to ground, then sweep area
-
Compare locates from both scans. If both locates agree, the locate is accurate.
-
If not, perform the scan using a different conductor, or using the inductive locate method instead.
-
-
Verify confidence by performing a depth measurement
-
-
Using the Locate Tool in Inductive Mode:
-
Turn transmitter power on, then set mode switch to Inductive
-
Place transmitter on the ground over the assumed location of the line
-
Move away from transmitter to avoid “Air-Lock”, then begin scanning area
-
To scan, walk towards the facility, holding the receiver vertical and perpendicular to the ground. The signal will increase as the receiver nears the line, so they should continue until the signal stops.
-
Once signal stops, move back towards the line and sweep receiver using smooth movements
-
-
Make temporary mark at location with the loudest tone, then scan again
-
Verify confidence by performing a depth measurement
-
-
To mark facilities, use the Flag Shooter (Wrist Menu > Tool Box).
-
Once facilities have been located and marked, confirm that the Facility Map matches the site (Wrist Menu > Reference Material > Service map).
- Report results through the Communication Menu afterwards.
-
End the scenario through Wrist Menu > Locate Complete.
Review Performance
When finished with a scenario, you are taken to a grading room and shown your results. Click the icons to the left to see more details.
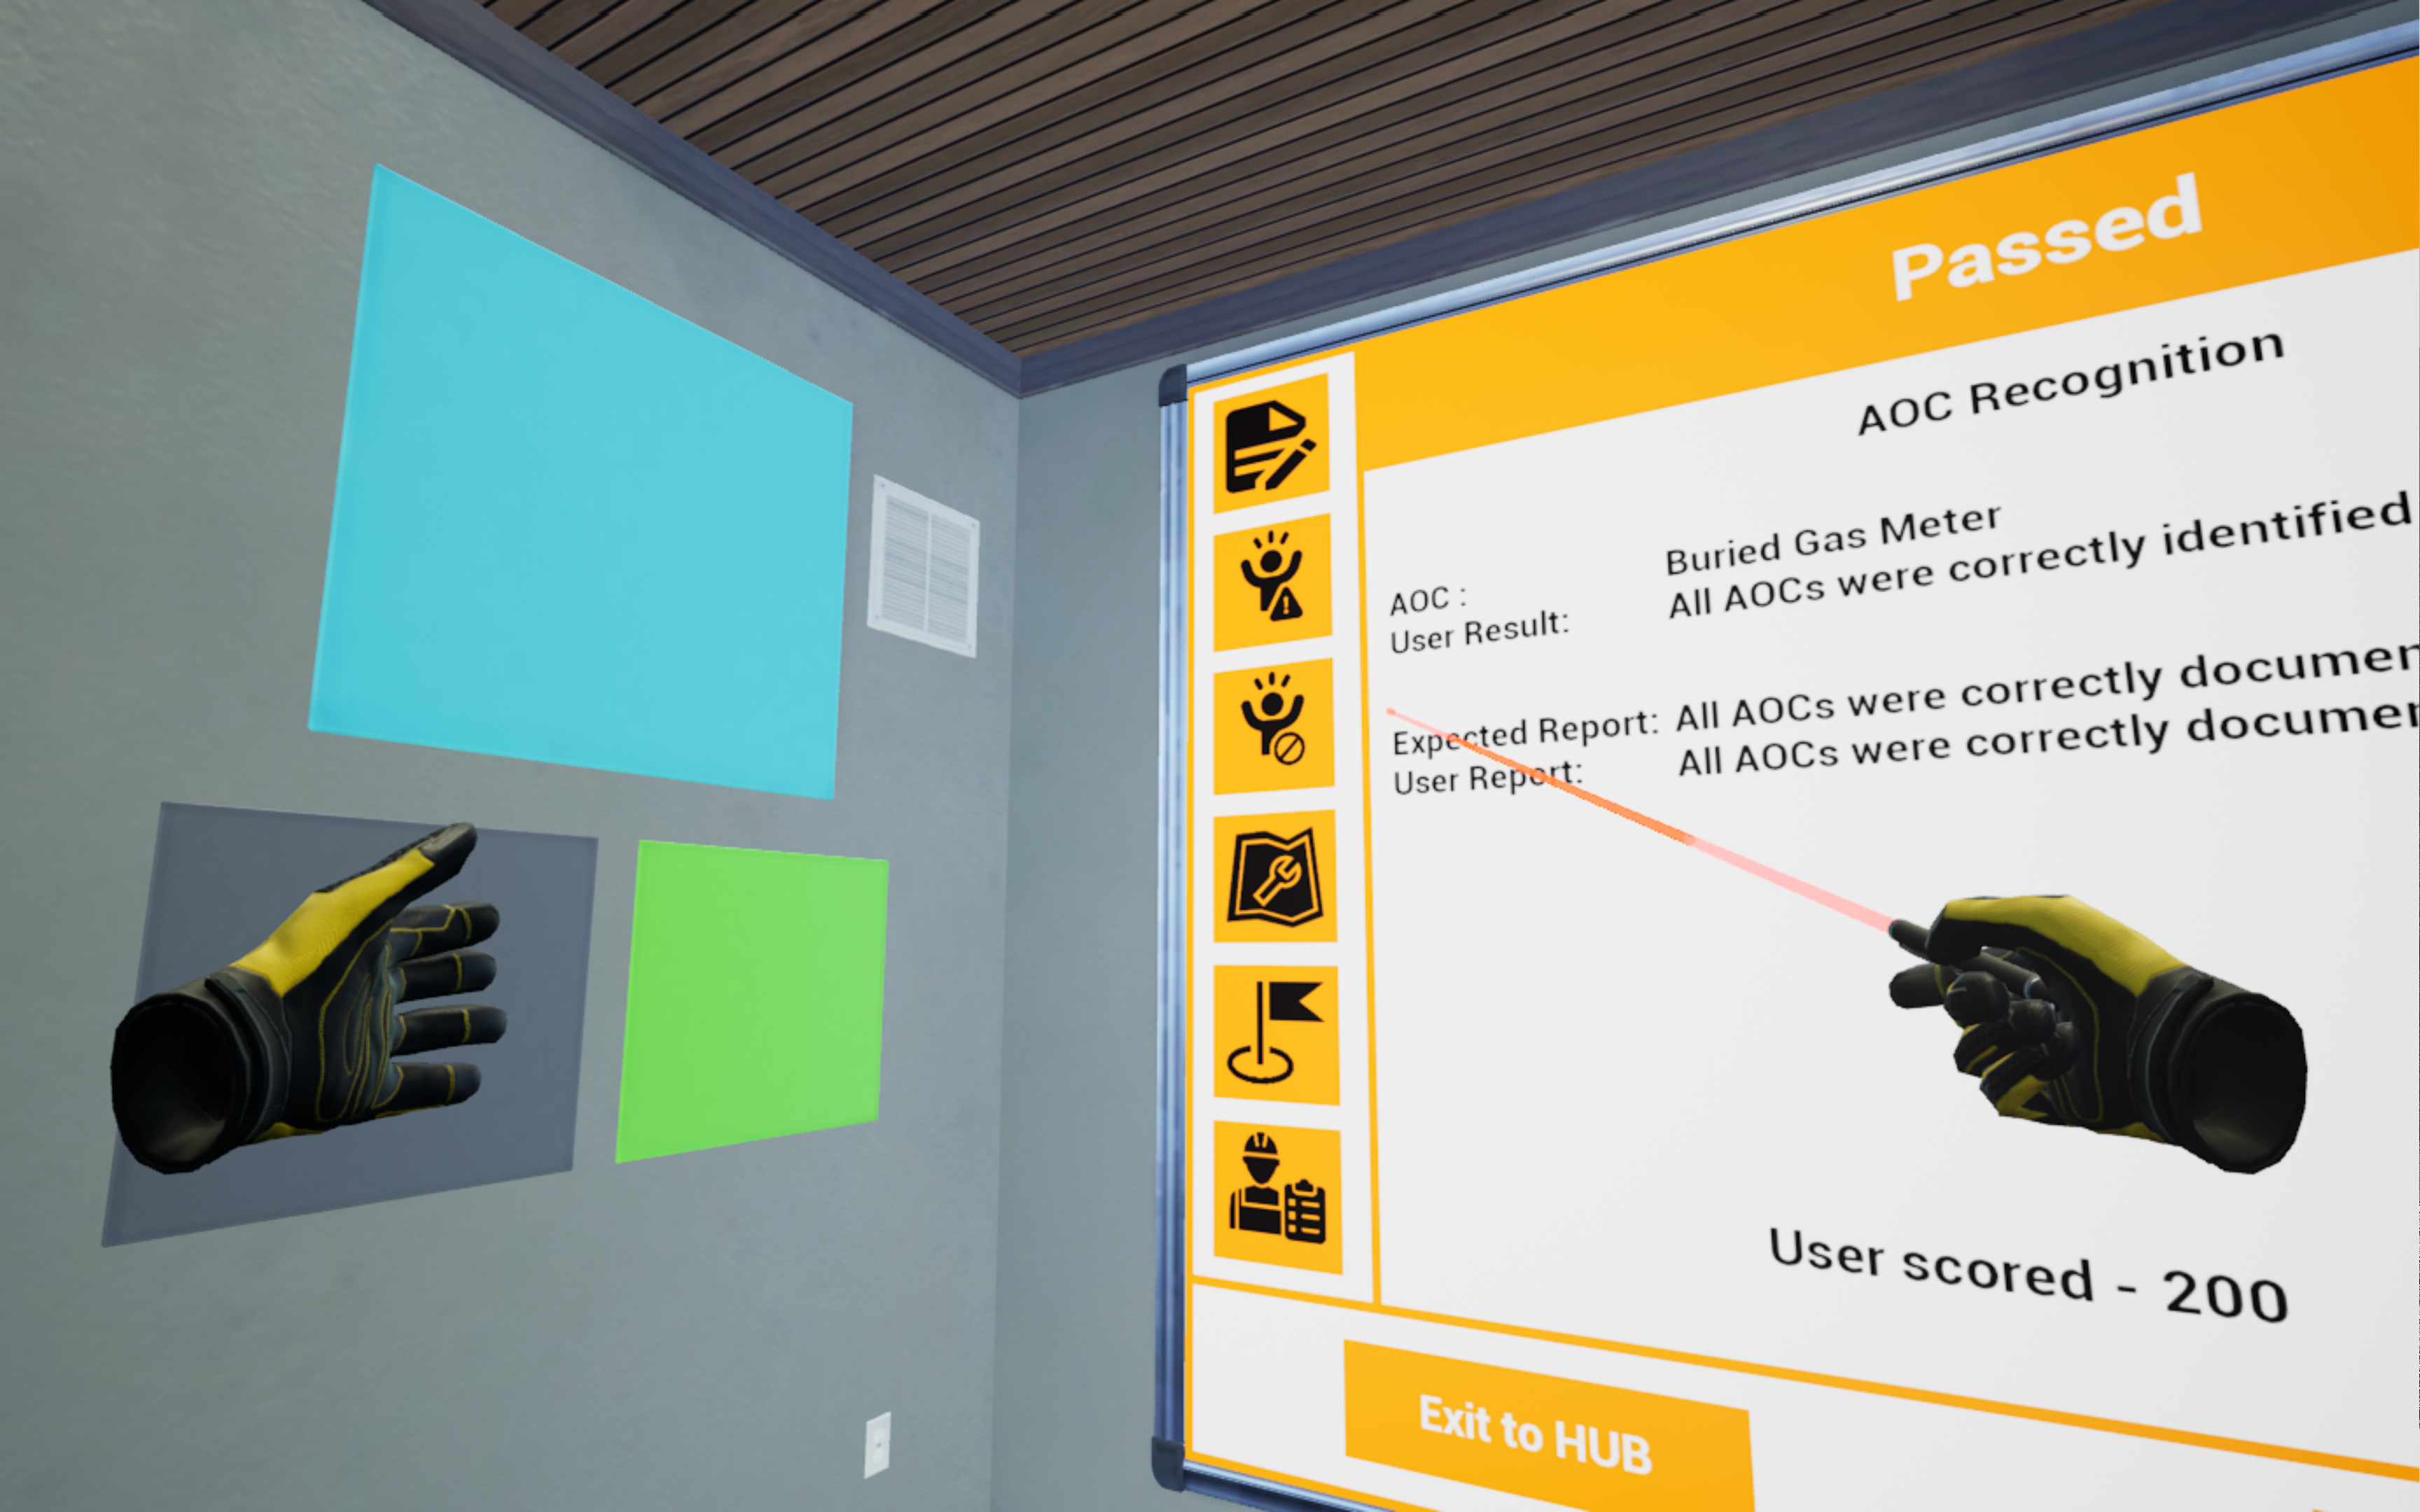
If you wish to, you can revisit the scenario to review what was missed by selecting “Review Mode”.
Review Mode
While in Review Mode, items that are highlighted red were misidentified. There will also be text stating the correct identification.
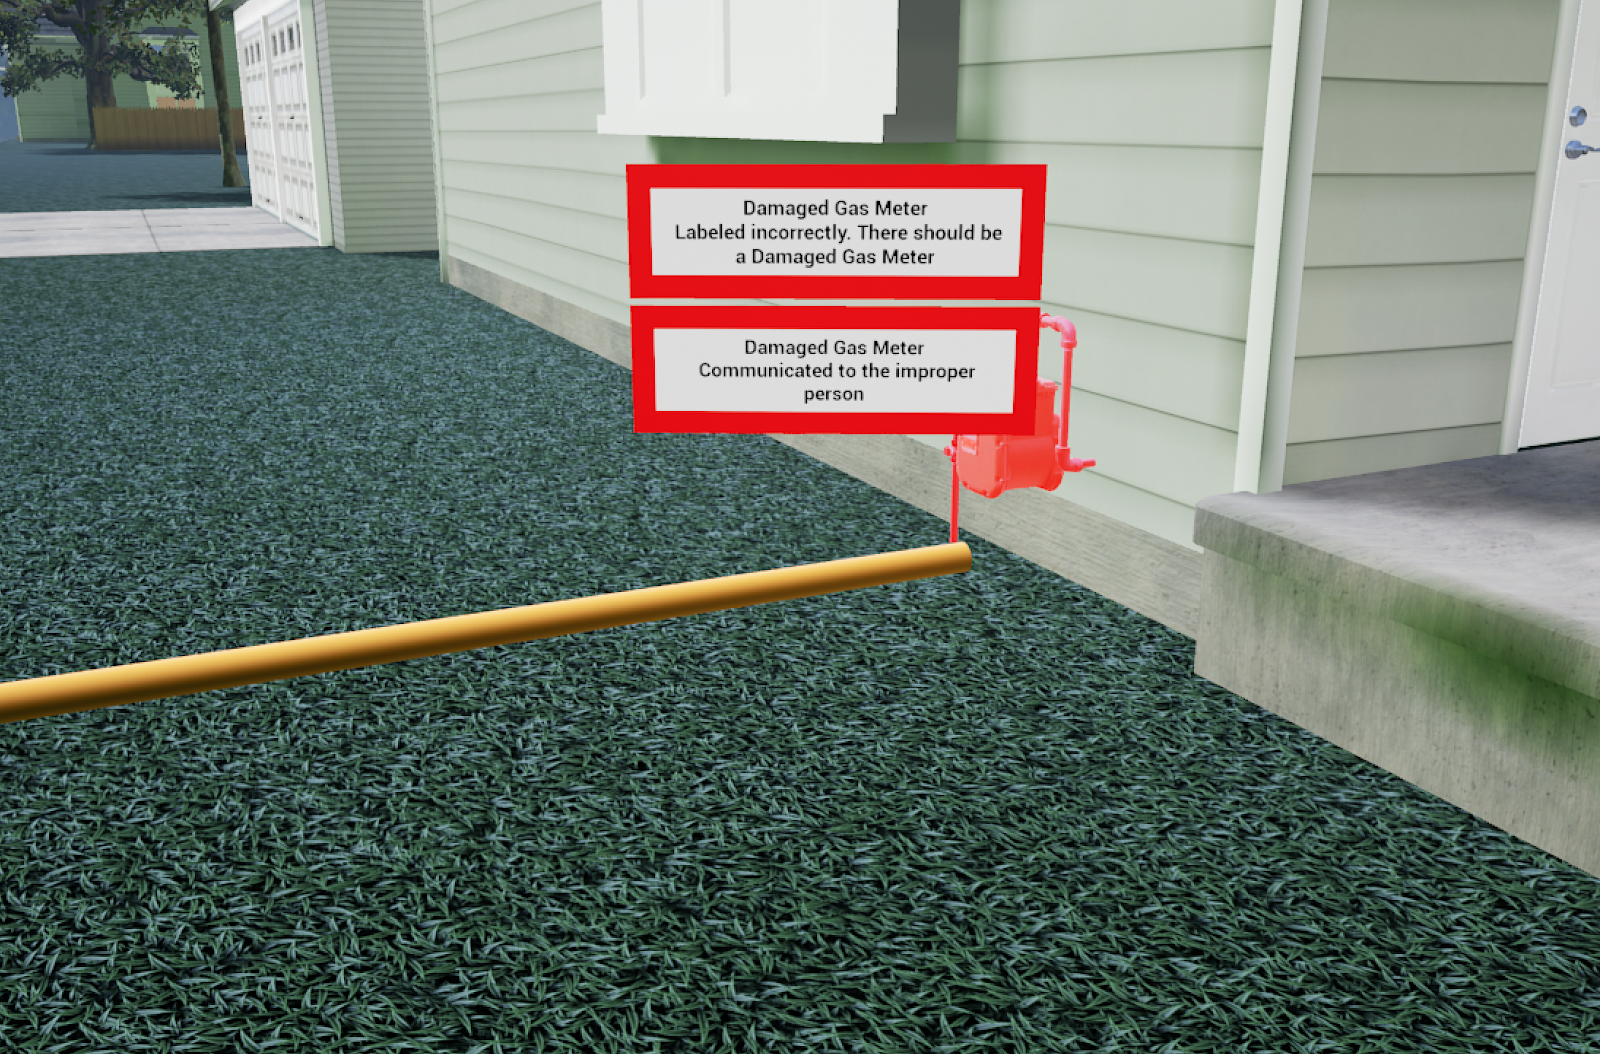
When finished reviewing, you can either play a new scenario or select the "Exit to HUB" button to finish the module.
Questions and Support
If you have any issues, please contact our tech support team at [email protected]

