

Program Overview
In this scenario, you are a safety observer while your colleague does an equipment swap out on an energized cabinet in a warehouse. You will have to prepare the worksite, perform a Low Voltage Rescue, contact emergency services, and properly follow up after the rescue is complete.
For a video walkthrough of the module, click this link: Low Voltage Rescue Walkthrough
Core Learning Objective
To assess the participant's ability to perform a rescue from a low voltage panel.
Functionality
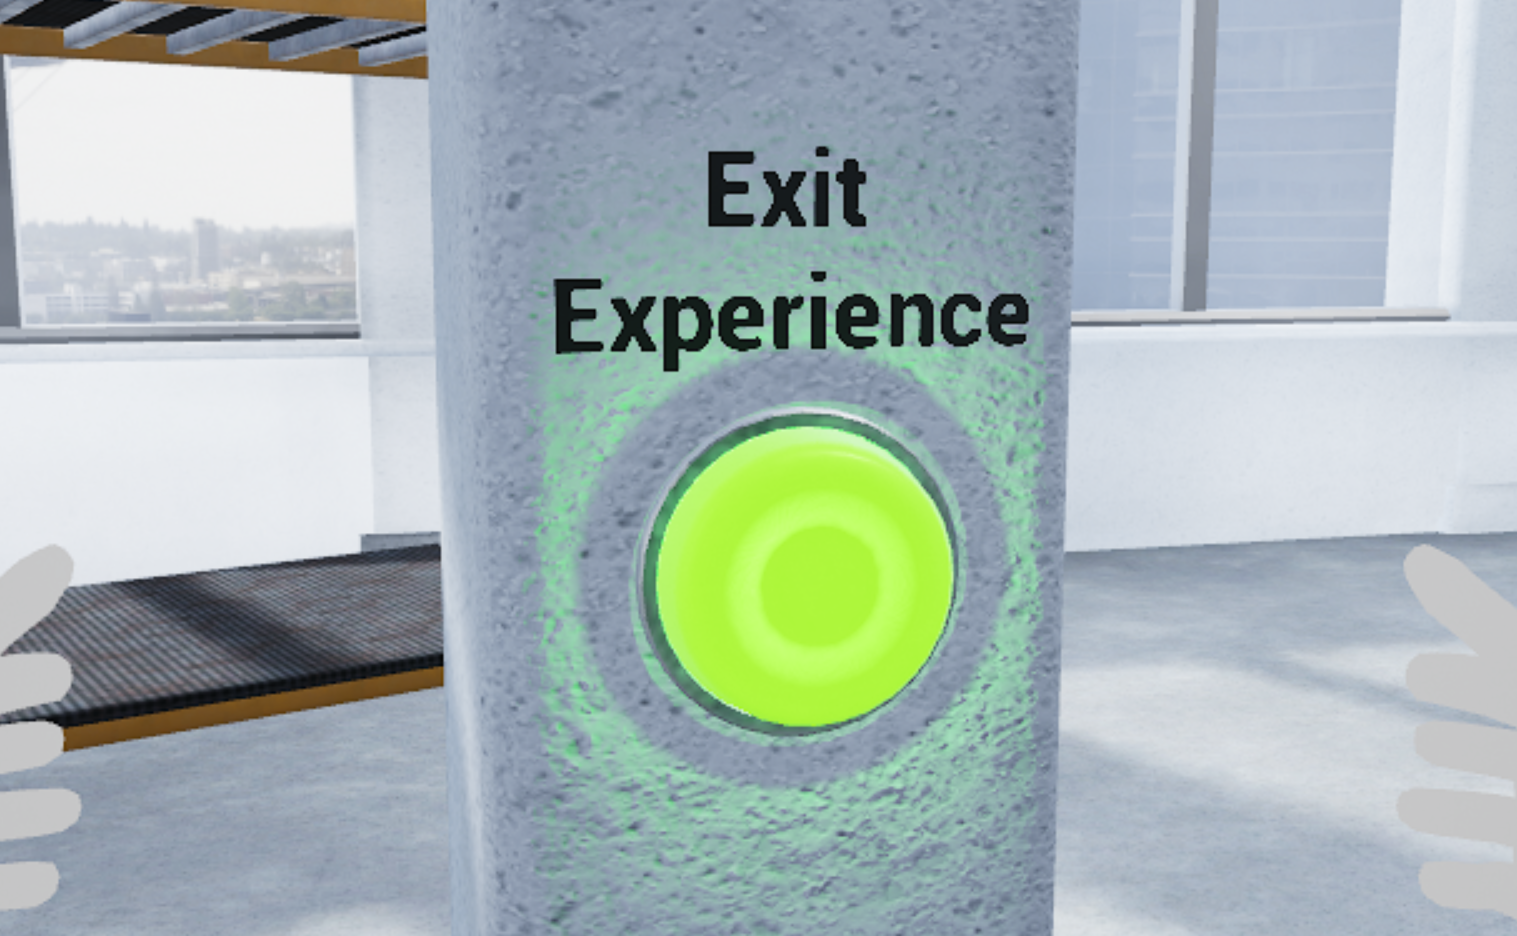
Exit Scenario
To exit a scenario, press the Exit Experience button with your virtual hands:
Tools
-
Laser Pointer — To interact with menus and objects in this experience, aim your laser pointer at the item you wish to interact with and pull the trigger on your controller to select it.
-
Rescue Crook — To drag your colleague back and away from the electrical panel, press the controller trigger.
User Controls
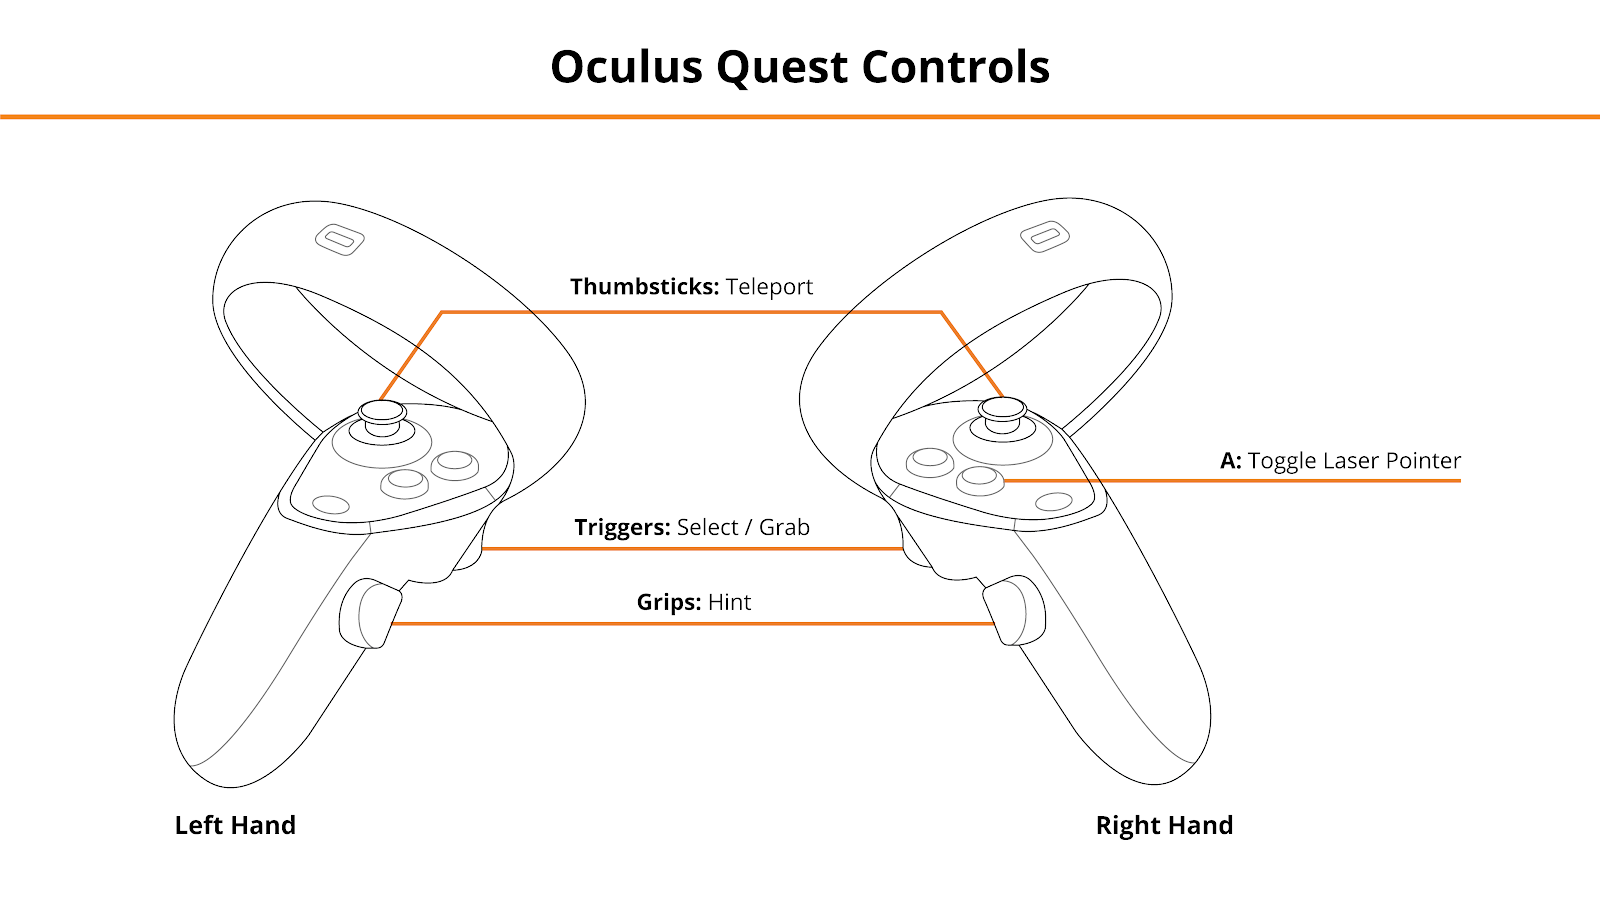
Pico + Meta Quest Headsets
- Thumbsticks — Teleport
- Triggers — Select, Grab
- A — Toggle Laser Pointer
- Grip Buttons — Hint
See below for button positions on Meta Quest controllers.
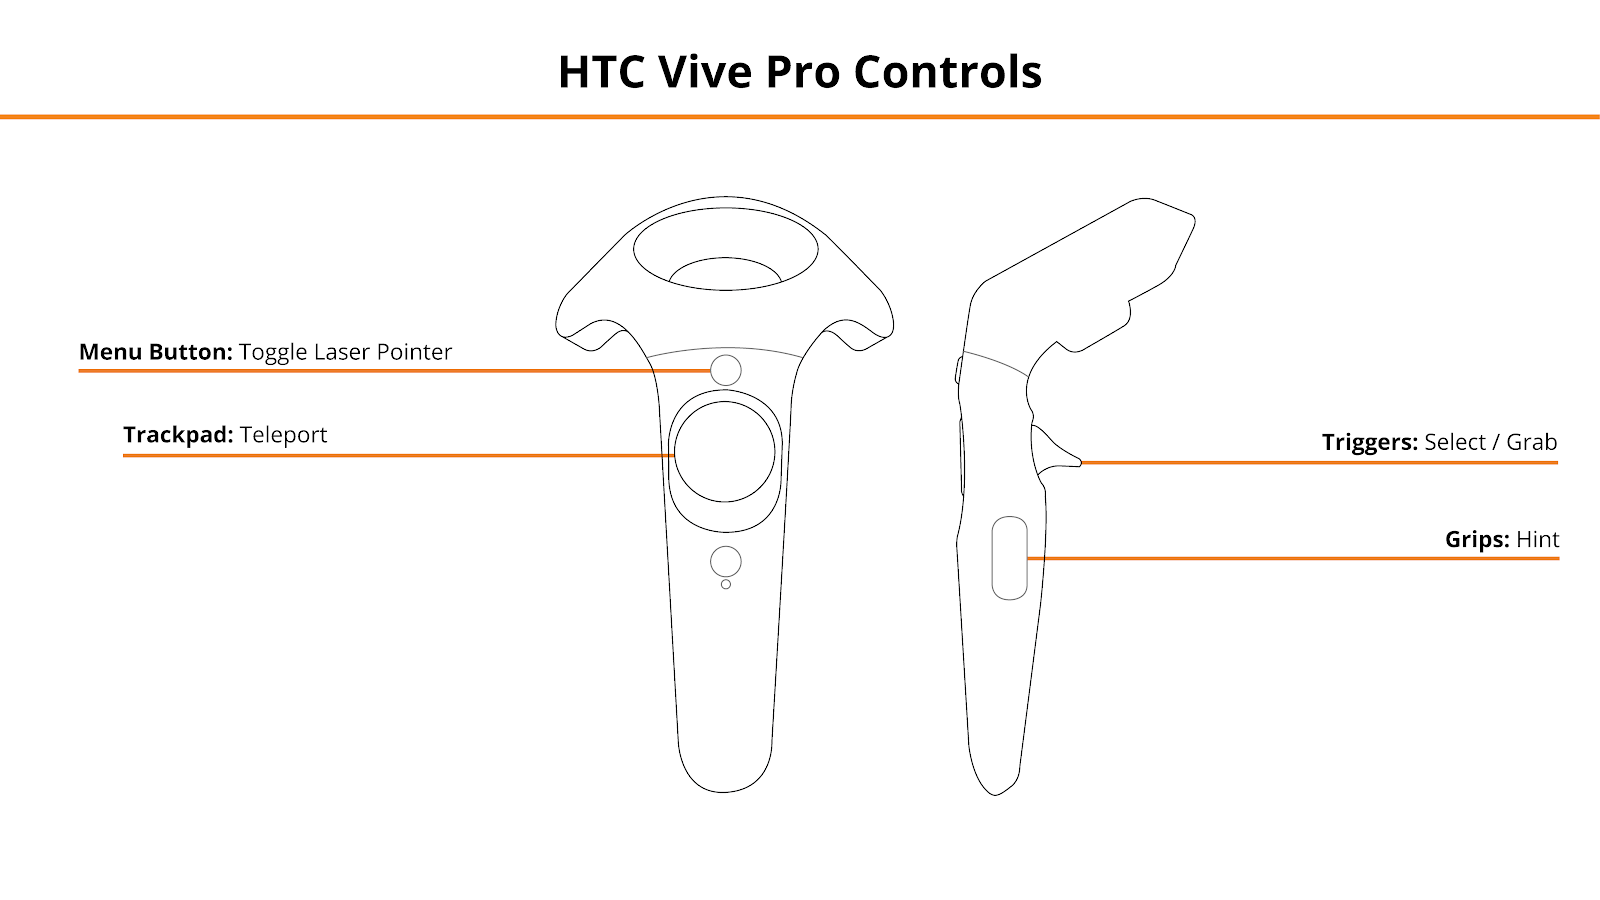
HTC Vive Pro + Focus 3 Headsets
- Trackpads — Teleport
- Triggers — Select, Grab
- Menu Buttons — Toggle Laser Pointer
- Grip Buttons — Hint
See below for button positions on Vive Pro controllers.
Keyboard / Mouse
- Mouse Left Click / Mouse Right Click — Grab / Select
- W, A, S, D — Move
- Q / E — Teleport
- F / Shift F — Toggle Laser Pointer
- I — Hint
- R — Call EMS

Entering the Experience
Login and Authentication
To use this experience, you must log in using a PIXO account created by the organization’s administrator, or by a PIXO VR Representative. The login must be performed from a headset that is connected to the internet for authentication to work successfully.
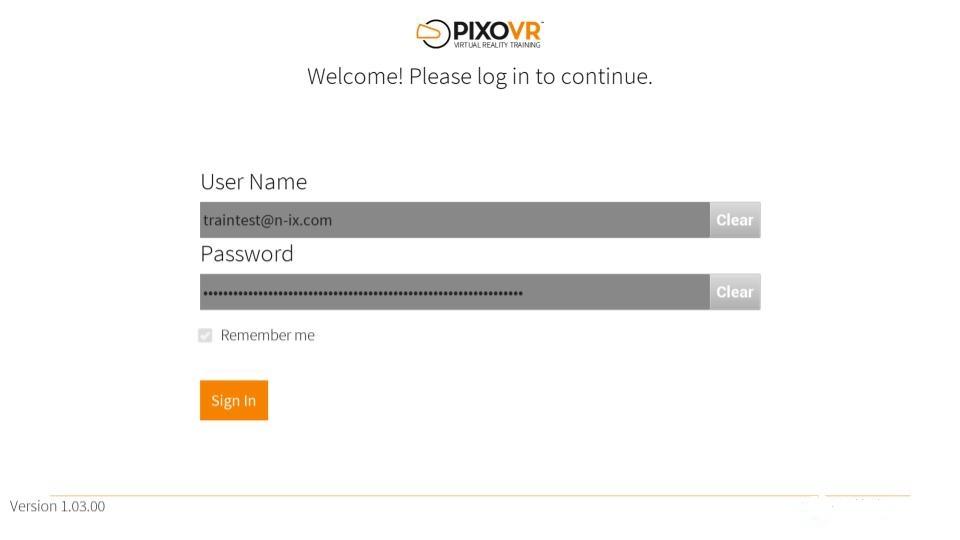
Tip: Select the Remember me flag to save your login credentials for your next session.
-
Enter your PIXO credentials in the corresponding fields, then select Sign In.
-
Once logged in, you will proceed to the lobby room, where the module introduction will play. To skip the intro, select the "Skip" button in the upper right corner.
Lobby
In the lobby, you can select your Experience and Region:
-
Experience — choose between replaying the Tutorial or the Assessment
-
Region — choose between USA, Australia or Saudi Arabia
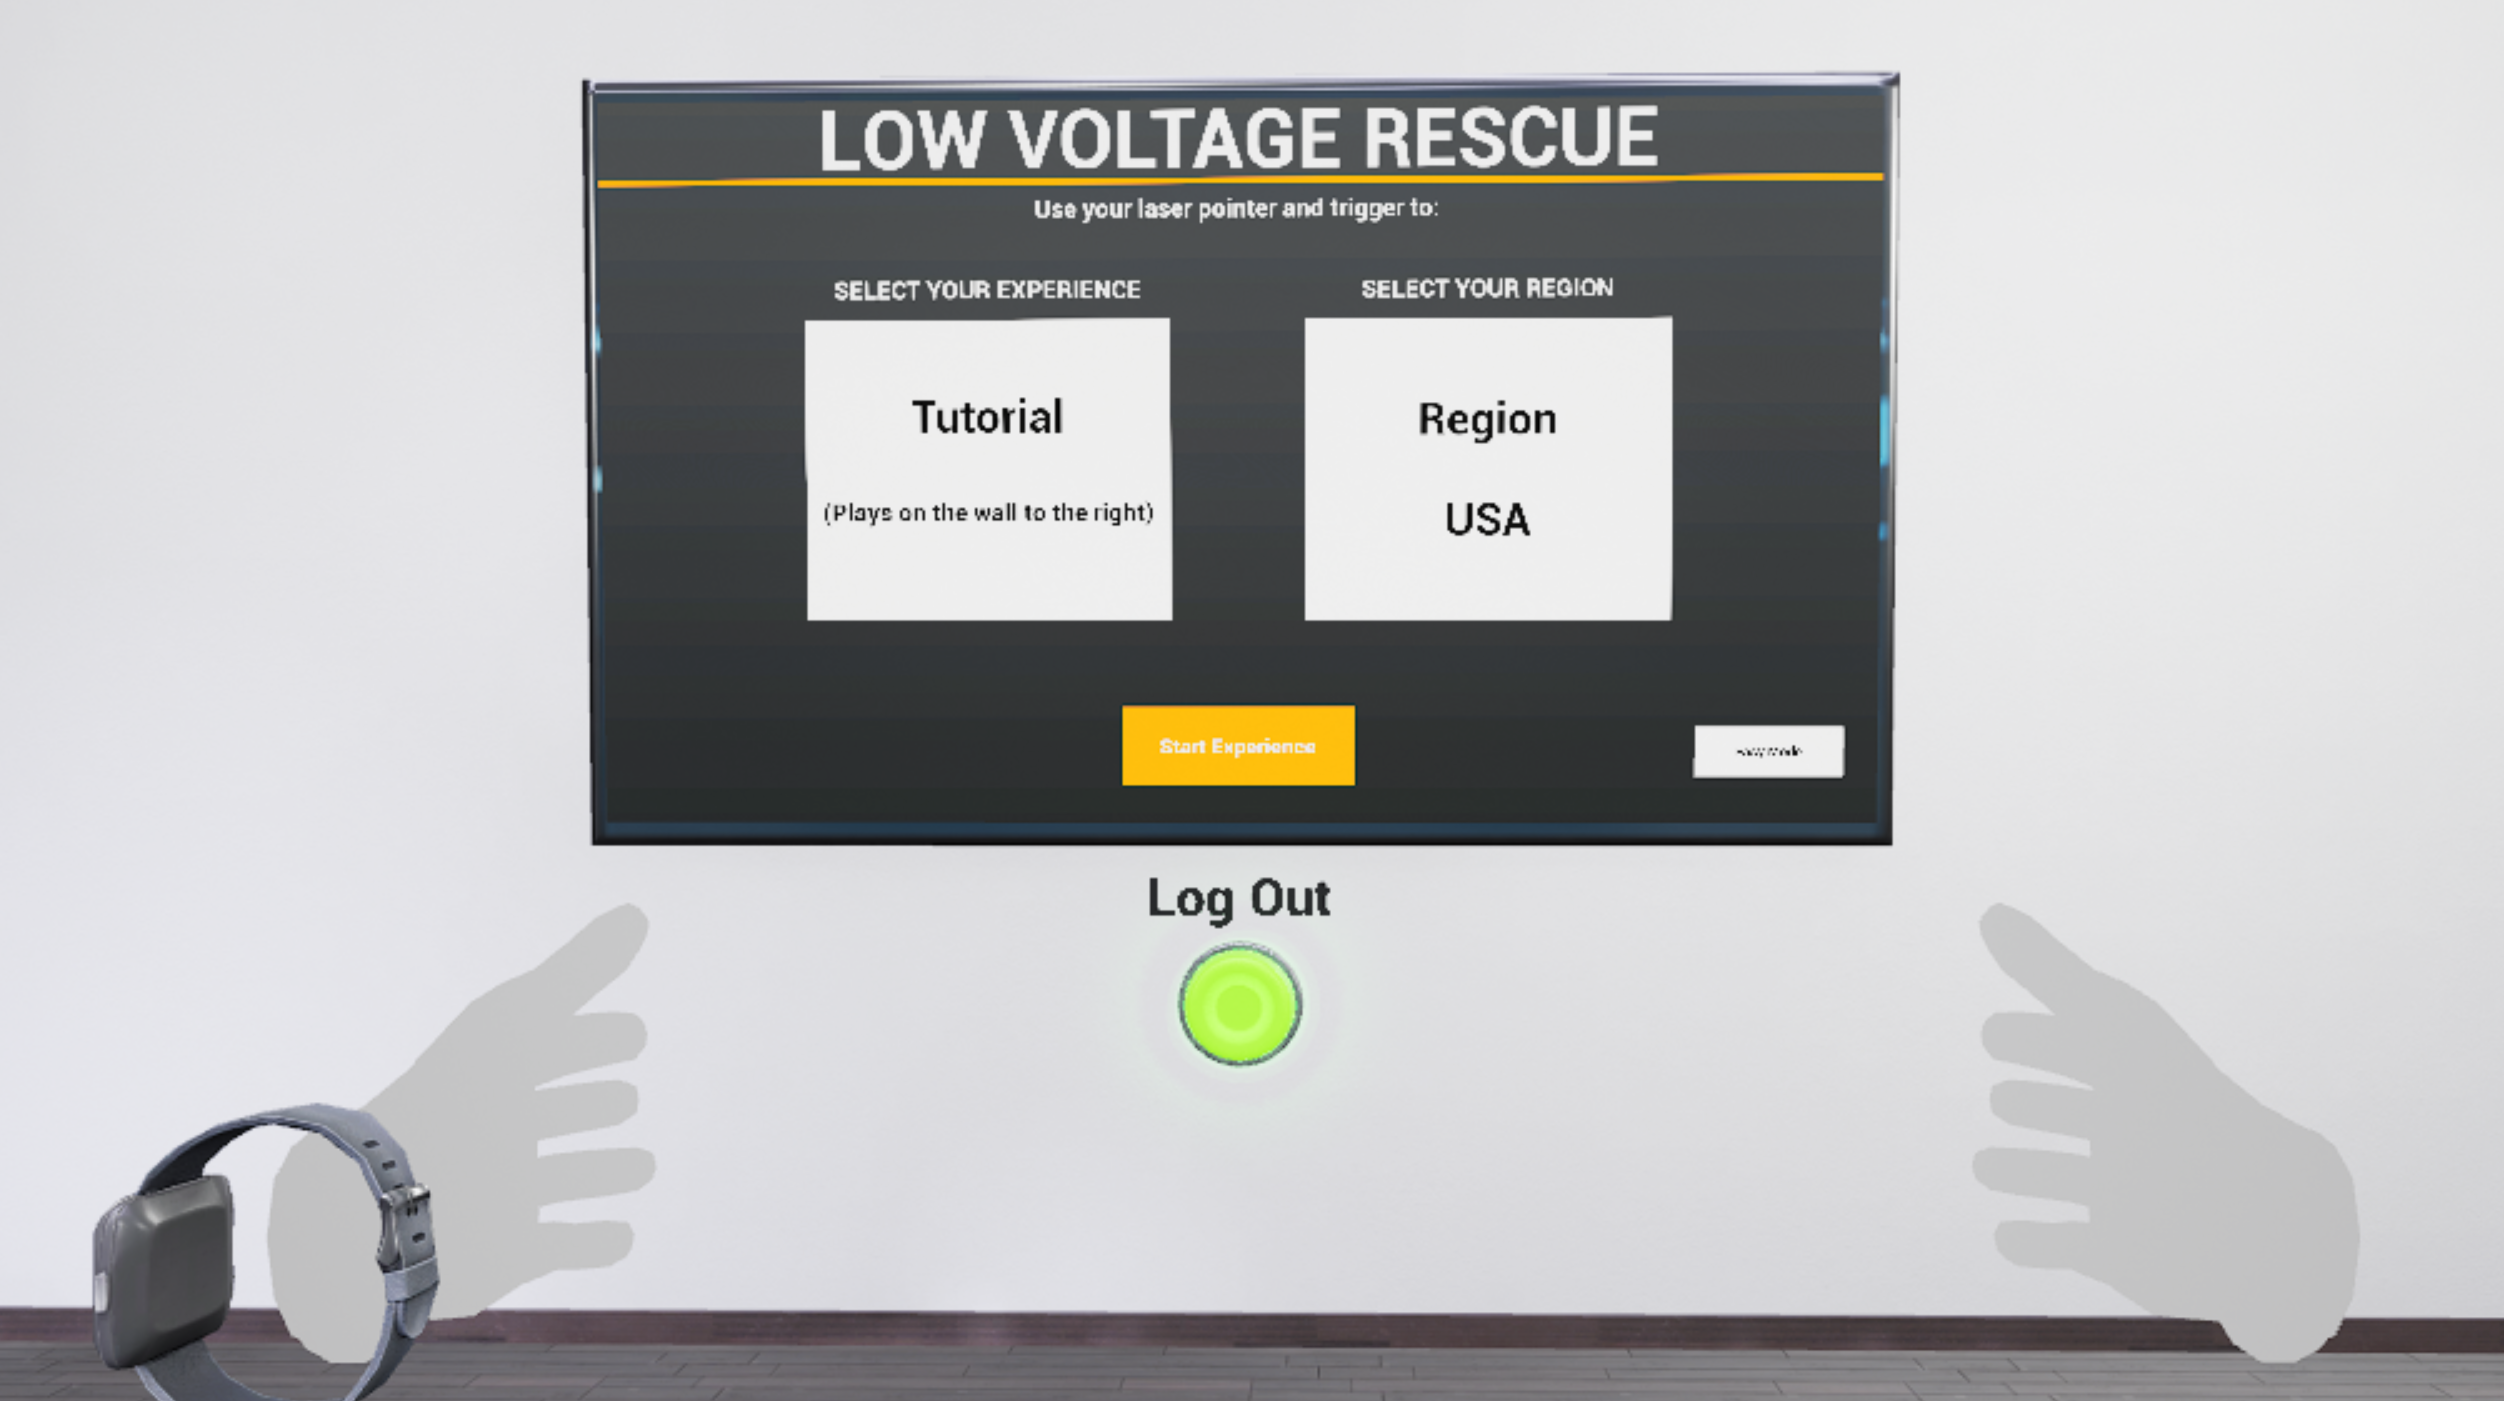
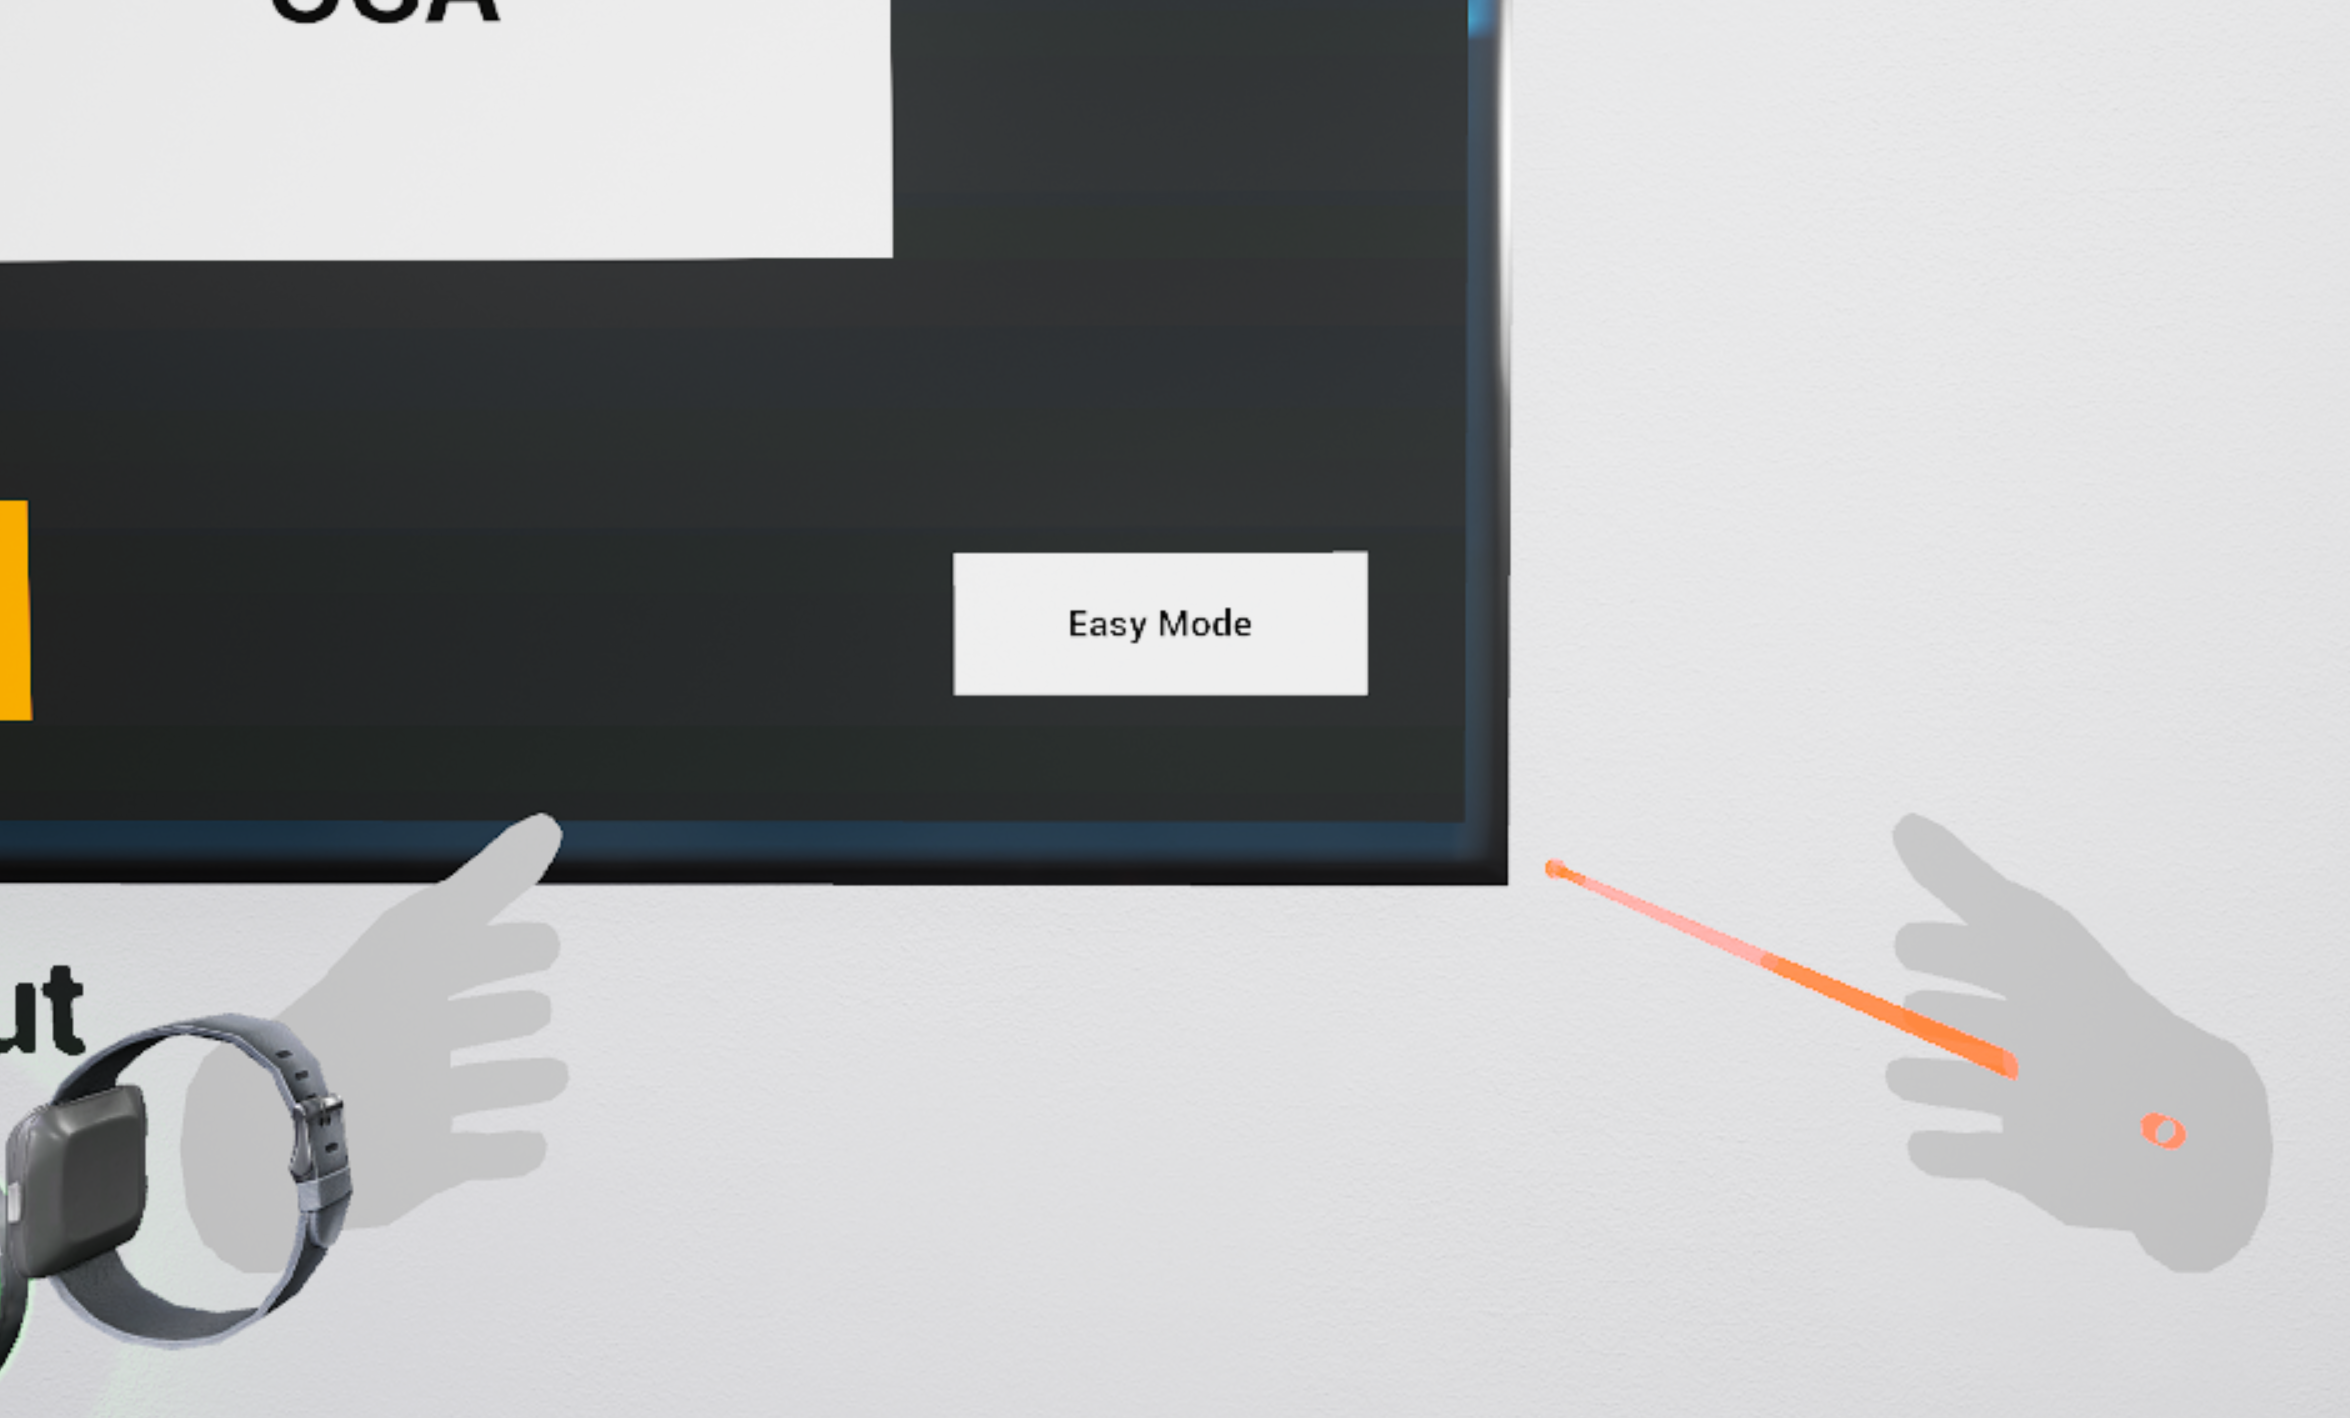
Tip: Switch between Easy and Advanced modes with the toggle in the bottom right corner:
-
Easy Mode — users get two chances to complete each step correctly before being told the correct answer and moving on
-
Advanced Mode — users get two chances to complete each step correctly before failing
Experience Walkthrough
Note: In this experience, you can make one mistake for each step and get a chance to try a second time. However, if you get any step wrong twice you will be transported back into the lobby and will have to restart the experience from the beginning.
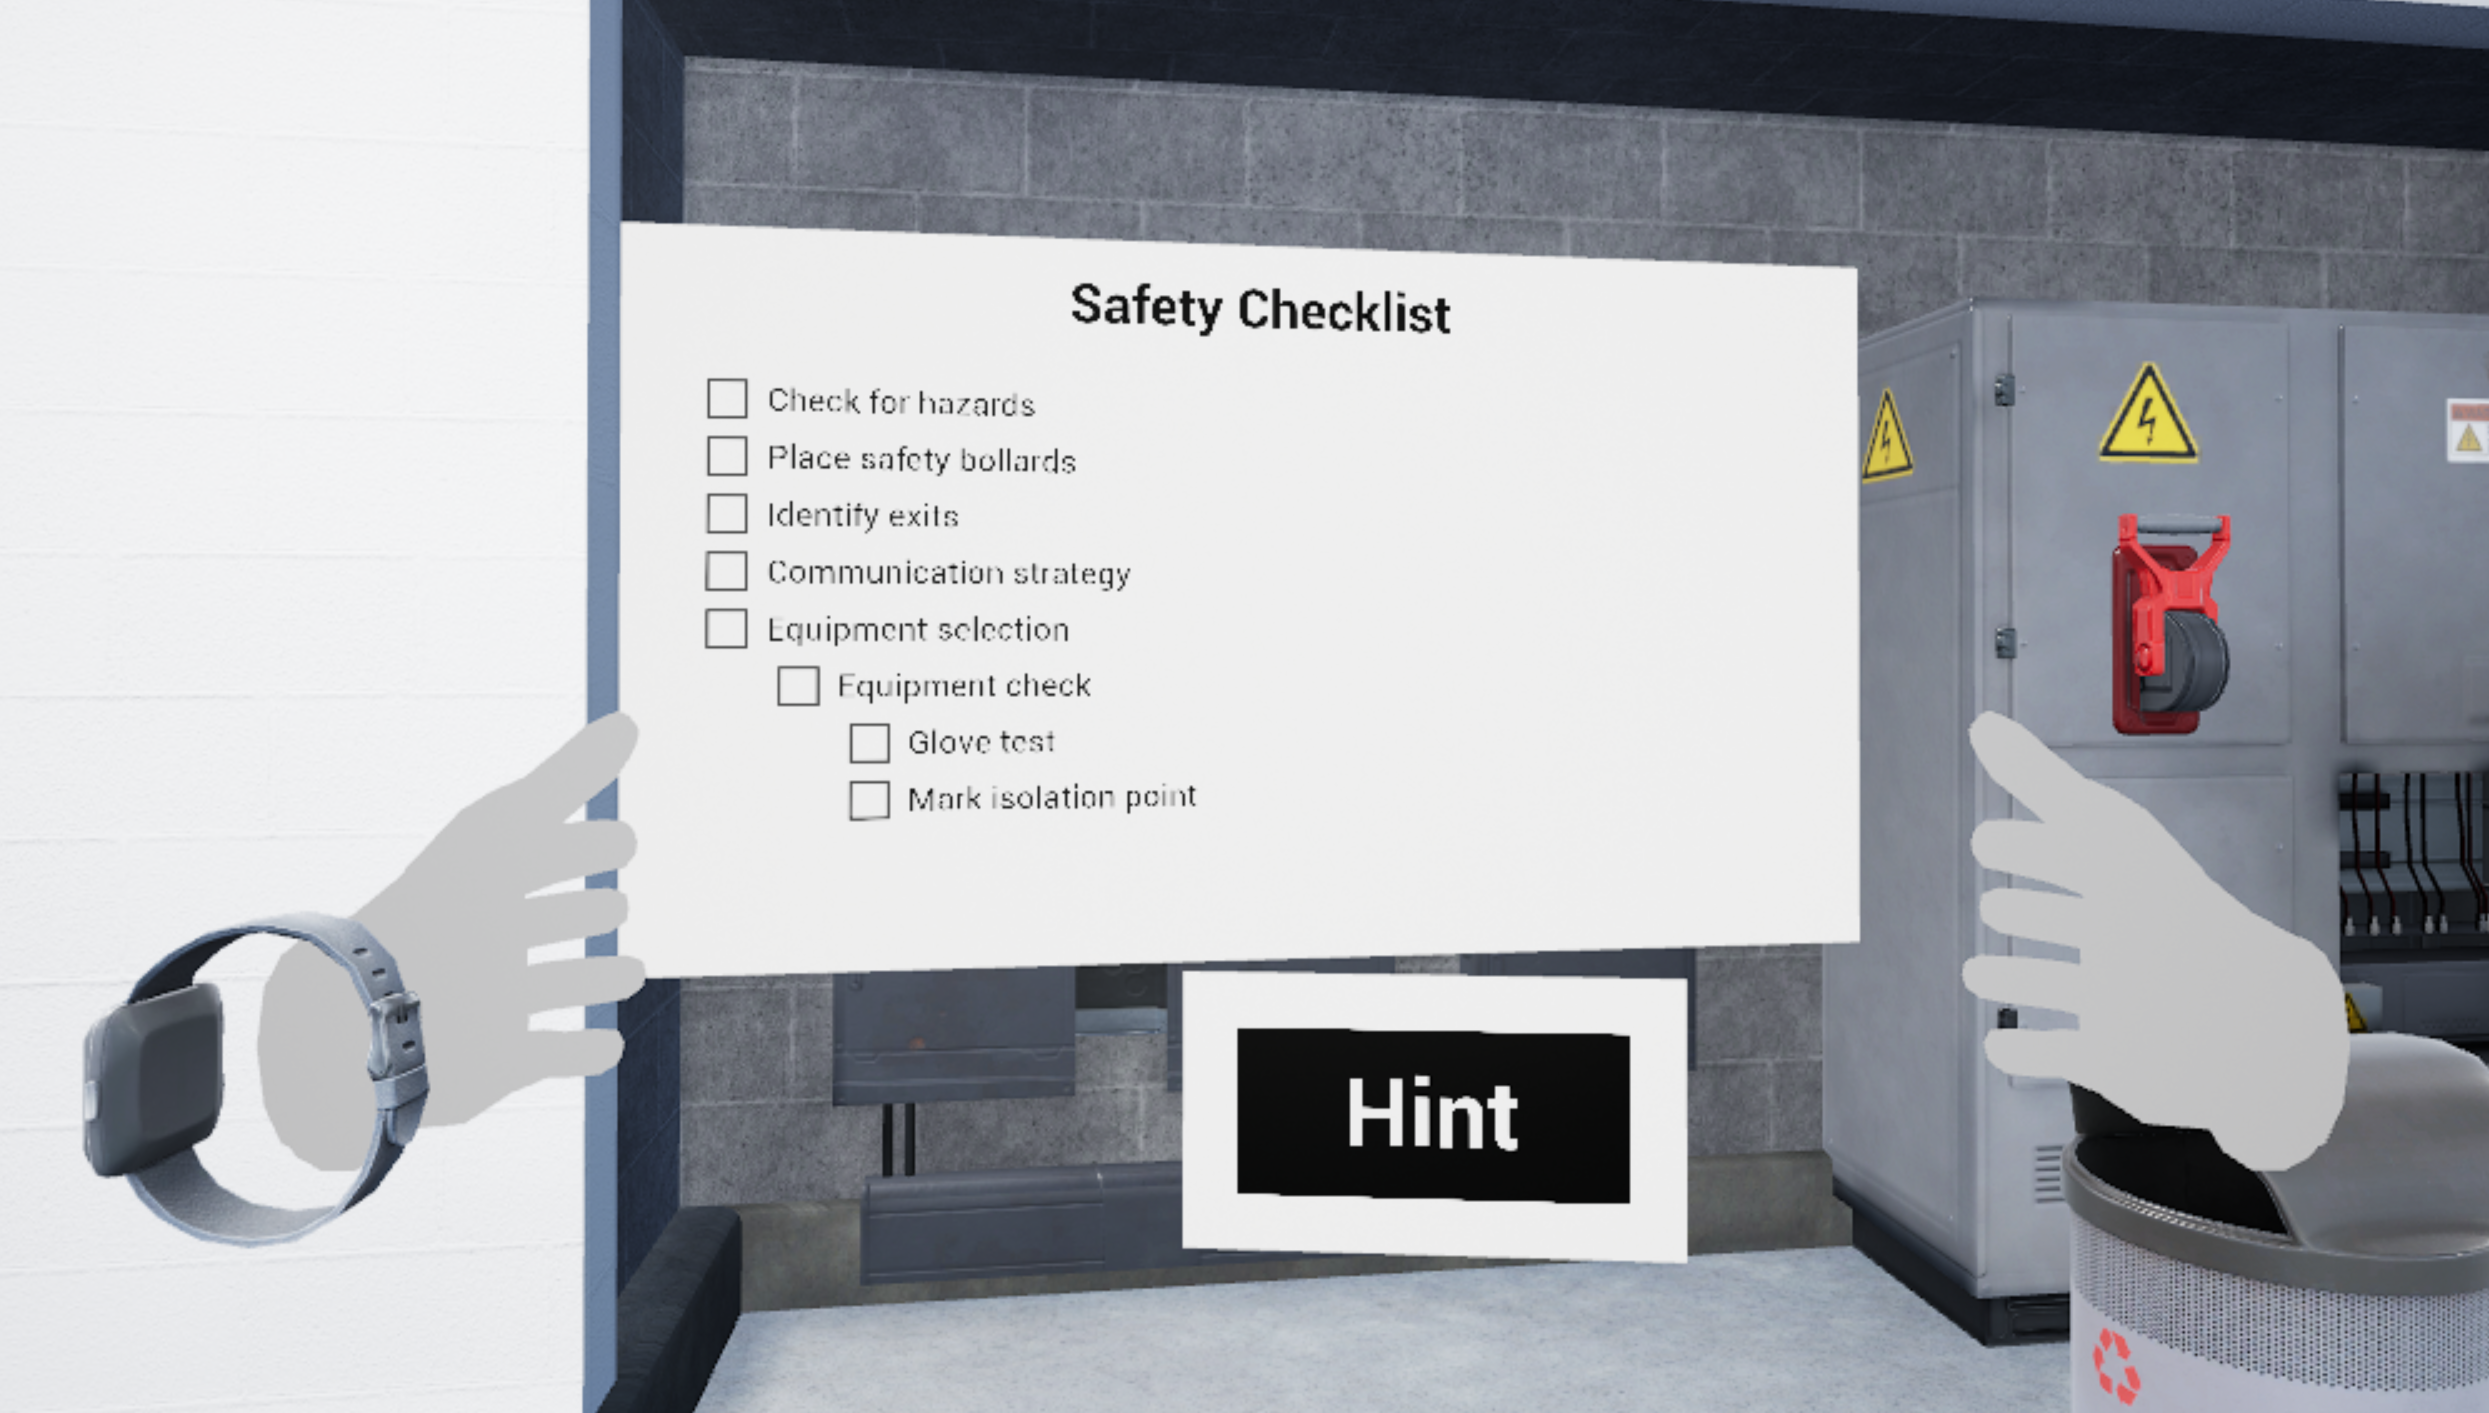
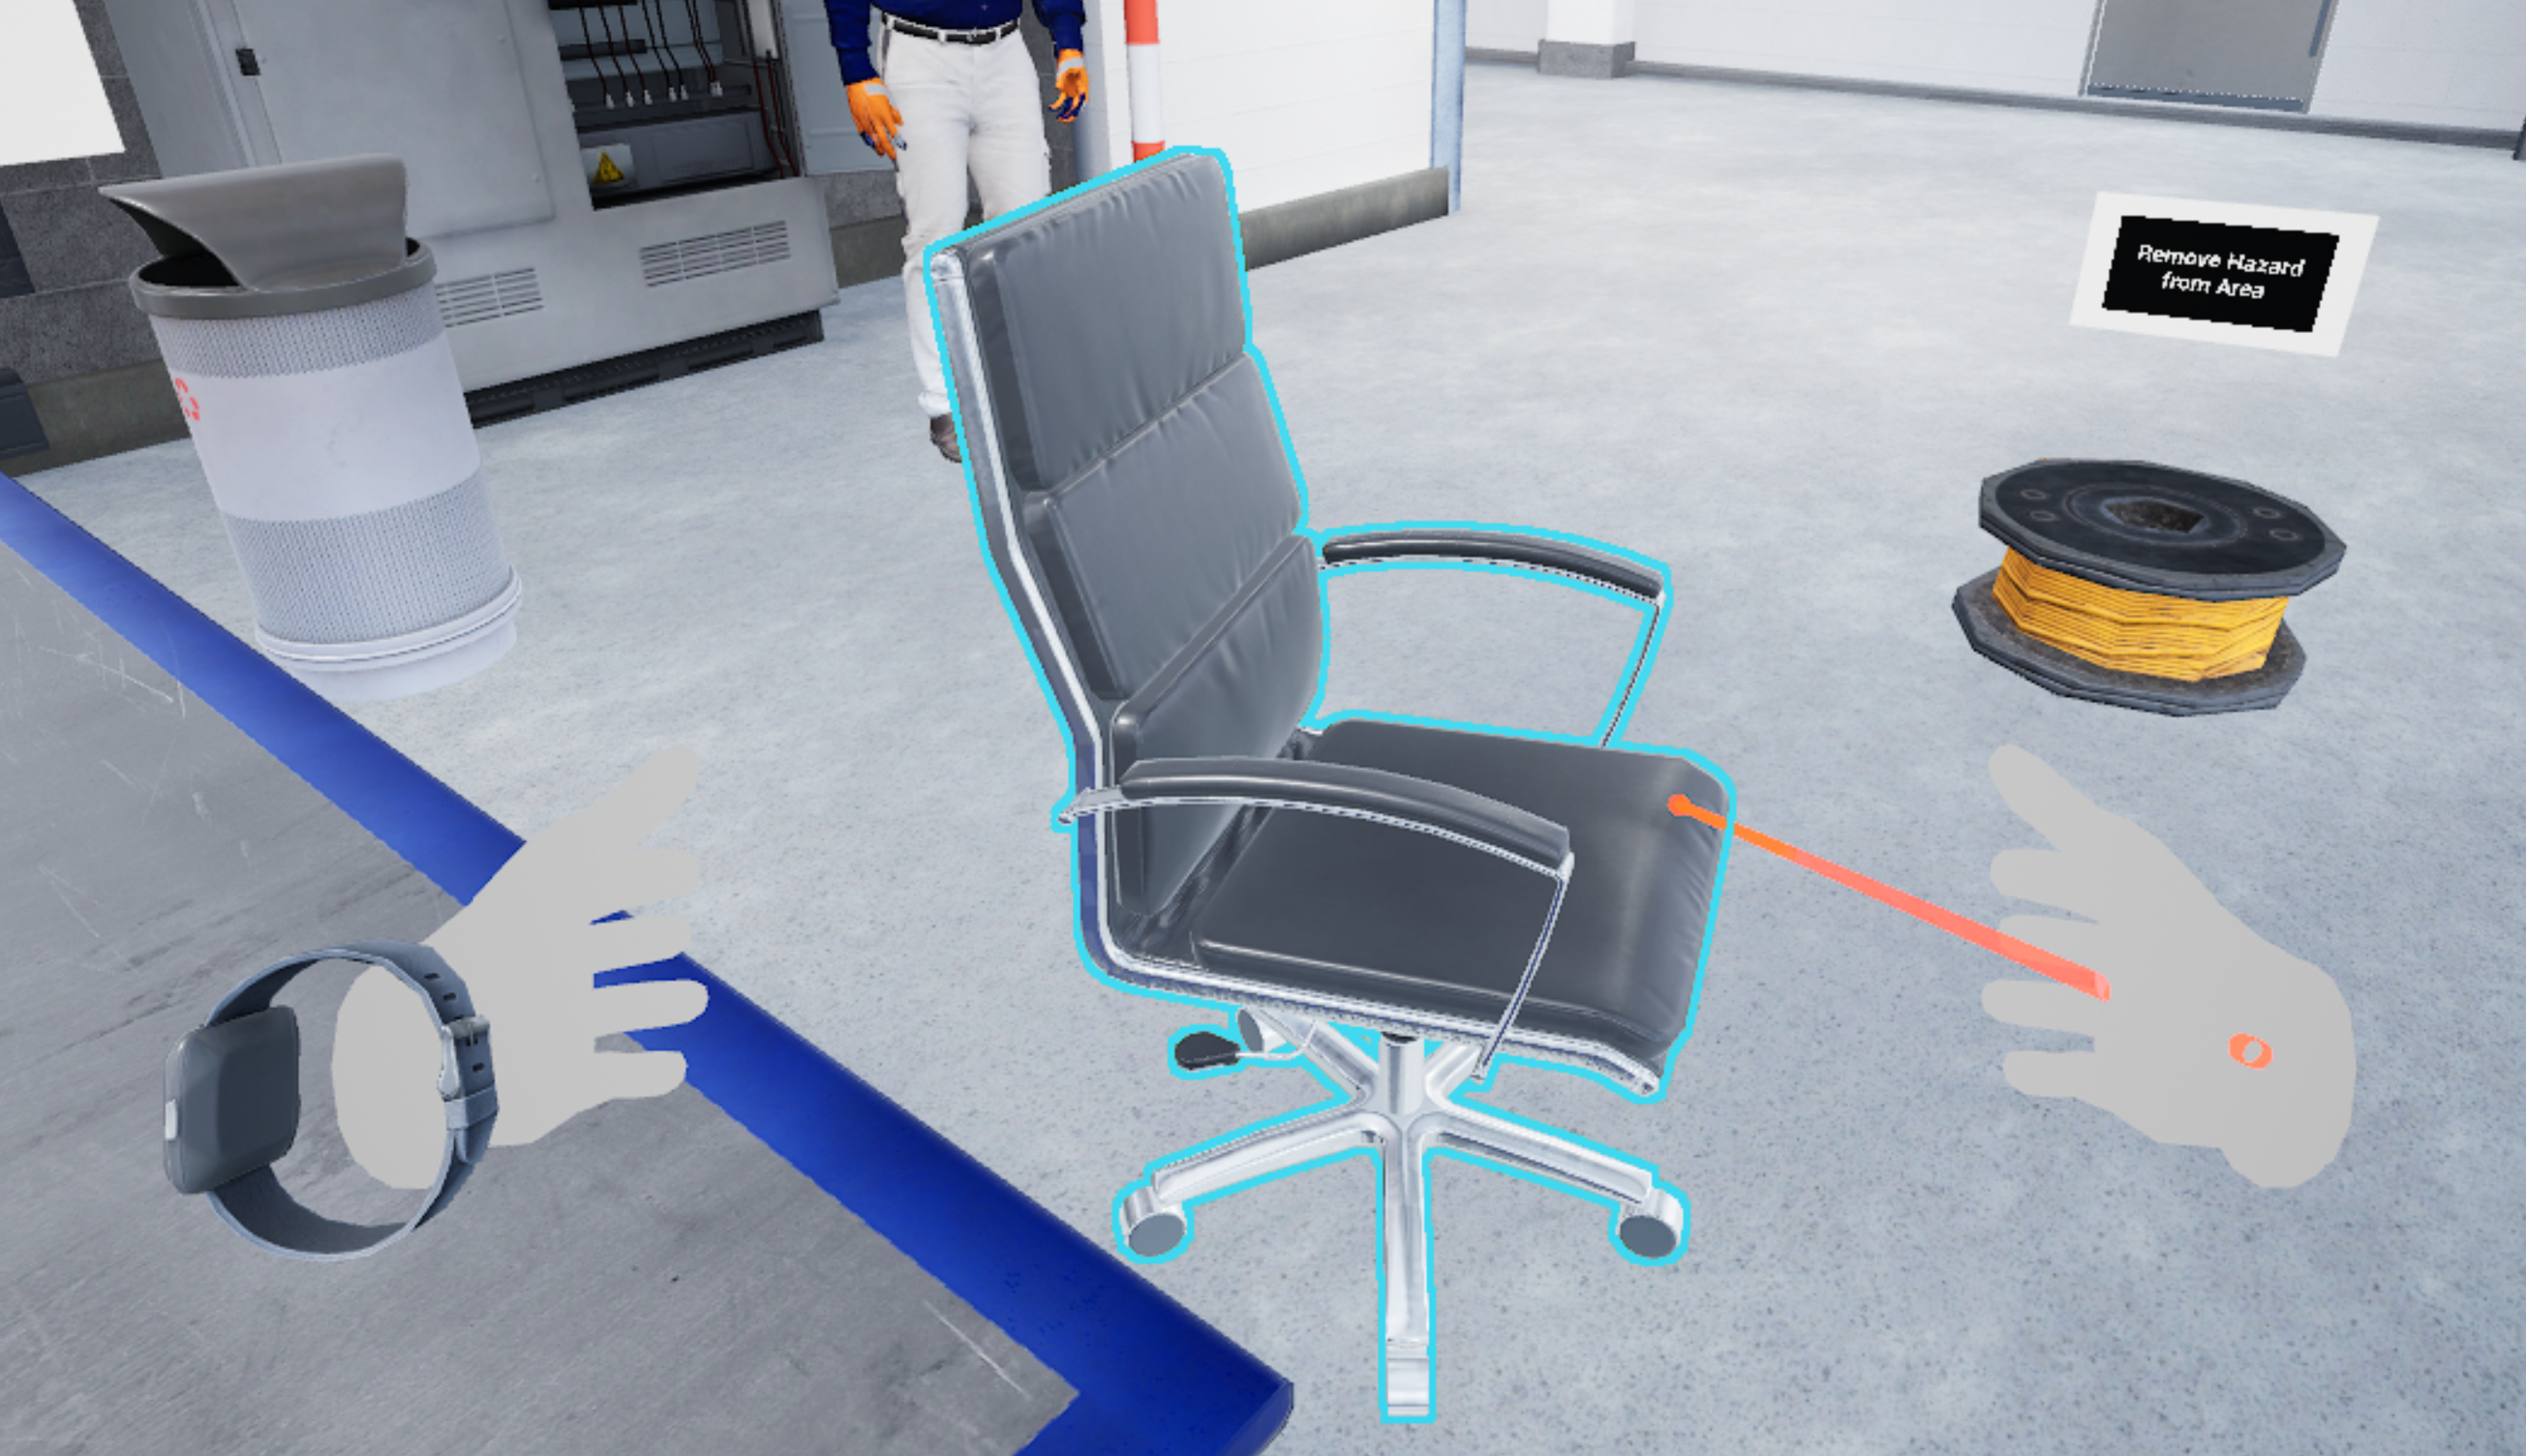
In this scenario, you are a safety observer while your colleague does an equipment swap out on an energized cabinet in a warehouse. Start by following the “Safety Checklist” located on the whiteboard on the left:
-
First, identify any hazards and remove them from the area. In this module, possible hazards can include: chairs, trash cans and spools of wire.
-
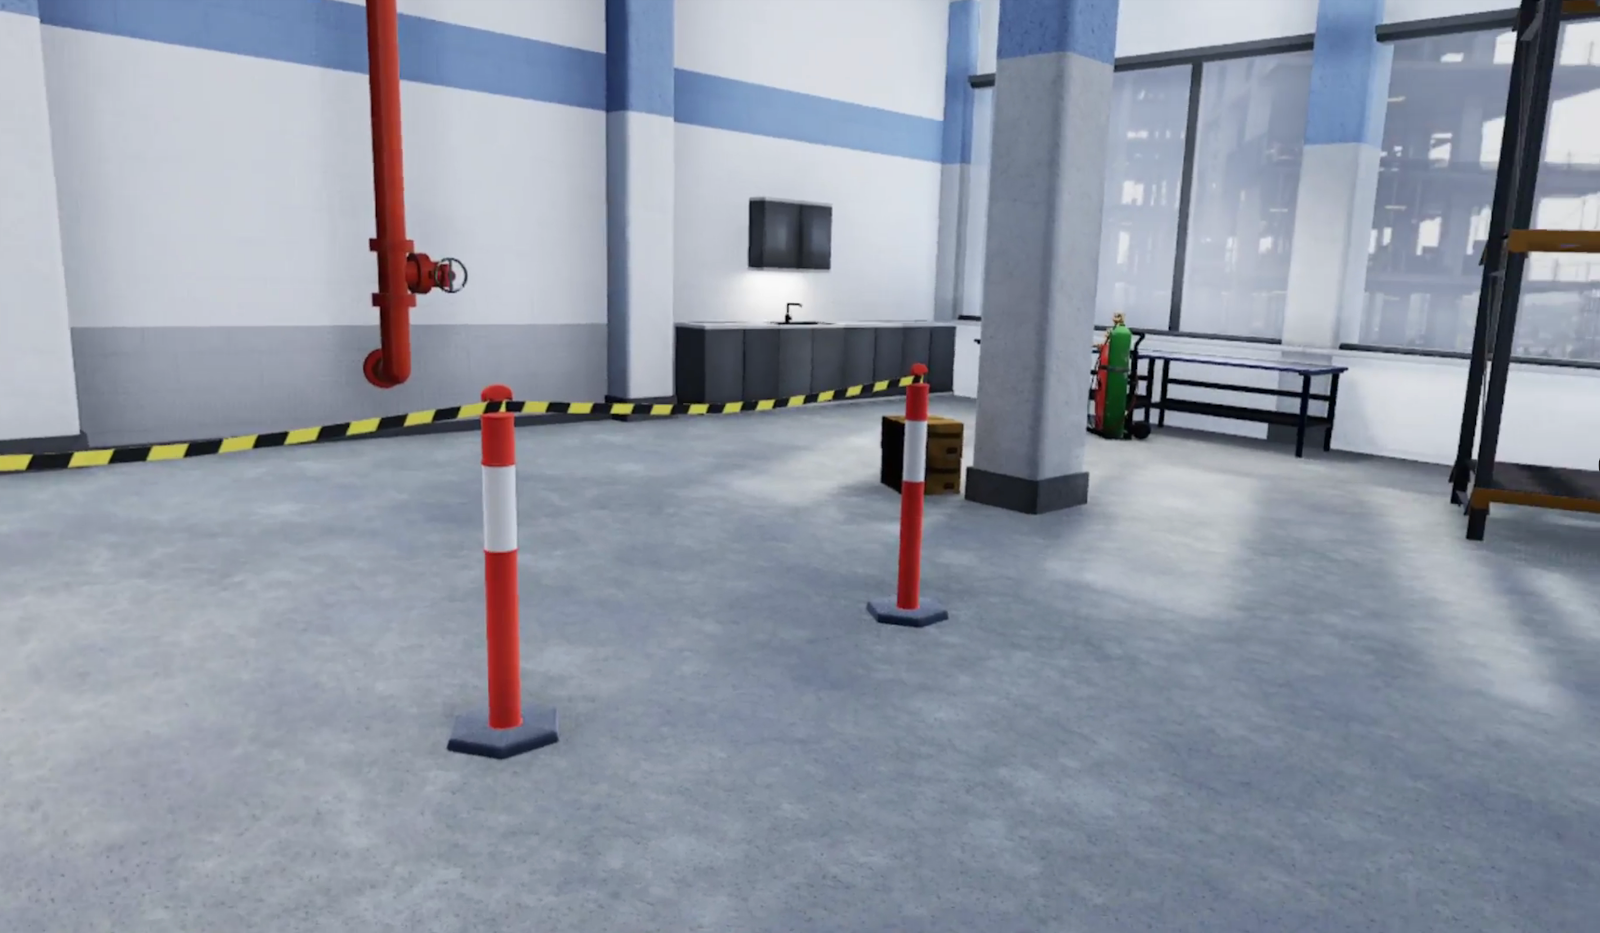
Once all hazards are removed, you need to select and place the safety bollards. You will see a menu with three options for placement. Each option will set the bollards in a different configuration. Once you have made a selection, select "next" to confirm.
-
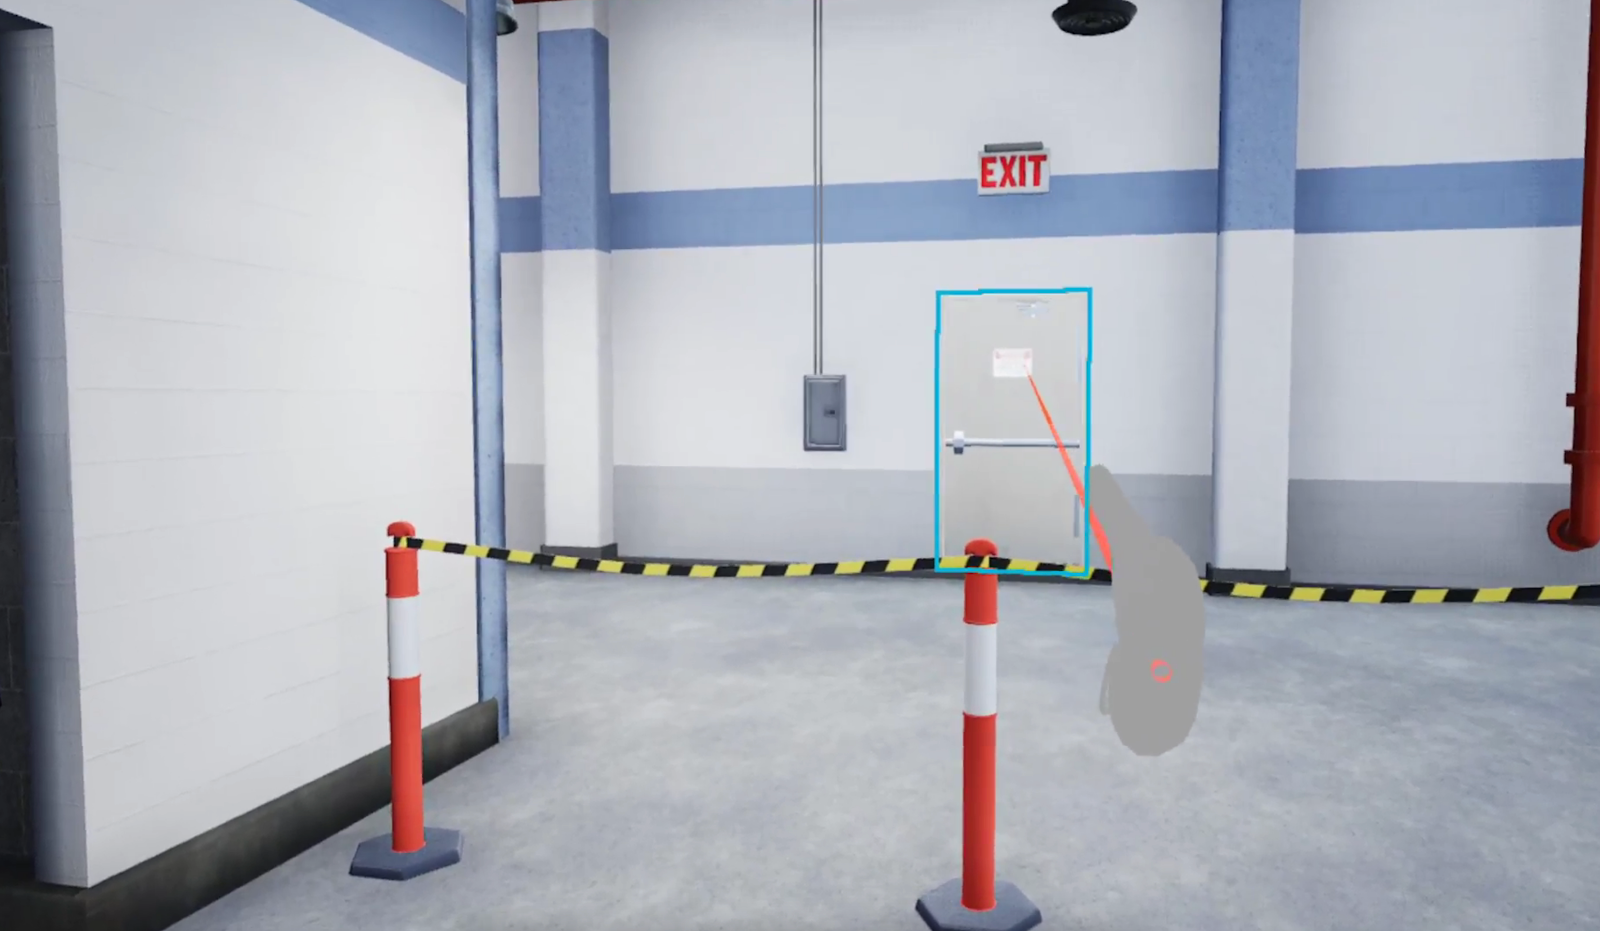
Next, identify the exit. To do this, find the exit sign, highlight it with your laser pointer and select it. Once you select it, you will have to choose between three options of what you should do with the exit door.
-
Identify your communication strategy by tapping the smartwatch that is located on your left wrist.
-
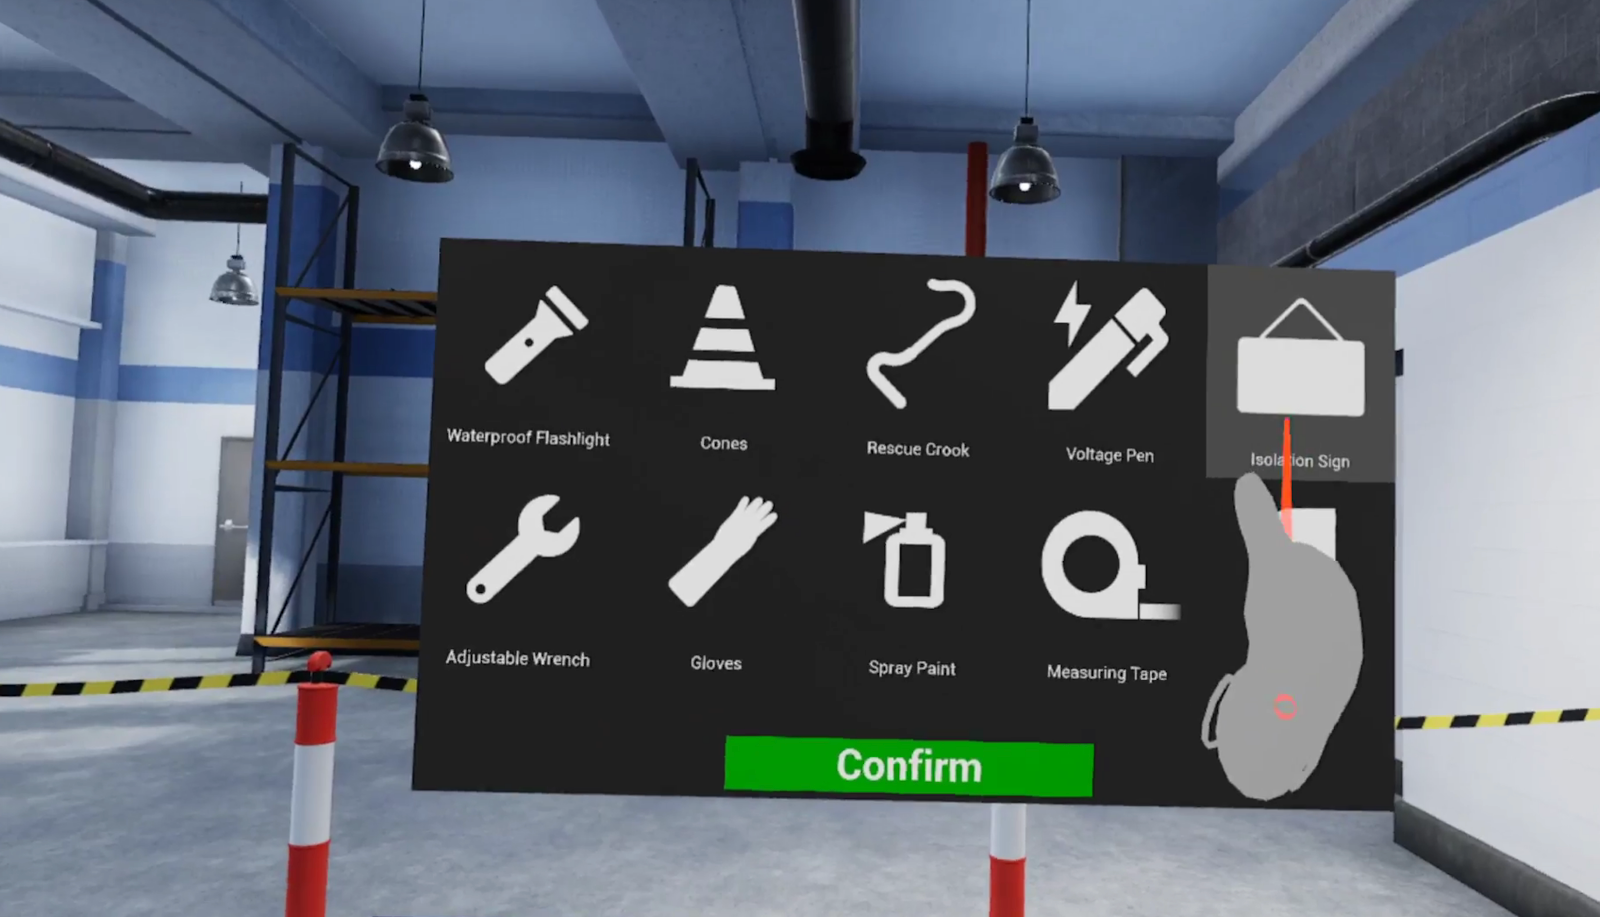
Next, select the equipment you need for the job. You will be presented with ten different equipment options, in which only five are needed.
-
After selecting the correct equipment, you must also inspect your equipment. You will be provided with three versions of each item. Use your laser pointer to select the version that is most appropriate for use.

-
Once all of the appropriate equipment has been selected, you can mark the power isolation point by picking up the correct item and placing it on the isolation point to mark it.
-
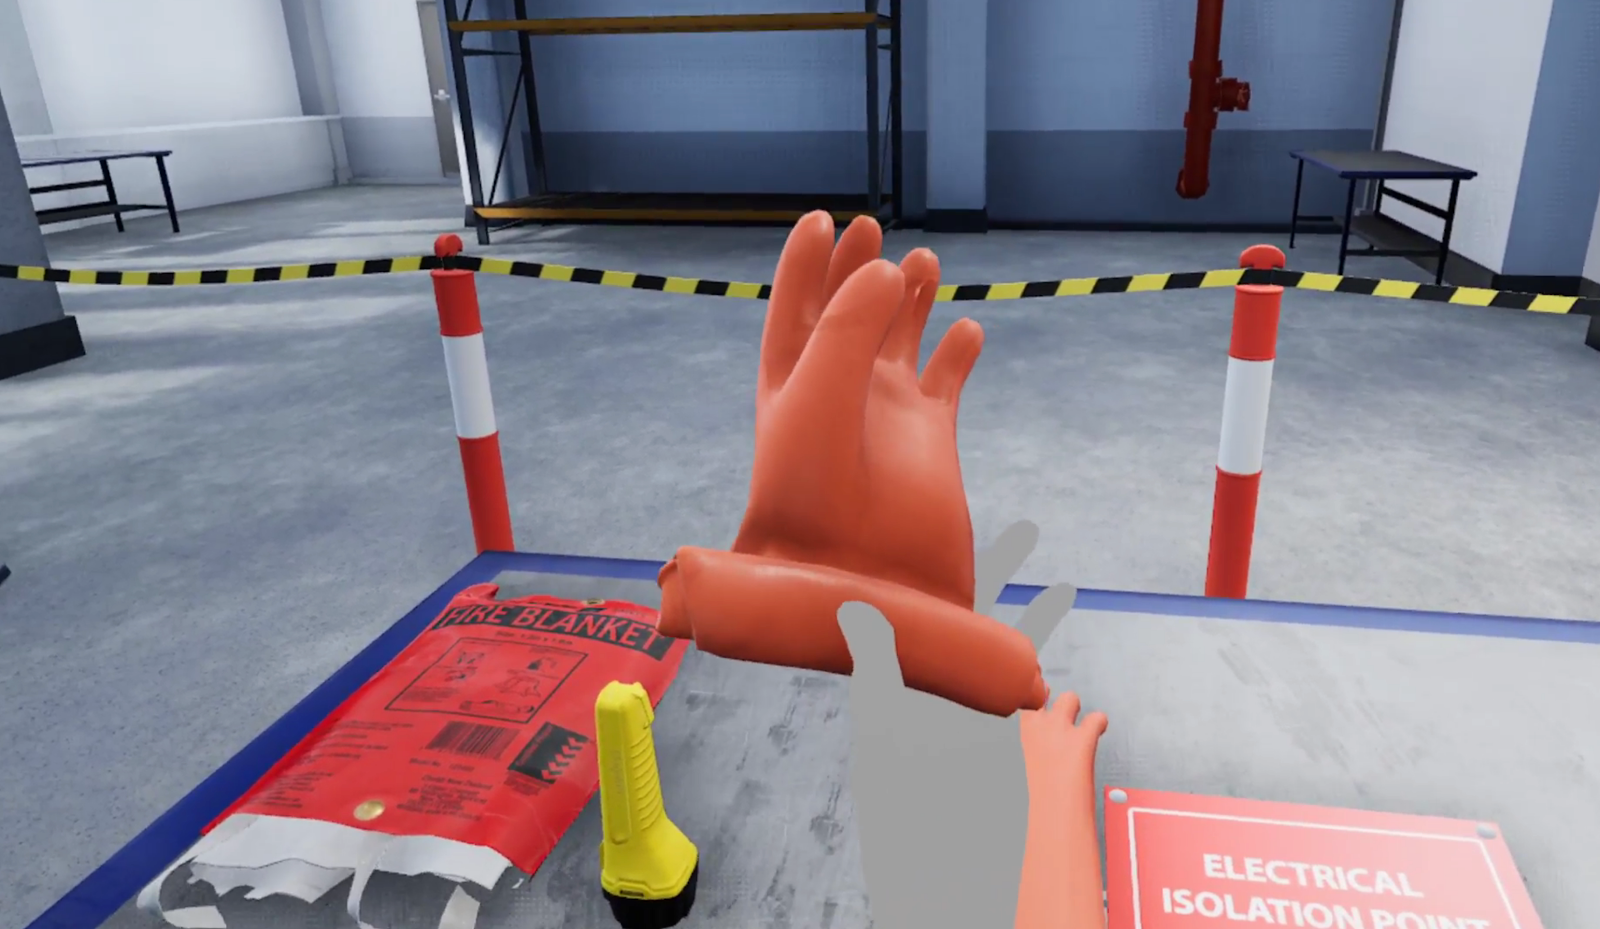
Next, you can perform a glove test. To perform a glove test, you must conduct a physical inspection and air test on both gloves by using your controller triggers to hold each glove, moving it in a repeated circular direction following the holographic arrows.
-
Once you have made sure that your gloves are safe, you have completed the safety checklist and can select the best standing location.
-
Next, your colleague will begin the equipment swap out for the energized cabinet, which results in them getting electrocuted from the panel and becoming unresponsive.
-
You can then perform a low voltage rescue and must contact emergency services through your smartwatch. To dial emergency services, use the smartwatch located on your left wrist.
-
Select a phone number to dial. The phone number that you choose to dial will depend on your local region.
-
Answer a series of questions such as the service you require, if your colleague is male or female, your colleagues age, and your location.
-
-
Once emergency services has been contacted and are on their way, turn off the power switch and grab the Rescue Crook.
-
Use the Rescue Crook to pull your colleague off the cabinet. Then pull them a few feet away from the cabinet.
-
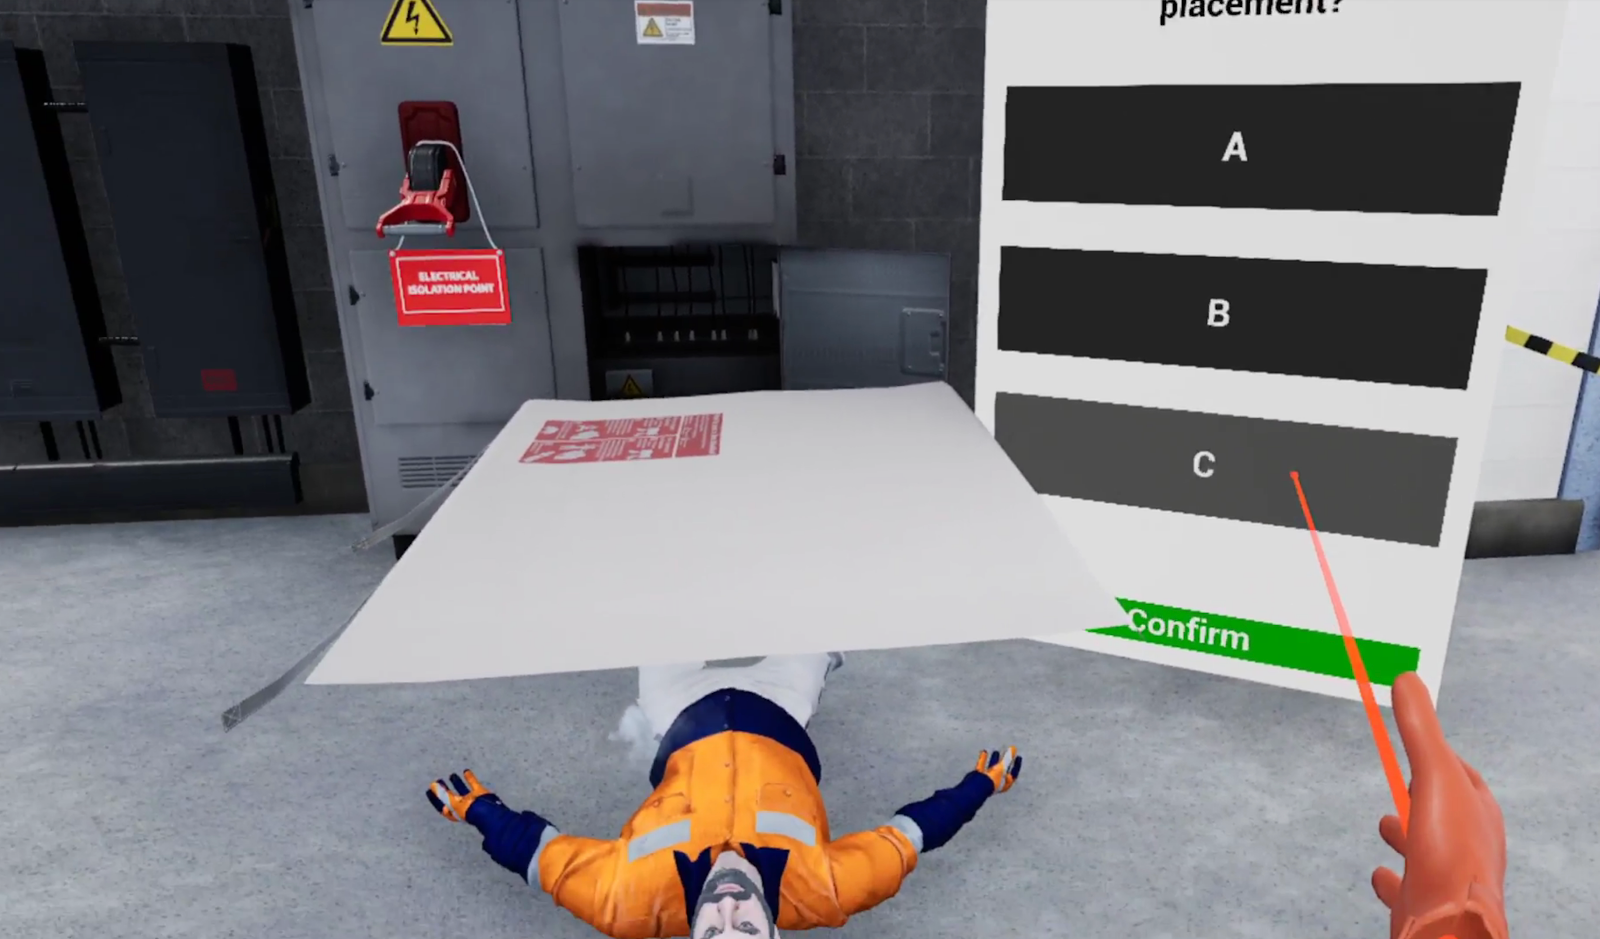
Next, select the Fire Blanket from the table. You will have to choose from three options of how you should hold the blanket, as well as how the blanket should be placed on the colleague. Once the fire blanket is on your colleague, pat down the blanket for at least three seconds before dragging your colleague back and away from the panel.
-
Note: To drag your colleague back, you must use both controllers.
-
-
Lastly, you will answer a few questions involving your next steps.
-
You will need to go through the assessment a second time for accreditation purposes, so the scene will be reset and you will go through the scenario one more time before completing your assessment.
Questions and Support
If you have any issues, please contact our tech support team at [email protected]

