

At PIXO VR, your organization can be billed by device, by session or as a subscription. This article will provide a basic overview of the Device billing type.
How Device Billing Works
Device billing is ideal for organizations that license certain modules per device, ensuring their users or customers can only use the content on the devices they've licensed. Device billing also allows organizations to use the Quick ID feature.
In order to manage devices, each device will need to be set up in ManageXR and assigned to an organization in the PIXO Platform.
Initial Steps
-
Create or log in to a device-based account in the PIXO Platform.
-
Setup your device(s) using ManageXR.
-
Wait for a PIXO Representative to assign the device(s) to your organization in the PIXO Platform.
-
Open the PIXO Platform and click on the Devices tab > Licensing.
The Devices Tab
The Devices tab allows Superadmins to view their licensed devices within the Licensing page. Each device will initially appear under the "Unassigned" section, detailing its model, manufacturer, serial number, battery percentage, and location.
After a PIXO Representative has assigned the device to your organization, it will appear under the "Assigned" section.

Assign a Device to an Organization
To assign devices to your sub-organizations, follow the steps below.
-
Click the "Assign to Organization" button next to your desired device(s):

-
Select an Expiration Date (1-3 Years).
-
Select an organization to assign the device to.

-
Click "Assign".
-
After clicking "Assign", the device will finish setting up and begin downloading your modules.
Unassign a Device
-
Scroll to "Assigned" devices.
-
Next to the device, click "Manage".

-
Click "Unassign".

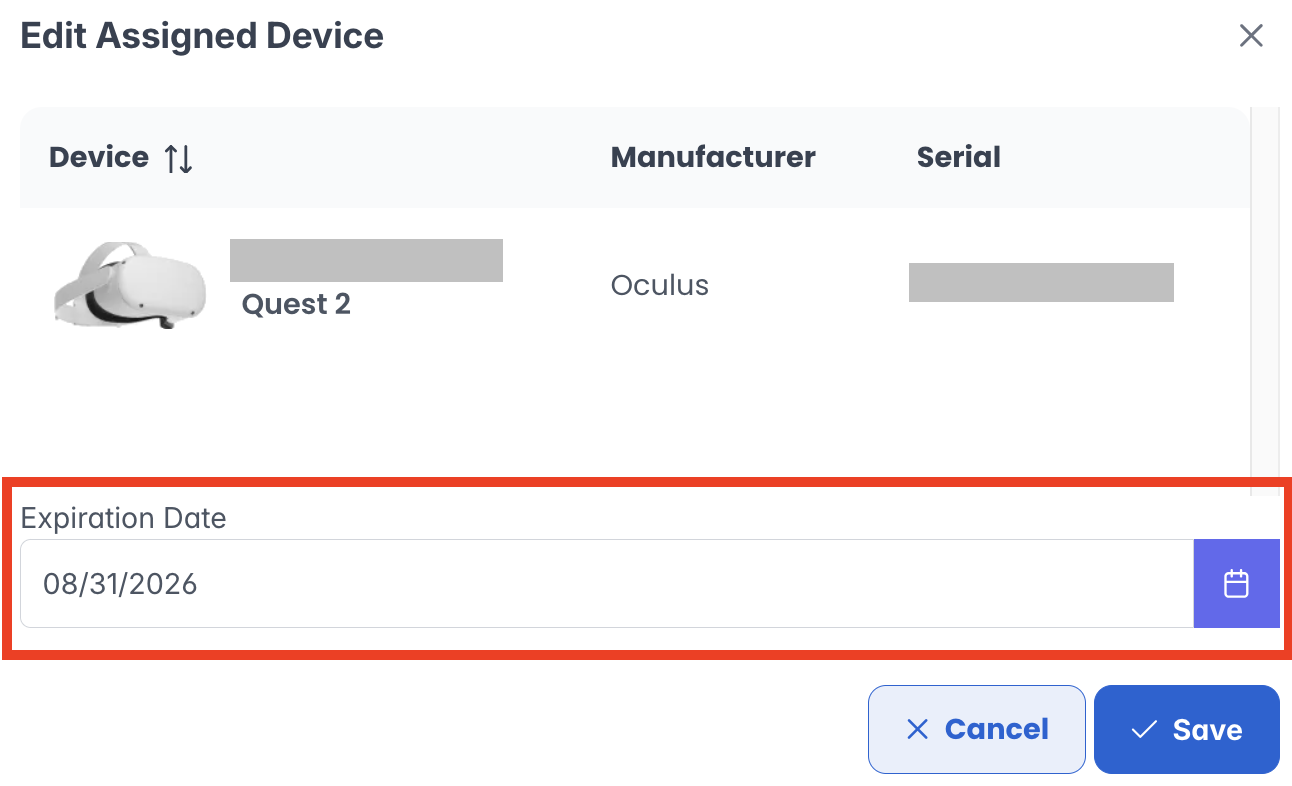
Edit a Device's Expiration Date
-
Navigate to "Assigned" devices.
-
Next to the desired device, click "Manage".
-
Click "Edit".
-
Click the "Expiration Date" field to edit it.
-
Click "Save" when finished.
Quick ID
Quick ID allows non-admin users (student, user, manager or developer) to login by selecting their name from a dropdown menu instead of typing their login in headset.
Tip: This option is only available if the headset is registered on the PIXO Platform and Quick ID is enabled for the org the headset is assigned to. To activate this feature, reach out to a PIXO VR Representative.
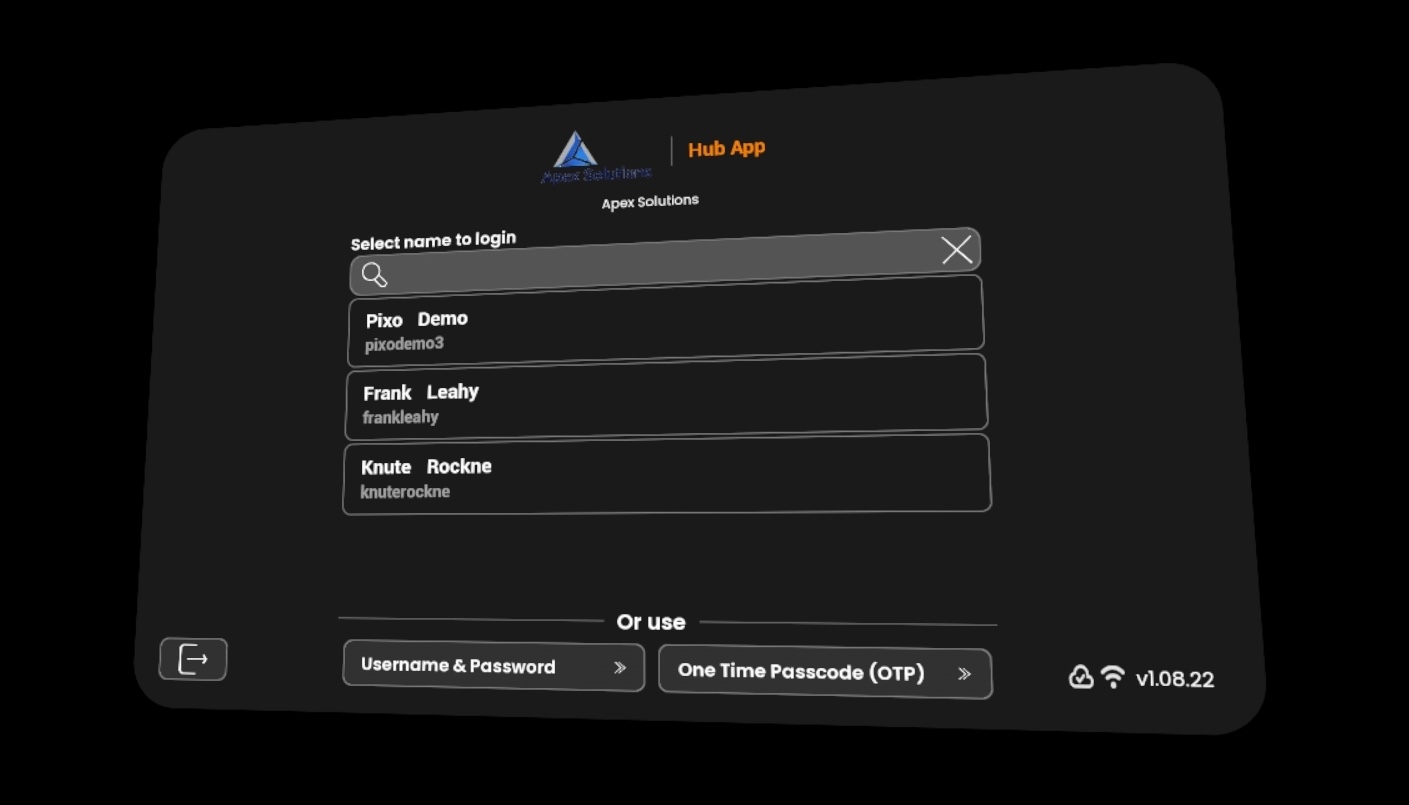
For more information on Quick ID Authentication, check out the "Login" section of the Hub App Guide.

