
V1.2

Download & Install SideQuest
-
Download SideQuest from Here.
-
Download "Advanced Installer".


Enable Developer Mode and Reboot
-
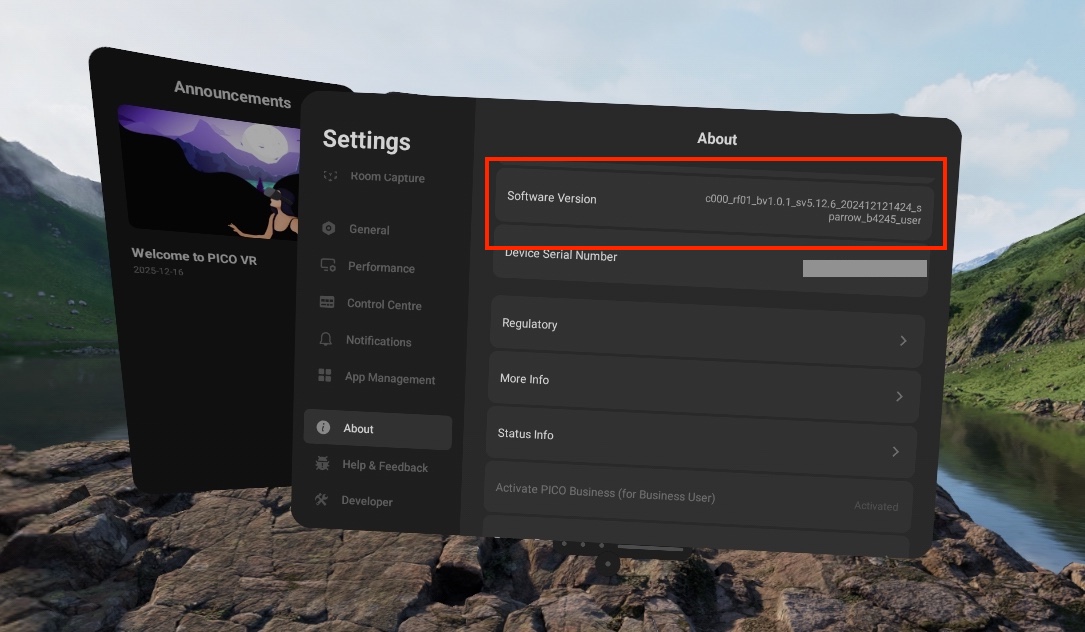
In the headset, navigate to "Settings".
-
Select "About".
-
Scroll to the "Software Version" menu item and select this 10 times.
-
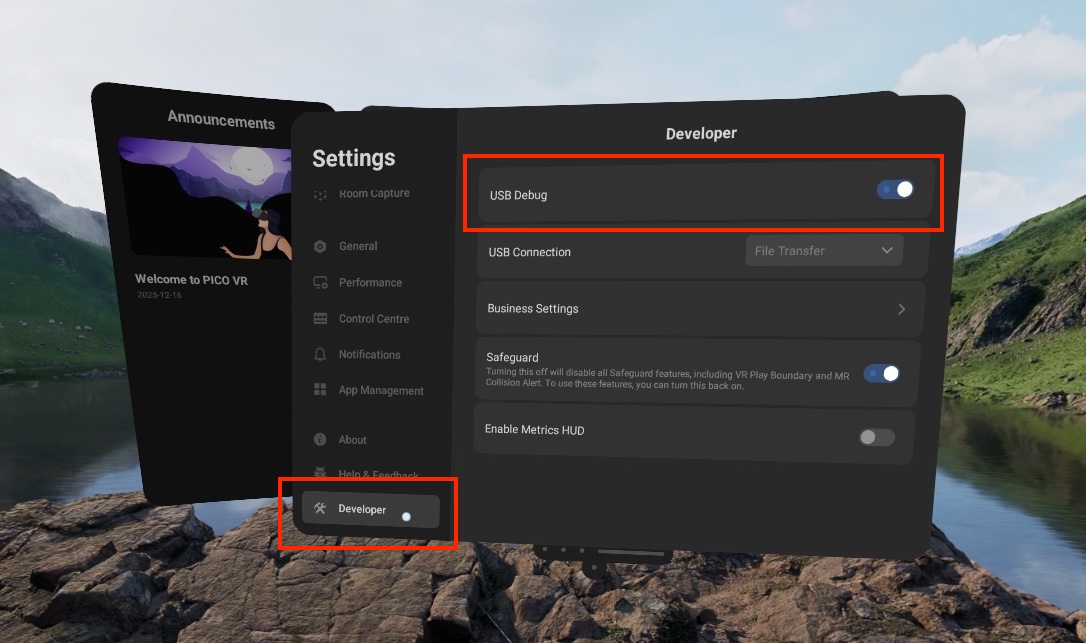
Once selected 10 times, the "Developer" menu item should appear in the left hand menu.
-
Select "Developer" and enable USB debugging.
-
Your headset is now in Developer Mode!
Connect USB Cable
Now its time to connect the USB cable. Once you are connected, you will have to allow USB debugging access on your headset. If you put your headset on at this point, you will see something like the below. You must also select "Always allow from this computer" to prevent this message from coming up every time you connect.
Note: If you do not see this message, please move on.

Close the app and connect the device. Reopen the app and see that the top left corner shows a device is connected to it. 
You can now use SideQuest to sideload content onto your headset!
Questions and Support
If you have any issues, please contact our tech support team at [email protected]

