
V2.1

Overview: This guide outlines the available screencasting methods and troubleshooting tips for HTC VIVE Focus Vision and Focus 3 headsets.
Supported Casting Methods:
|
|
|
USB-C Wired |
|
|
|
|
|
|
|
|
|
|
|
|
|
|
|
|
-
Cast to Computer Browser
-
Cast to Computer using Miracast
-
Cast to Smart TV using Miracast
-
Cast to Phone using the VIVE Manager App
Related Article:
-
Comprehensive Casting & Streaming Guide (covers all headsets + third-party tools)
Before Casting
-
Make sure your headset and casting device (PC, Phone or Smart TV) are turned on and connected to the same Wi-Fi network.
-
Enable Casting in Passthrough Mode:
-
Go to "Settings".
-
Select Advanced > Camera settings.
-
Turn on "Allow passthrough recording and casting".
-
Casting to a Computer
To cast to a computer, you can either cast to a Web Browser or cast using Miracast.
Important: Regardless of casting method, ensure that your VR headset and computer are on the same Wi-Fi network before casting.
Cast to Browser
-
Put on your headset.
-
Press the VIVE button on the right controller.
-
Select "Cast", then select "Cast to browser".
-
An IP Address will be displayed in your headset. Type this IP Address into your web browser.
-
Click "Connect".
-
Put on your headset.
Your headset screen should now be duplicated to your computer browser.
Cast using Miracast
-
First, ensure that your PC supports Miracast:
-
Put on your headset.
-
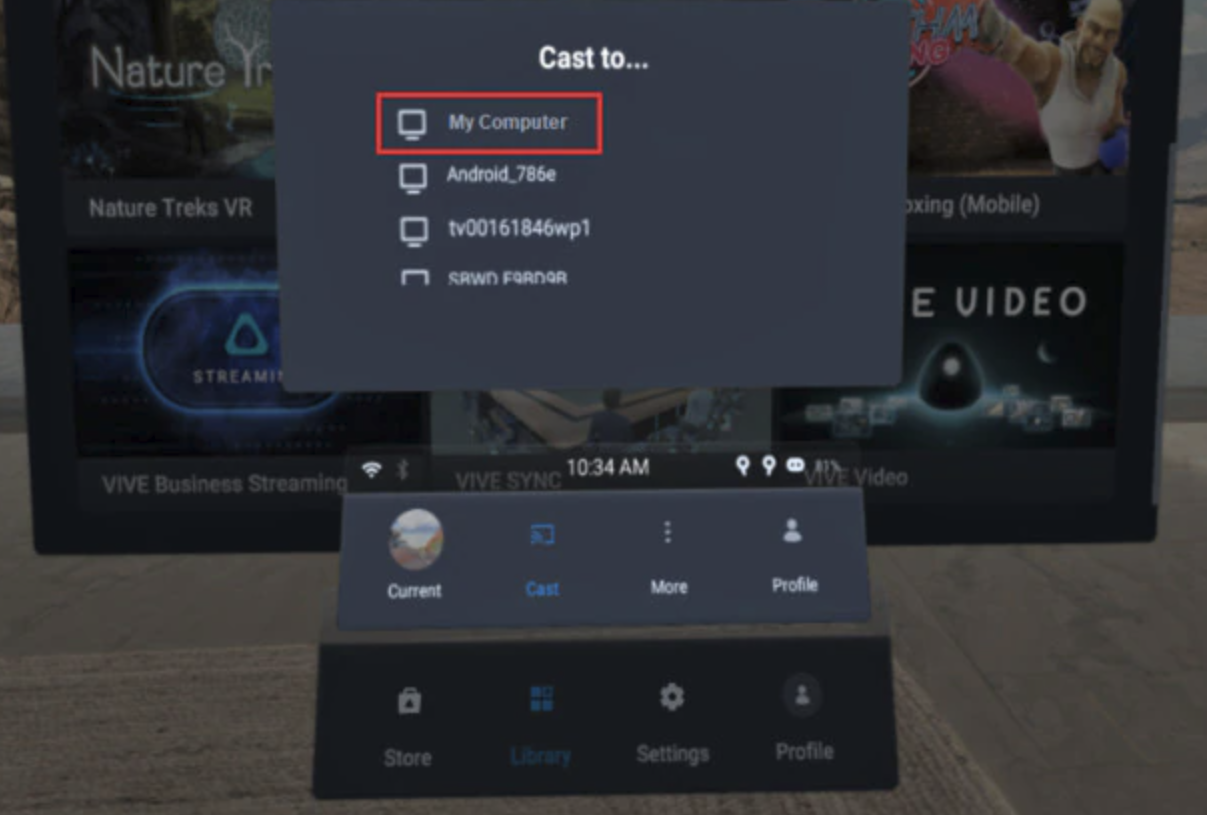
Press the VIVE button on the right controller.
-
Select "Cast", then select your computer from the list:
-
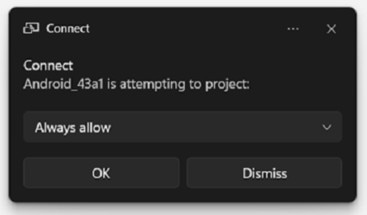
Take off your headset.
-
In the Windows Connect app, allow projecting to the computer, then click "OK".
-
Put on your headset again. What you're viewing in VR will now appear on your computer.
Check for Miracast Support
-
Open the command prompt window.
a) Press the Windows logo and R keys to open the "Run dialog" box.
b) Enter cmd, and then click "OK".
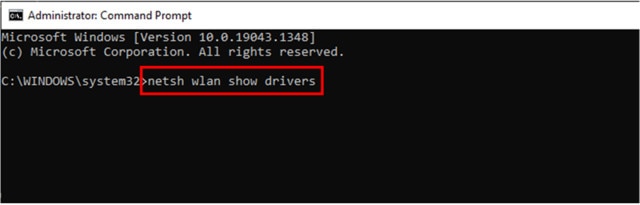
- In the command prompt window, enter the following command:
netsh wlan show drivers
-
In the driver details, check if Wireless Display Supported displays "Yes", which means your computer supports Miracast.

-
If Wireless Display Supported says "No", follow the setup steps below.
Setting up Miracast on a PC
-
Open the command prompt window as an administrator.
a) Press the Windows logo and R keys to open the "Run dialog" box.
b) Enter cmd, and then press Ctrl + Shift + Enter.
-
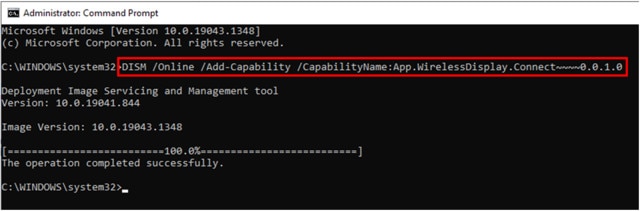
In the command prompt window, run the following command and wait for the operation to complete:
DISM /Online /Add-Capability /CapabilityName:App.WirelessDisplay.Connect~~~~0.0.1.0
-
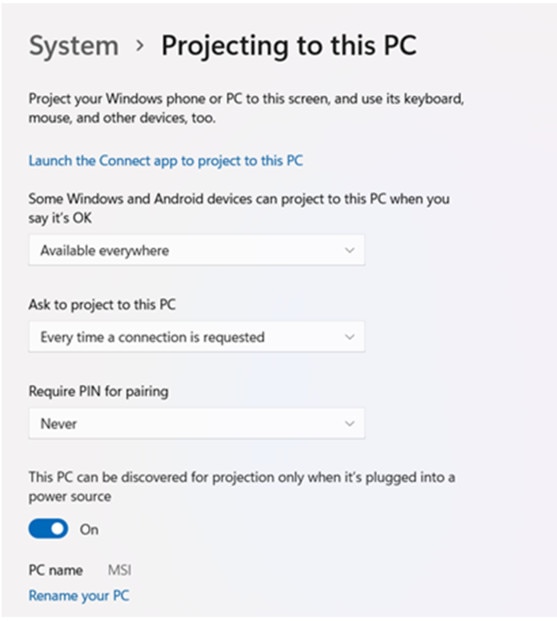
Click Start > Settings > System > Projecting to this PC.
-
To allow the headset to cast to your computer, configure your projection settings as follows:
Casting to a Smart TV
Important: Ensure that the VR headset and TV are on the same Wi-Fi network.
-
First, turn on the TV and open the Miracast app (most smart TVs come with Miracast).
-
To check if your TV has Miracast: look for terms like "Screen Mirroring", "Wi-Fi Direct", or "Miracast" in the Input/Source menu, Network Settings or App list.
-
If your TV does not support Miracast, you can purchase a Miracast dongle and plug it into the HDMI port on your TV.
-
-
Put on your headset.
-
Press the VIVE button on the right controller.
-
Select "Cast", then select the TV from the list.
Your headset screen should now be duplicated to your Smart TV.
Casting to a Phone
Important: Ensure that the VR headset and phone are on the same Wi-Fi network.
-
Install and/or open the VIVE Manager mobile app on your phone.
-
Make sure your headset is paired with the app prior to casting:
-
In the VIVE Manager app, tap "Devices".
-
If your device isn't paired yet, tap "Connect". If it is paired, move to step 3.
-
Put on your headset. When the VR environment appears, take the headset back off.
-
-
In VIVE Manager, tap the Cast button in the upper right hand corner of the "Devices" screen to start casting.
-
Put your headset back on.
Your headset screen should now be duplicated to your phone.
How to Stop Casting
- Press the VIVE button on your right controller.
- Select "Cast".
- Select "Stop".
Troubleshooting Tips
All Casting Methods
-
Confirm that casting device and headset are connected to the same Wi-Fi network. To check the current connection:
-
Go to "Settings".
-
Select Connectivity > Wi-Fi.
-
-
Check for Software Updates:
-
From the main lobby, go to Settings > General.
-
Select "Update" next to "System Update".
-
If you don't see the yellow indicator, you can also select "Check now" to check for updates manually.
-
-
Restart your Headset and Casting Device.
-
Restart your Wi-Fi Router.
-
Try a Different Network.
-
Avoid using Wi-Fi networks that are crowded with many devices.
-
You can also place the casting device and headset closer to your Wi-Fi router to reduce signal interference.
-
-
Disable VPNs/Firewalls that Block Casting.
-
Certain mesh networks and corporate or certificate-based networks may not support casting due to blocks for security purposes. These blocks are common on home guest networks, corporate and commercial networks (e.g. at a hotel or airport).
-
This will require working with your local IT Team.
-
Casting to Browser Tip
Try casting to Chrome or Edge browsers, as they are often more reliable.
Casting to TV Tip
If you want to cast to a TV that isn't a Smart TV:
Try casting to a browser and plug your PC into the TV with an HDMI cable.
Questions and Support
If you have any issues, please contact our tech support team at [email protected]

