
Overview
Any time we have to create a custom-coded spark for a project, we must build it into a new, custom version of the PIXO Builder. Since PIXO has a custom player that is used for all clients, we have to get updates from DimensionX (DimX) pushed to our repo for new enhancements from them, in addition to our own updates.
Use this guide for steps to build a new version of the PIXO Builder: PIXO Builder History
Building for PICO & Meta Quest
-
Close the Unity Editor before pulling the changes from git.
-
Checkout dev branch.
-
Open the Unity Editor and switch to the Android platform.
Quest Setup
-
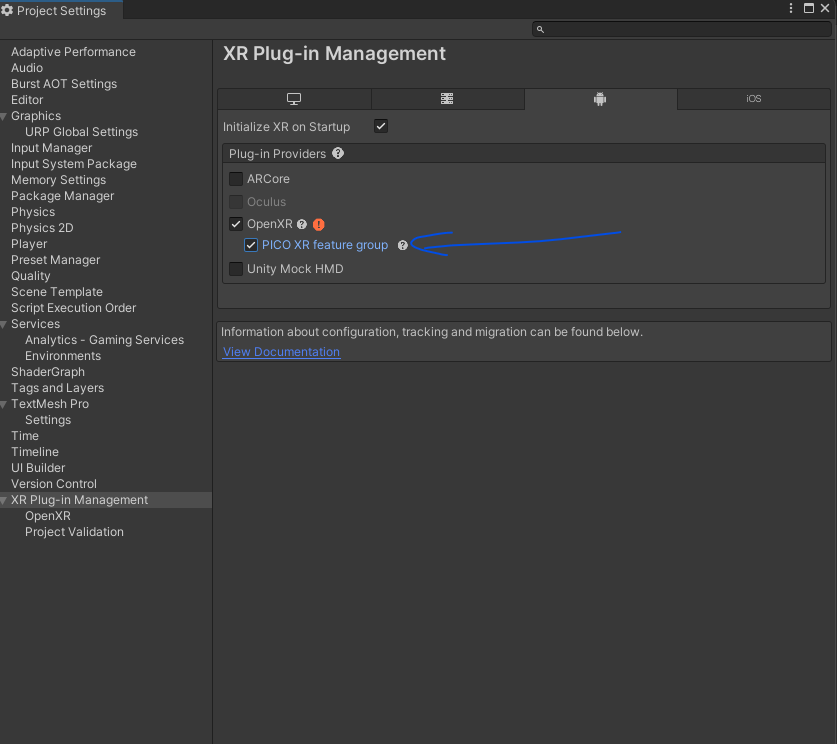
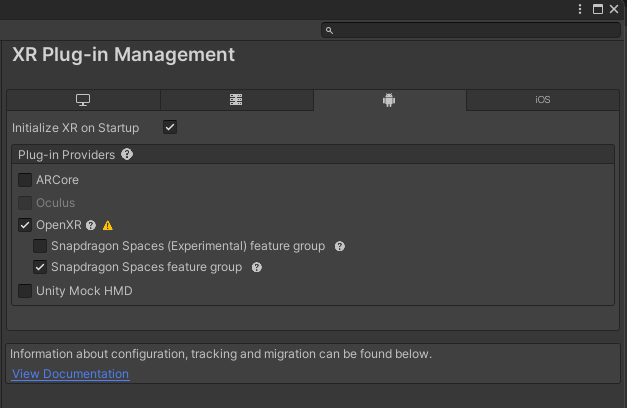
Go to PlayerSettings > XR Plug-in Management. Select the OpenXR checkbox:

-
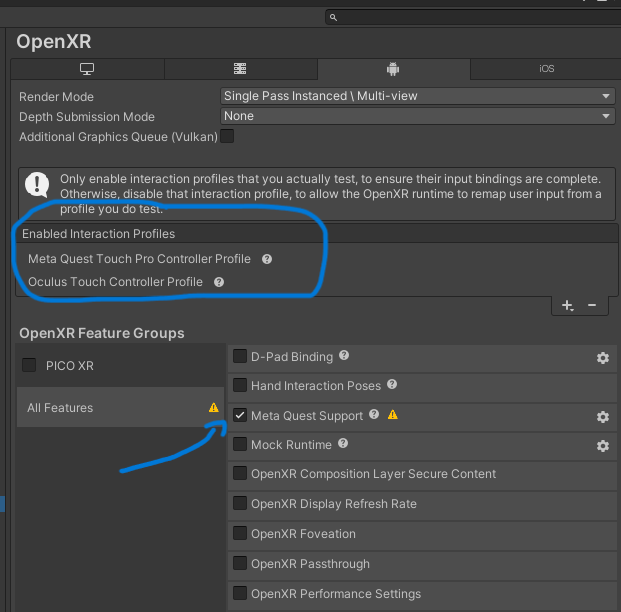
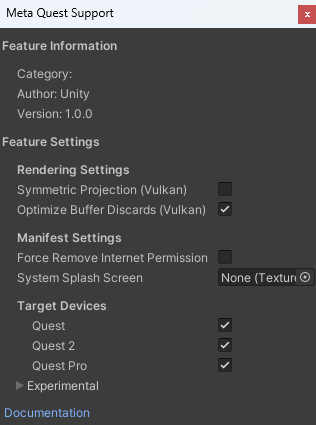
Under XR Plug-in Management, go to the OpenXR Settings. Select the Meta Quest Support checkbox and add both Quest interaction profiles.
-
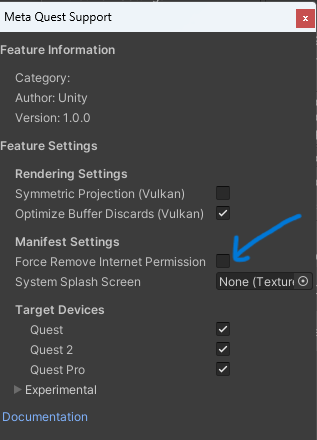
Click the Gear icon next to the Meta Quest Support checkbox and double check that the Force Remove Internet Permission checkbox is left unchecked.
-
Build an apk.
PICO Setup
-
Enable Pico support under the OpenXR settings by clicking the PICO XR feature group checkbox.
-
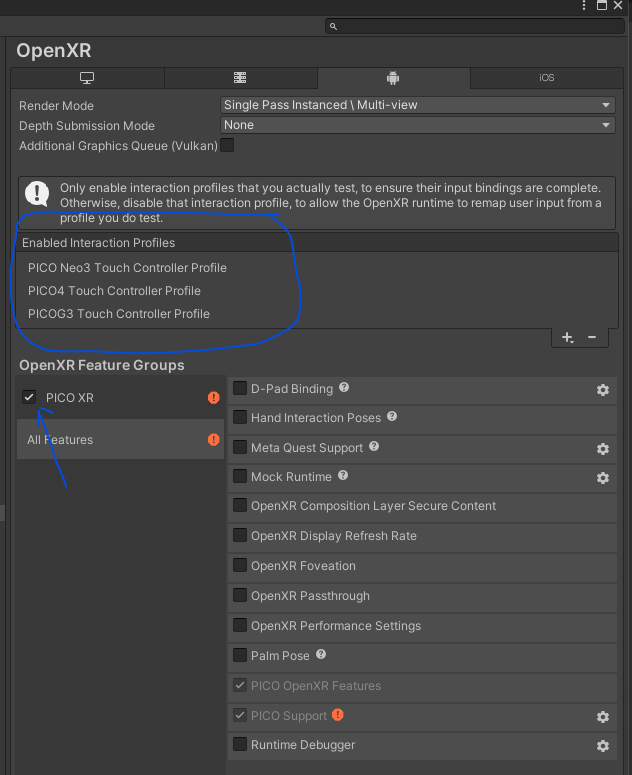
Under OpenXR settings, add the PICO interaction profiles and select the PICO XR checkbox under OpenXR Feature Groups.
-
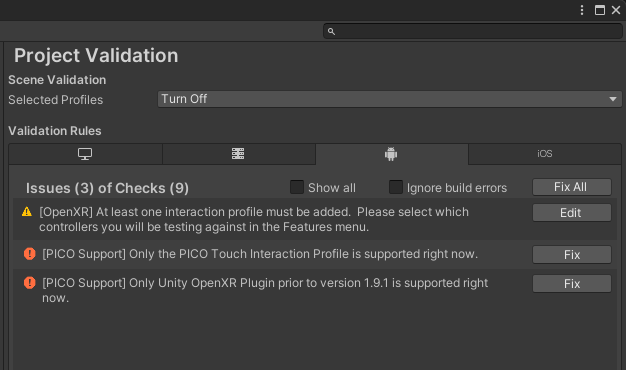
Go to XR Plug-in Management > Project Validation. If you don’t see any errors there, but the exclamation points near PICO XR are still showing, restart the Editor. You should see the errors like in the screenshot below. Click Fix All and wait.
-
Return back to the OpenXR settings and make sure that the exclamation points are gone. Check if the interaction profiles are still present. If not, add them again.
-
Click the Gear icon next to the Meta Quest Support checkbox and uncheck Force Remove Internet Permission.
-
Build an apk.
Building for VRX
-
Close the Unity Editor before pulling the changes from git.
-
Checkout dev-vrx branch. Pull the latest changes from dev to dev-vrx.
-
Open the Unity Editor and switch to Android platform.
-
Check the Snapdragon Spaces feature group checkbox under the OpenXR settings checkbox.
-
Setup the Snapdragon OpenXR SDK and add interaction profiles.

-
Click the Gear icon next to Base Runtime and make sure the setup is identical to the below screenshot:

-
Double check that the Force Remove Internet Permission checkbox is left unchecked in the Meta Quest Support menu.
-
Build an apk.

