
V1.0

Overview: This article will provide a quick overview on launching a training module using a PICO virtual reality headset.
For guides detailing other headsets, see our VR Headset Help folder.
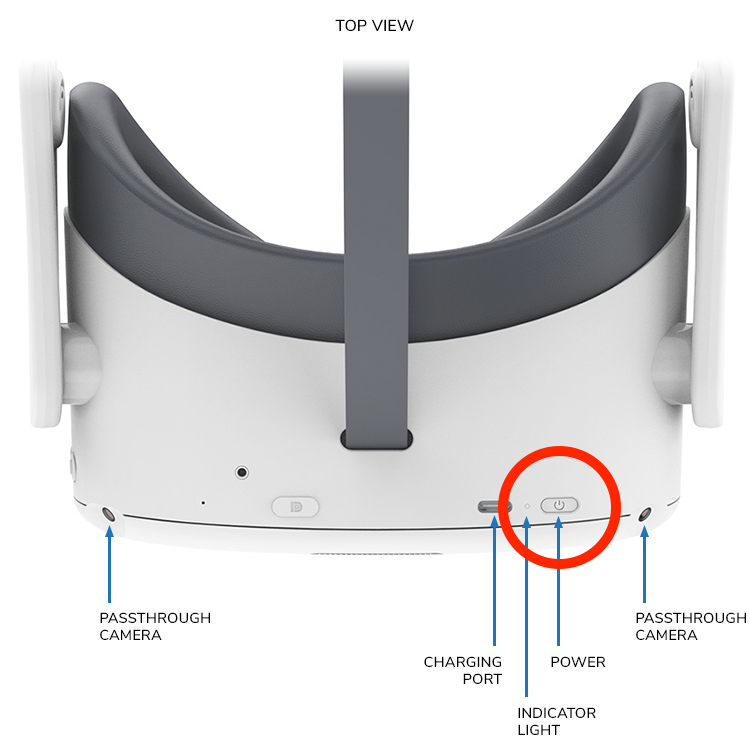
Power on Headset
Press and hold the Power button for 2 seconds until the headset turns on:
-
Once the headset is on, you can quick press the Power button to briefly put the headset to sleep. To wake up the headset, quick press the Power button again.
-
To turn the headset off, hold the Power button for 5 seconds.
Set up Play Boundary
-
When turning on the headset, it should automatically ask to set up the boundary area.
-
Choose between "Quick Setup" or "Custom":
-
Quick Setup — your playing area is circular and you can set it to 3 different sizes. You can also choose to play sitting or standing.
-
Custom — set your own floor height and draw your safe area.
-
-
Set the floor level:
-
Look down at the virtual grid. If it appears to be at floor level, select "Continue".
-
If not, select "Set Manually".
-
-
Create your custom boundary:
-
Aim the controller pointer at the floor, then press and hold the Trigger button to draw along the boundary of your cleared area.
-
Select "Continue".
-
Check Wi-Fi Connectivity
-
Select the Wi-Fi icon from the Home menu.
-
Connect to your desired network.
Hub App Login and Taking Courses
-
Once you have connected to Wi-Fi and adjusted your play boundary, open the "App Library" and select the PIXO Hub App.
-
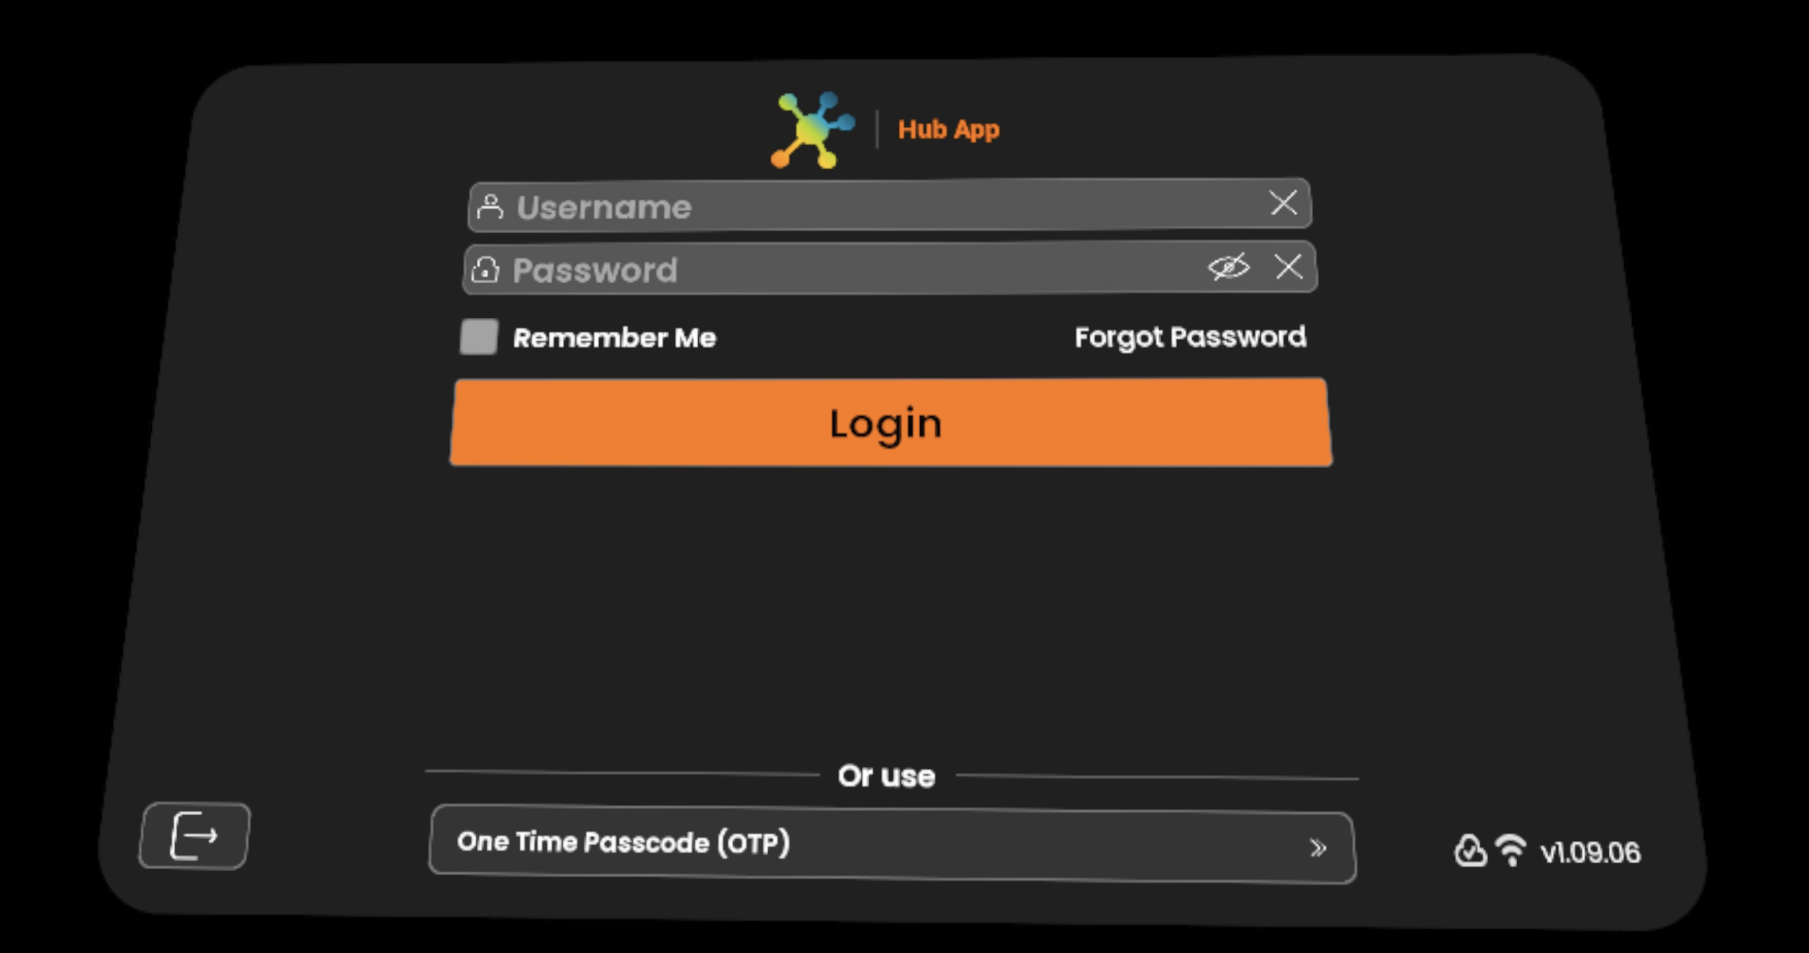
You will need to enter in your username and password that was provided to you via email. If you have lost this, you can contact [email protected] for assistance.
-
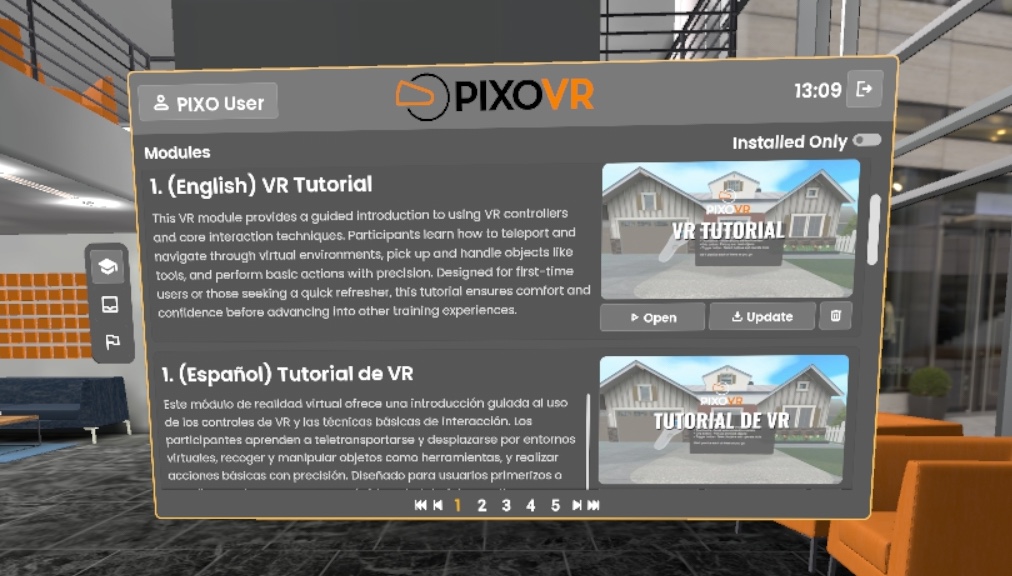
From there, you will see the Hub App lobby and Modules tab. Scroll to view your available training modules.
-
Select the desired training module by selecting the corresponding Open button and start training!
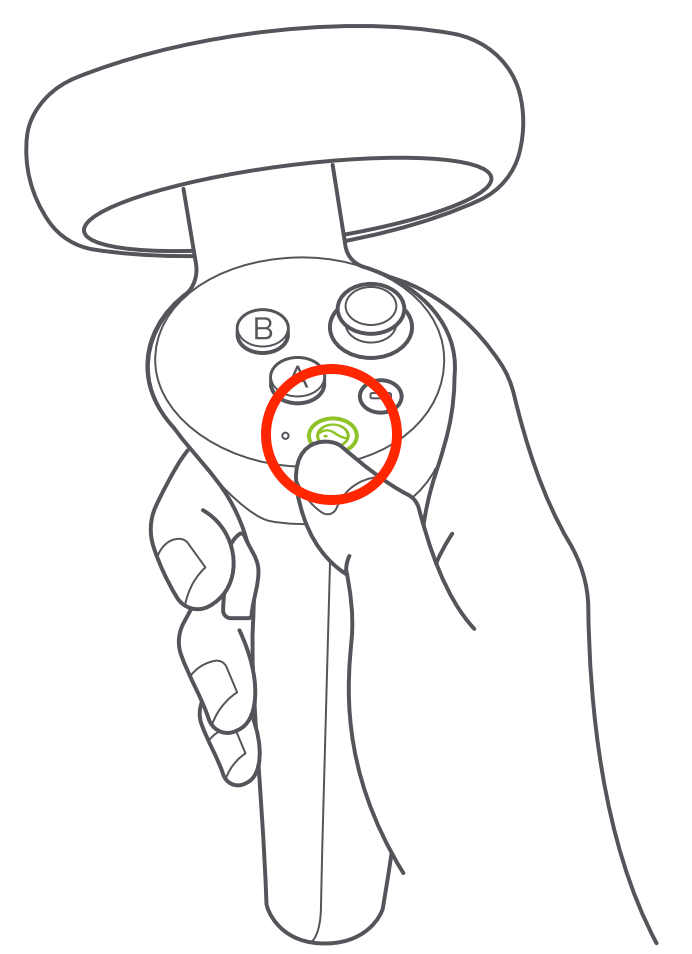
Tip: If you need to pause or exit the training at any point, press the Home button on your right controller:
Questions and Support
If you have any issues, please contact our tech support team at [email protected]

